
The kitchen work triangle is a design principle that connects the sink, stove, and refrigerator into an imaginary triangle to minimize wasted steps during cooking. I’ve watched this single concept separate a kitchen that feels effortless from one that fights you at every turn. Builders still lean on it because it works, even as kitchens evolve.
Getting this layout wrong costs you steps, time, and patience every single day you cook in that space. We see the same complaints over and over from homeowners stuck with a poorly planned kitchen.
This guide covers what the work triangle actually is and where it came from, the ideal measurements and distances that make it function, how different layout types and kitchen islands shape the triangle, modern alternatives like zone-based design, and the common mistakes that undo good intentions. We also get into small kitchens, multi-cook households, and what to watch for if your own layout feels off.
What Is the Kitchen Work Triangle?
The kitchen work triangle connects the sink, stove, and refrigerator in a layout that minimizes the distance a cook travels between the three most-used work points. I think of it as the skeleton beneath every functional kitchen, whether the designer consciously planned for it or not. Each leg of the triangle represents a path you’ll walk hundreds of times a year.
The Three Points of the Triangle (Sink, Stove, Refrigerator)
The sink handles prep and cleanup, the stove handles cooking, and the refrigerator handles storage and retrieval, and each point pulls double duty throughout a single meal. Placing these three appliances too far apart turns basic cooking into an exercise in pacing back and forth. Placing them too close together creates a cramped triangle where counter space and traffic both suffer.
Why the Concept Still Matters in Modern Homes
Open floor plans and oversized islands have changed what kitchens look like, but the underlying need for efficient movement hasn’t gone anywhere. I still use triangle thinking on every project, even when the final layout doesn’t look anything like the original mid-century diagrams. The goal was never the shape; it was always the walking distance.
The History and Purpose Behind the Work Triangle Rule
The kitchen work triangle rule originated from kitchen efficiency studies conducted in the 1940s at the University of Illinois’s Small Homes Council, which measured cook movement patterns to reduce fatigue. I find it useful to remember that this wasn’t a design trend; it was closer to an industrial engineering exercise applied to a domestic space. Researchers timed how long it took cooks to move between appliances and used that data to recommend spacing.
How Mid-Century Designers Developed the Standard
Post-war housing construction demanded repeatable, efficient kitchen layouts that could be built at scale without an architect redesigning every floor plan from scratch. The triangle gave builders a simple rule they could apply across thousands of homes. That same simplicity is exactly why it stuck around for the better part of a century.
Ideal Work Triangle Measurements and Distance Guidelines

The National Kitchen and Bath Association recommends each leg of the work triangle measure between 4 and 9 feet, with a combined perimeter of no more than 26 feet. These numbers aren’t arbitrary. I’ve found they map almost exactly to the point where a kitchen stops feeling tight and starts feeling like a hike.
Minimum and Maximum Leg Distances
| Triangle Leg | Minimum Distance | Maximum Distance | Why It Matters |
| Sink to Stove | 4 feet | 7 feet | Shortest leg handles the most frequent back-and-forth |
| Stove to Refrigerator | 4 feet | 9 feet | Balances cooking with ingredient retrieval |
| Refrigerator to Sink | 4 feet | 7 feet | Supports prep and cleanup flow |
This table shows the distance range recommended for each leg of the triangle individually. Go under the minimum, and you get appliances fighting for the same floor space. Go over the maximum and the kitchen starts to feel like it was designed for someone else’s stride length.
Total Perimeter Recommendations
A combined perimeter under 13 feet usually signals a cramped galley layout, while anything over 26 feet starts eating into actual cooking efficiency no matter how nice the finishes are. I treat the 26-foot ceiling as a hard line on any project where walking distance actually matters to the client. Beyond that number, the “triangle” stops functioning as one.
How the Work Triangle Improves Kitchen Efficiency
A well-proportioned work triangle improves kitchen efficiency by shortening the physical distance between the three tasks a cook repeats most during any meal. I notice this most in homes where the previous layout forced the cook to cross the entire room just to grab something from the fridge mid-recipe. Efficient spacing turns that constant backtracking into a few short pivots.
Reducing Unnecessary Steps During Meal Prep
Every extra foot between the stove and the sink adds up across a single meal, let alone a full year of daily cooking. I’ve measured this directly on renovation projects: shortening one leg of the triangle by even two feet noticeably changes how a kitchen feels to use. It’s a small adjustment with an outsized effect on daily comfort.
Common Kitchen Layouts and How They Shape the Triangle

Kitchen layout type directly determines how naturally a work triangle forms, since each configuration positions the sink, stove, and refrigerator differently. Some layouts practically build the triangle for you. Others require real planning to avoid awkward appliance placement.
This table compares how four common kitchen layouts naturally support or complicate the triangle.
| Layout Type | Triangle Formation | Best For |
| L-Shaped | Forms naturally along two connecting walls | Open-concept spaces, moderate to large rooms |
| U-Shaped | Strong natural triangle across three walls | Dedicated kitchens with ample square footage |
| Galley | Compressed, linear triangle between two walls | Small or narrow kitchens |
| Island | Triangle often routes around or through the island | Kitchens with 200+ square feet |
L-Shaped Kitchens
L-shaped kitchens place two walls of cabinetry and appliances at a right angle, which naturally keeps the sink, stove, and refrigerator within a tight, efficient triangle. This layout also leaves the rest of the room open for dining or living space. I recommend it often for open-concept homes precisely because it solves the triangle problem without extra walls.
U-Shaped Kitchens
A U-shaped kitchen wraps appliances and counters around three walls, which creates one of the most reliable and efficient triangles of any layout. The tradeoff is square footage; this layout needs a dedicated room rather than an open floor plan. It tends to work best in homes where the kitchen is a closed, purpose-built space.
Galley Kitchens
Galley kitchens line appliances and counters along two parallel walls, compressing the triangle into a tight, linear shape that works well in small homes. The narrow footprint limits island options and multi-cook flexibility. I still consider this one of the most efficient layouts per square foot despite its size limitations.
Island Kitchens
Island kitchens add a fourth work surface into the mix, which can either strengthen the triangle or disrupt it depending on exactly where the island sits relative to the other three points. A well-placed island often becomes the prep point of the triangle itself. A poorly placed one blocks the most direct path between appliances.
The Modern Kitchen “Zones” Approach vs. the Traditional Triangle
Kitchen zone design organizes a kitchen into distinct functional areas prep, cooking, cleaning, and storage rather than relying on a single three-point triangle. I bring this up because modern kitchens, especially ones with multiple cooks or large islands, often outgrow the original triangle model. Zones give a more flexible way to think about larger, more complex layouts.
Prep Zone, Cooking Zone, Cleaning Zone, Storage Zone
A prep zone centers on counter space near the refrigerator, the cooking zone surrounds the range and oven, the cleaning zone wraps the sink and dishwasher, and the storage zone covers the pantry and cabinetry. Each zone functions almost like its own mini work triangle. This approach scales much better in kitchens over 300 square feet, where a single triangle starts to feel too simplistic.
When Zones Make More Sense Than a Triangle
Large kitchens, multi-cook households, and heavily islanded layouts all tend to outgrow a strict triangle model fairly quickly. I shift to zone-based thinking whenever a floor plan has more than three major work areas or more than one person cooking at once. The triangle still matters inside each zone; it just stops being the whole story.
Open-Concept Kitchens and Work Triangle Challenges
Open-concept kitchens complicate the work triangle because removing walls often stretches the distance between appliances beyond the recommended range. I’ve seen this happen constantly in great-room renovations where a wall comes down and nobody recalculates the appliance spacing. The room looks bigger and airier, but the actual cooking workflow can get worse.
Maintaining Flow When Walls Are Removed
Keeping the sink, stove, and refrigerator close together even in a wide-open floor plan protects the triangle without sacrificing the visual openness homeowners want. Furniture and island placement become the real boundary lines once walls disappear. I treat traffic flow planning as just as important as appliance spacing in these layouts.
Kitchen Islands and Their Impact on the Work Triangle

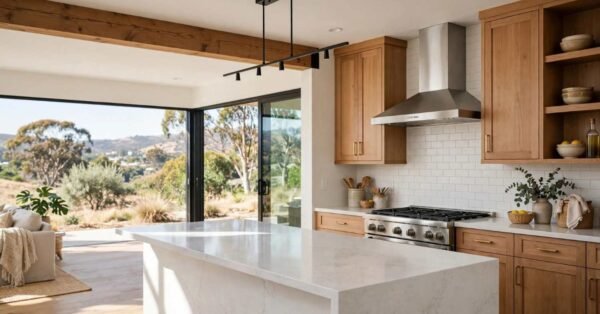
A kitchen island changes the work triangle by either becoming a fourth functional point or by physically cutting through one of the triangle’s three legs. This is one of the most common layout mistakes I run into on renovation consultations. An island installed without checking triangle distances first can turn a great kitchen into an obstacle course.
Avoiding Obstructed Pathways
A minimum of 42 inches of clearance between the island and surrounding counters keeps the primary cooking path open for one person, and 48 inches works better for two. I measure this clearance before finalizing any island placement, not after. It’s a far cheaper fix on paper than it is once the cabinetry is installed.
Multi-Cook Kitchens and Secondary Work Triangles
A multi-cook kitchen requires a secondary work triangle or a modified zone layout so two people can work simultaneously without crossing paths constantly. Families who cook together or homes with frequent entertaining run into this problem fast. A single triangle built for one cook turns into a bottleneck the moment a second person joins.
Designing for Two or More People Cooking Simultaneously
Adding a second sink, a secondary prep area, or a dedicated beverage station near the island lets two cooks maintain separate flow paths without constant collision. I usually recommend this for households that regularly host or cook as a family unit. It adds cost, but it solves a daily friction point that a single-triangle layout simply can’t.
Common Kitchen Work Triangle Design Mistakes to Avoid
The most common work triangle mistakes include oversized triangles, blocked pathways, and traffic routes that cut directly through the triangle’s legs. I see these errors repeatedly, usually from floor plans drawn for appearance first and function second. Each one is avoidable with planning done early enough in the design process.
Blocked Pathways, Traffic Interference, and Oversized Triangles
A triangle leg that crosses a main walkway forces household traffic directly through the cook’s workspace during meal prep. An island, peninsula, or table placed inside the triangle creates the same problem from a different angle. I flag any triangle perimeter over 26 feet as an immediate red flag during layout review.
Appliance Placement and Its Effect on Workflow
Appliance placement determines whether the work triangle functions efficiently, since the exact position of the refrigerator, range, and sink sets the shape and length of every leg. Even a technically correct triangle can feel wrong if the appliances face awkward directions or open into blocked paths. I always check door swing and appliance orientation alongside raw distance.
Positioning the Refrigerator, Range, and Sink for Efficiency
The refrigerator ideally sits near the kitchen entrance so groceries don’t cross the whole room, the range sits centered for ventilation access, and the sink sits between the two to support prep and cleanup without extra steps. Door swings on the fridge and dishwasher matter just as much as the appliance’s actual floor position. A refrigerator door that swings into the stove’s workspace undoes a lot of otherwise good planning.
Small Kitchen Layouts and Space-Saving Triangle Adaptations

Small kitchens adapt the work triangle by compressing leg distances toward the 4-foot minimum while keeping each appliance fully accessible. Space constraints don’t eliminate the need for a functional triangle; they just demand tighter tolerances. I find galley and single-wall layouts handle this compression better than most other configurations.
Compact Triangle Strategies for Tight Floor Plans
Corner sinks, slim-depth appliances, and combination units like a refrigerator-freezer column all help shrink the triangle’s footprint without sacrificing function. I also look at vertical storage solutions to free up floor space so the triangle can stay functional. Small kitchens reward precise planning far more than large ones do.
Universal Design and Accessibility in Kitchen Layout Planning
Universal design in kitchen layout planning adapts the work triangle to accommodate users of different ages, heights, and mobility levels. This matters more than people expect, especially in homes built for multigenerational living or long-term aging in place. A triangle that works for one user profile doesn’t automatically work for another.
Designing Work Triangles for All Ages and Abilities
Lower counter sections, pull-out shelving, and clear floor space of at least 60 inches for wheelchair turning radius all affect how a triangle should be measured and placed. I treat accessibility planning as part of the initial triangle layout, not an add-on applied later. Retrofitting an existing triangle for accessibility is almost always harder than planning for it from the start.
How Builders and Designers Plan the Work Triangle During New Construction
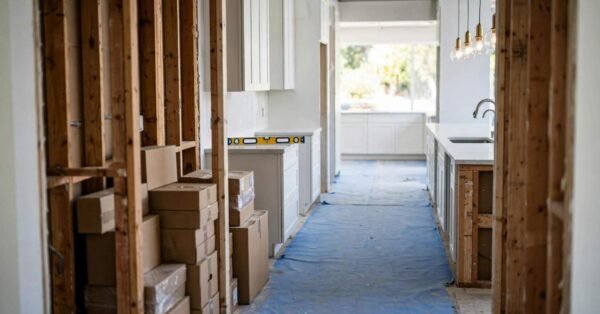
Builders plan the kitchen work triangle during new construction by coordinating appliance rough-in locations, plumbing lines, and electrical placement before framing is finalized. This stage of planning determines almost everything about how the finished kitchen will actually function. I push for this coordination to happen alongside the architectural design phase, not after.
Coordinating Layout Early in the Design Process
Plumbing for the sink, gas or electrical lines for the range, and venting for the refrigerator all need to be locked in before drywall goes up, which means the triangle has to be finalized months before anyone picks a countertop. Waiting until finishes are selected to reconsider appliance placement usually means expensive change orders. I always recommend finalizing the work triangle layout during the construction planning phase, well before the build reaches framing.
Signs Your Kitchen Layout Needs Reconsideration
Clear signs a kitchen layout needs reconsideration include constant bottlenecks between appliances, a triangle perimeter exceeding 26 feet, and family members routinely colliding during meal prep. I treat these as diagnostic signals rather than minor annoyances. A kitchen that generates this kind of friction daily is telling you something about its underlying layout.
Warning Signs of a Poorly Planned Triangle
Frequent counter clutter from a lack of landing space near the stove, constant need to reach across someone to access the sink, and excessive walking during routine meals all point to a triangle that was never properly measured. I also watch for homeowners who’ve unconsciously developed workarounds, like prepping food in a different room entirely. That’s usually the clearest sign the original layout failed the household’s real needs.
Conclusion
A functional kitchen work triangle ties the sink, stove, and refrigerator together, and getting those distances right shapes the entire cooking experience. From layout types to island placement to zone-based alternatives, these principles all connect back to one goal: less wasted movement. We build kitchens around exactly this kind of thoughtful planning, and Tiny Home Builders California can help you design a layout that actually works for how you live.
Frequently Asked Questions
What is the kitchen work triangle rule?
The kitchen work triangle rule connects the sink, stove, and refrigerator into a triangular layout that minimizes walking distance during cooking. Each leg should measure between 4 and 9 feet. The total perimeter should stay under 26 feet for optimal efficiency.
What are the ideal distances for a kitchen work triangle?
Each leg of the triangle should measure between 4 and 9 feet, with a combined perimeter of no more than 26 feet. Shorter distances can feel cramped. Longer distances reduce efficiency during meal prep.
Does the kitchen work triangle still apply to modern kitchens?
Yes, the work triangle still applies, though many modern kitchens combine it with zone-based design. Large open-concept kitchens and multi-cook households often need additional planning beyond a single triangle. The core efficiency principle remains relevant regardless of layout style.
How does a kitchen island affect the work triangle?
A kitchen island can become a fourth functional point or disrupt the triangle if placed inside one of its legs. Proper clearance of 42 to 48 inches keeps pathways open. Island placement should always be checked against existing triangle distances.
What is the difference between the work triangle and kitchen zones?
The work triangle connects three core appliances, while kitchen zones organize the space into prep, cooking, cleaning, and storage areas. Zones work better in larger or multi-cook kitchens. Both approaches aim to reduce wasted movement during cooking.
Can a kitchen have more than one work triangle?
Yes, multi-cook kitchens often benefit from a secondary triangle or additional prep station. This allows two people to cook simultaneously without constant interference. Adding a second sink or prep area typically supports this setup.
What are common mistakes that ruin a kitchen work triangle?
Common mistakes include oversized triangles, blocked pathways, and traffic routes cutting through the triangle’s legs. Islands or tables placed inside the triangle also interfere with workflow. Keeping the perimeter under 26 feet helps avoid most of these issues.