A bathroom remodel is a renovation project that replaces or updates fixtures, surfaces, plumbing, and electrical systems in a bathroom, and the DIY-vs-pro decision determines which of those tasks a homeowner handles personally versus hands to a licensed professional. I’ve walked enough homeowners through this exact fork in the road to know it’s rarely all-or-nothing. Most remodels end up as a mix some demo and painting done by hand, some plumbing and tiling handed off.
Getting this split wrong costs real money through rework, code violations, and water damage repairs. We’ve seen a confident weekend project turn into a six-month insurance dispute over one bad shower pan.
This guide covers what separates safe DIY tasks from licensed-pro territory, including permits and code requirements, plumbing and electrical boundaries, tiling and waterproofing risk, demolition hazards, cost and timeline differences, and a simple framework for deciding your own split between the two.
What “DIY vs. Pro” Really Means in a Bathroom Remodel
A bathroom remodel splits into roughly a dozen distinct trades, and the DIY-vs-pro question is really asking which of those trades you’re qualified and legally permitted to perform yourself. I think of it less as one decision and more as twelve small ones stacked together.
Demo, painting, and fixture swaps sit at the easy end. Plumbing rerouting, electrical circuits, and waterproofing sit at the end where a mistake stays hidden behind a wall for years before it shows up as mold or rot.
Scope of a Typical Bathroom Remodel Project
A typical bathroom remodel covers demolition, rough plumbing and electrical, waterproofing, tile work, fixture installation, and finish carpentry. Each of those six phases carries its own skill floor and its own code exposure.
A full gut remodel touches all six. A cosmetic refresh new vanity, new paint, new hardware might only touch one or two, which is exactly why the DIY-vs-pro line moves depending on project scope.
Permits and Code Requirements for Bathroom Remodels in California
California requires a building permit for any bathroom remodel involving plumbing relocation, electrical circuit changes, or structural modification, under the California Building Standards Code. Cosmetic work new fixtures in the same location, paint, flooring over existing subfloor typically doesn’t trigger a permit.
Skipping a required permit doesn’t just risk a fine. It creates a paper trail gap that surfaces later during a home sale inspection.
When a Licensed Contractor Is Legally Required
California law requires a licensed contractor for any project exceeding $500 in combined labor and materials when the work is advertised or performed by a business, under rules enforced by the Contractors State License Board. Homeowners doing their own labor on their own property are generally exempt from this threshold, which is the loophole that makes DIY legal in the first place.
The exemption covers your own labor. It doesn’t cover unlicensed electrical or plumbing subcontractors you hire informally to cut costs.
Plumbing Work: What You Can DIY vs. What Needs a Licensed Plumber
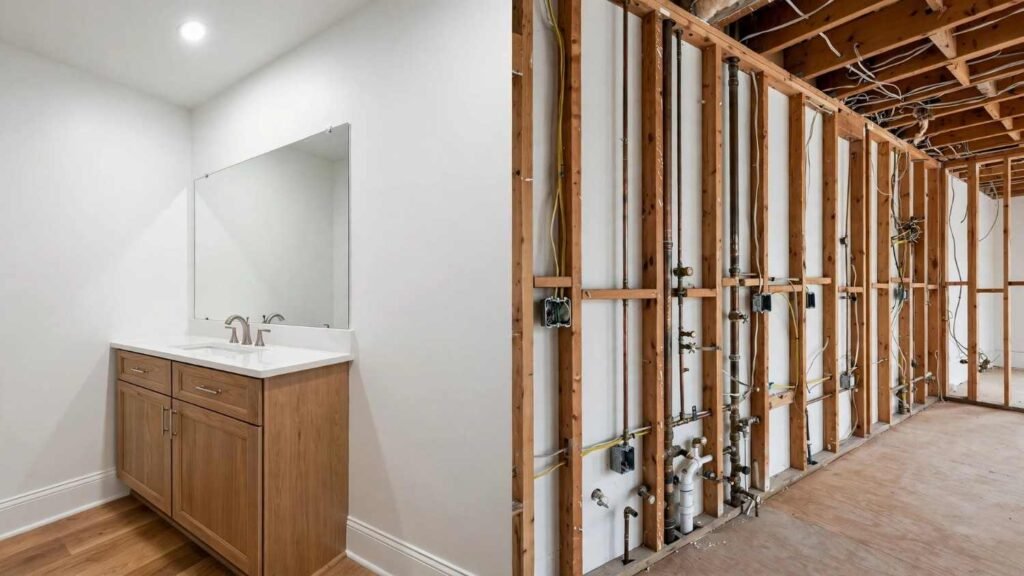
Homeowners can safely DIY plumbing tasks like replacing a faucet, swapping a showerhead, or installing a new toilet on an existing waste line, while rerouting supply lines or waste lines requires a licensed plumber. I draw this line at anything that opens a wall or touches the drain-waste-vent system.
Surface-level fixture swaps use existing connections and rarely require code inspection. Anything that changes pipe routing introduces slope, venting, and pressure requirements that are easy to get wrong and expensive to fix after tile goes down.
| Task | DIY-Safe | Requires Licensed Plumber |
| Faucet or showerhead swap | ✅ | |
| Toilet replacement (same location) | ✅ | |
| Moving a sink or shower drain | ✅ | |
| Rerouting supply lines | ✅ | |
| Water heater connection changes | ✅ |
Common DIY Plumbing Mistakes That Cause Water Damage
The most common DIY plumbing mistake in a bathroom remodel is improper slope on a relocated drain line, which causes standing water and slow leaks that aren’t visible until the subfloor rots. I’ve seen this exact failure show up eighteen months after a remodel, usually discovered only when the flooring starts to feel soft.
Over-tightened supply line connections crack fittings slowly rather than all at once. That delay is what makes this category of mistake so expensive the damage compounds before anyone notices it.
Electrical Work: Safe DIY Tasks vs. Licensed Electrician Requirements
Homeowners can typically DIY simple fixture swaps like a light fixture or exhaust fan on an existing circuit, but adding a new circuit, relocating an outlet, or working near a wet area requires a licensed electrician under the National Electrical Code. Bathroom electrical work carries higher code scrutiny than almost any other room because of water proximity.
A single miswired GFCI outlet near a sink is a shock hazard, not just a code violation. That’s the specific risk that pushes this category toward “hire it out” for most homeowners.
GFCI Outlets and Bathroom Electrical Code Basics
Ground-fault circuit interrupter outlets are required by code on every bathroom circuit within six feet of a water source, a standard set under the National Electrical Code and enforced by local California building departments. A GFCI outlet cuts power within milliseconds if it detects a current imbalance, which is what prevents a dropped hairdryer from becoming a fatal shock.
Installing one isn’t technically hard. Wiring it into an existing circuit without tripping breaker load limits is where an unlicensed install commonly goes wrong.
Tiling and Waterproofing: Why This Is the Hardest DIY Skill to Get Right
Tiling and waterproofing are widely considered the hardest bathroom remodel tasks to DIY successfully because a single gap in the waterproof membrane can cause invisible water damage for months before it’s discovered. This is the section of the project where I see the biggest gap between confidence and outcome.
Good tile work is visible and forgiving of small flaws. Waterproofing is invisible the moment tile goes over it, which means mistakes don’t announce themselves they just wait.
Signs of Improper Waterproofing That Lead to Mold and Rot
Signs of failed waterproofing include soft or spongy flooring near the shower, a persistent musty smell, discoloration on the ceiling below the bathroom, and grout that stays damp long after showering. Any one of these on its own is worth investigating immediately.
By the time these symptoms appear, the damage is usually already behind the wall. That’s what makes waterproofing one of the few tasks where I’d rarely recommend a first-time DIY attempt.
Demolition: What’s Safe to DIY and What Risks Hidden Damage

Demolition of surface finishes like tile, vanities, and flooring is generally safe to DIY, while removing walls or ceiling material in homes built before 1980 carries asbestos and lead-paint risk that requires testing first. I treat demo as the cheapest phase to DIY and the one most likely to uncover a surprise.
Pulling out a vanity or ripping up flooring rarely requires special skill. Opening a wall in an older home is where that changes.
Identifying Asbestos and Mold Before You Start Demo
Homes built before 1980 commonly contain asbestos in flooring adhesive, popcorn ceiling texture, or pipe insulation, and testing by a certified lab is the only reliable way to confirm it before demolition begins. Visual inspection alone can’t confirm or rule out asbestos.
A positive test doesn’t mean the project stops. It means that specific material gets handled by a licensed abatement contractor instead of a sledgehammer.
Fixture Installation and Finish Work You Can Realistically DIY

Fixture and finish work towel bars, mirrors, cabinet hardware, painting, and caulking represents the most realistic category for a first-time DIY homeowner because mistakes are visible, low-risk, and easy to correct. This is where I tell most homeowners to start if they want hands-on involvement without exposure.
None of these tasks touch plumbing lines, electrical circuits, or waterproofing membranes. That’s exactly why the failure cost stays low even when the first attempt isn’t perfect.
Vanities, Mirrors, Hardware, and Painting
Installing a pre-plumbed vanity, mounting a mirror, swapping cabinet hardware, and painting are all tasks a homeowner can complete with basic tools and a weekend of time. A pre-plumbed vanity connects to existing supply and drain lines rather than requiring new ones, which keeps it in DIY territory.
Painting in a bathroom does require moisture-resistant paint rated for high humidity. That’s the one product detail that trips up otherwise straightforward DIY finish work.
Structural and Layout Changes: Why These Belong to a Professional
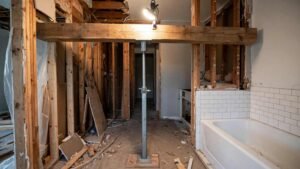
Any bathroom remodel that changes the room’s footprint, moves plumbing to a new wall, or alters a load-bearing structure requires a licensed contractor and, in most California jurisdictions, a structural engineer’s review. This is the category with zero DIY exception, full stop.
Moving a wall changes how weight transfers through the structure above it. Getting that calculation wrong isn’t a cosmetic mistake it’s a safety one.
Moving Walls, Plumbing Lines, and Load-Bearing Considerations
A load-bearing wall carries structural weight from the floors or roof above it, and removing or altering one without engineering review risks structural failure. Not every interior wall is load-bearing, but identifying which ones are requires more than a stud finder.
Relocating a toilet or shower to a new position in the room means extending the drain-waste-vent system, which almost always requires opening the subfloor. That combination of structural and plumbing complexity is why this category gets handed to a professional builder almost universally.
Cost Comparison: DIY vs. Pro Bathroom Remodel Budgets
A mid-range bathroom remodel in California typically costs $15,000 to $35,000 when fully professional, and DIY labor on the tasks homeowners can safely handle saves roughly 20% to 35% of total project cost, according to data compiled by Remodeling Magazine’s Cost vs. Value report. The savings scale with how much of the skilled trade work you’re willing and able to take on yourself.
Materials cost the same whether you install them or a pro does. The savings come entirely from labor, which is also exactly where mistakes get expensive to fix.
Hidden Costs of DIY Mistakes That Erase Savings
The most expensive DIY mistakes in a bathroom remodel are failed waterproofing and improper plumbing connections, which can cost two to three times the original labor savings once water damage repair and mold remediation are factored in. I’ve watched a $3,000 labor savings turn into an $11,000 repair bill from one missed waterproofing detail.
That math is exactly why the savings on the hardest tasks are the least reliable. The easy tasks save money predictably; the hard ones carry real downside risk.
Timeline Differences: How Long DIY vs. Professional Remodels Take
A professional bathroom remodel typically takes two to four weeks from demo to final finishes, while a DIY remodel commonly takes two to six months due to limited availability, sequencing errors, and inspection delays. Professional crews work the project daily; most DIY homeowners work it in evenings and weekends.
That schedule gap compounds fast once a bathroom becomes the only one in a house out of commission. Four weeks without a bathroom is inconvenient. Four months changes daily life.
Why DIY Projects Commonly Stall Midway
DIY bathroom remodels most commonly stall at the tiling and waterproofing phase, where unfamiliarity with the process causes homeowners to pause, research, and often bring in a professional partway through. That stall point isn’t a coincidence it’s the exact phase where skill requirements jump the most.
A stalled bathroom remodel isn’t just inconvenient. It’s also the point where materials sit exposed to moisture and dust longer than planned, adding its own damage risk.
Skill and Tool Requirements for a DIY Bathroom Remodel
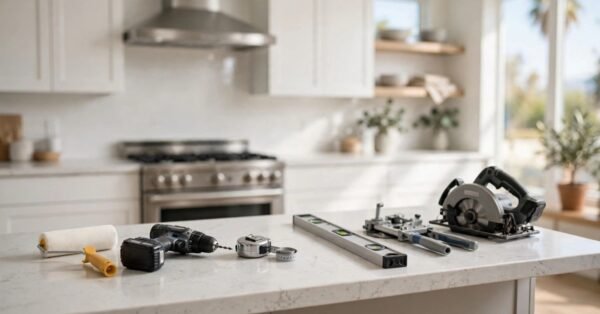
A DIY bathroom remodel requires basic hand tools, a wet tile saw, a level, a stud finder, and comfort working in tight, awkward spaces for extended periods. Most of the tool list is approachable. The skill list is where the real gap shows up.
Tile work specifically rewards experience in a way that’s hard to shortcut. A first tile job and a tenth tile job look visibly different, even using identical tools.
Tools Most Homeowners Underestimate Needing
Homeowners most often underestimate the need for a wet tile saw, a stud finder rated for finding plumbing and wiring, and a reliable moisture meter to confirm a surface is dry before tiling over it. Renting these tools is usually cheaper than buying them for a one-time project.
A moisture meter in particular prevents one of the most common and expensive mistakes on this list: tiling over a subfloor that looks dry but isn’t.
Insurance, Resale Value, and Liability Considerations
Unpermitted bathroom work can void homeowner’s insurance coverage for related water damage claims and create disclosure obligations during a home sale in California. This is the risk category that has nothing to do with how good the work looks and everything to do with paperwork.
An insurer can deny a water damage claim entirely if the underlying work wasn’t permitted and code-compliant. That denial often surfaces at the worst possible moment after the damage has already happened.
How Unpermitted Work Affects Home Resale in California
California requires sellers to disclose known unpermitted work, and a buyer’s inspector or appraiser identifying unpermitted plumbing or electrical changes can delay closing or reduce the appraised value. This disclosure requirement exists independent of whether the work itself was done well.
A well-executed unpermitted remodel can still cost a seller money at closing. The permit record matters as much as the craftsmanship behind it.
How to Decide Which Parts of Your Remodel to DIY
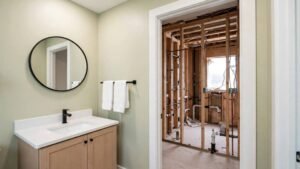
Deciding which bathroom remodel tasks to DIY comes down to three questions: does this task require a permit, does a mistake stay hidden behind a wall, and can I redo it myself if it goes wrong. I use this same three-question filter with every homeowner I talk through this decision.
Tasks that fail any one of those three questions are the ones worth handing to a professional. Tasks that pass all three are usually safe to take on yourself.
A Simple Framework for Splitting Work Between You and a Pro
A practical split assigns demolition, painting, and fixture installation to the homeowner, while plumbing relocation, electrical work, waterproofing, and structural changes go to licensed professionals. This split captures most of the available labor savings while keeping the highest-risk tasks in experienced hands.
It’s not a rigid rule. It’s a starting framework that shifts based on your own experience level and how much risk you’re comfortable carrying.
Working With a Professional Builder for the Parts You Don’t DIY
Hiring a professional builder for the technical phases of a bathroom remodel plumbing, electrical, waterproofing, and structural work while handling demolition and finish work yourself is the most common hybrid approach among California homeowners. This split works because it hands off exactly the tasks where mistakes are expensive and keeps the low-risk, high-visibility work in your hands.
A good builder will work around a partial-DIY scope rather than insisting on an all-or-nothing contract. That flexibility is worth asking about directly before you sign anything.
What to Ask a Builder Before Hiring Them for Partial Work
Before hiring a builder for partial remodel work, ask whether they’ll coordinate around DIY phases, whether their quote separates labor from materials, and whether they’ll pull the required permits under their own license. Those three questions reveal more about a builder’s reliability than almost anything else in the conversation.
A builder who hesitates on permit questions is one worth reconsidering. Permit transparency is one of the clearest measurable signals of construction quality available before work even starts.
Conclusion
A bathroom remodel splits cleanly into DIY-safe finish work and professional-grade plumbing, electrical, and waterproofing. Permits, hidden damage risk, and resale value all follow that same line.
We see the best outcomes when homeowners split labor deliberately rather than guessing. The right builder partnership protects both your budget and your home’s long-term value.
We build with exactly that balance in mind. Reach out to Tiny Home Builders California to plan a remodel that fits your skills, budget, and timeline.
Frequently Asked Questions
Can I remodel my own bathroom without a permit in California?
Cosmetic work like paint, flooring, and fixture swaps in the same location typically doesn’t require a permit. Any plumbing relocation, electrical circuit change, or structural work does.
What parts of a bathroom remodel should never be DIY?
Structural changes, load-bearing wall modifications, and new electrical circuits should never be DIY. These carry safety risks and almost always require licensed professionals and permits.
How much money does DIY actually save on a bathroom remodel?
DIY labor typically saves 20% to 35% of total project cost. Savings shrink significantly if a DIY mistake requires professional repair later.
Can I do my own tile work if I hire a pro for plumbing?
Yes, this is a common hybrid approach. Just confirm the plumbing rough-in is fully inspected and approved before tiling over any finished surfaces.
Do I need a licensed contractor for a full bathroom remodel?
Not if you’re performing the labor yourself on your own property. You do need licensed trades for any plumbing, electrical, or structural work beyond basic fixture swaps.
How long does a DIY bathroom remodel take compared to hiring a pro?
A professional remodel typically takes two to four weeks. A DIY remodel commonly takes two to six months due to limited time availability and skill-building delays.
What happens if DIY bathroom work isn’t up to code?
Non-compliant work can be flagged during inspection, require costly rework, void insurance claims for related damage, and create disclosure problems when selling the home.