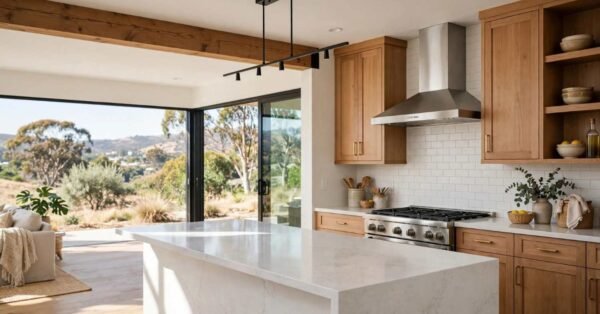
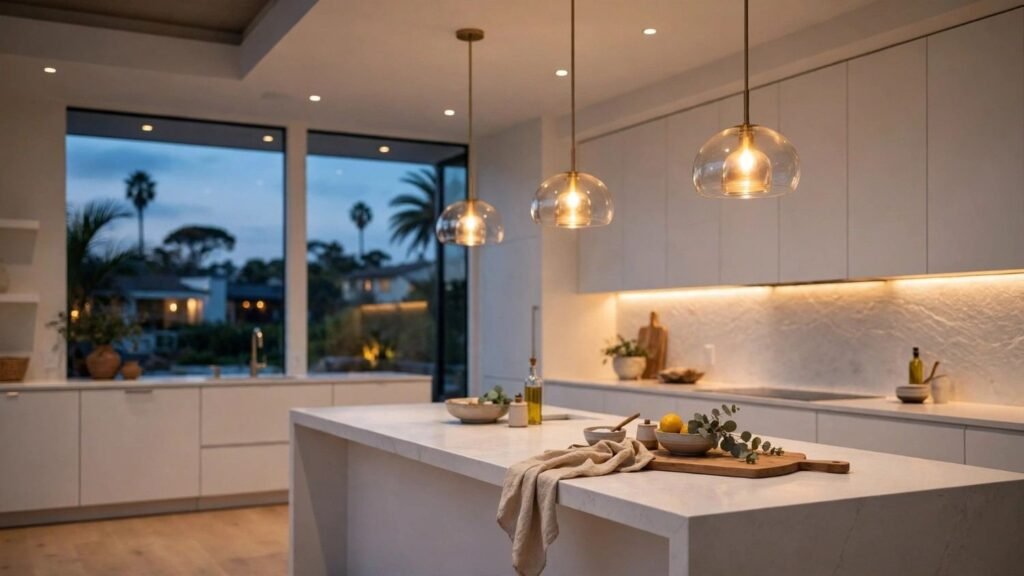
Kitchen lighting design is the practice of layering ambient, task, and accent light sources to make a kitchen both functional and visually balanced. I think of it as one of the most overlooked quality markers in a new build, because a kitchen can have beautiful cabinetry and still feel flat or unusable under the wrong lighting plan.
Getting this wrong means dark counters, harsh shadows, and a kitchen that never quite feels finished no matter the budget spent on finishes.
This guide walks through the three lighting layers and how they work together, the placement rules for pendants, recessed cans, and under-cabinet fixtures, how natural light and controls factor into the plan, and how all of it ties back to overall construction quality in a new home.
What Is Layered Kitchen Lighting?
Layered kitchen lighting is a design approach that combines ambient, task, and accent light sources to serve different functions at different times of day. Ambient light fills the room generally. Task light targets work surfaces. Accent light adds depth and highlights specific features.
I rarely see a kitchen fail because of one bad fixture. It usually fails because only one layer was planned and the other two were an afterthought.
Ambient vs. Task vs. Accent Light
Ambient lighting is the base layer that replaces daylight after dark. Task lighting sits closer to the work surface so shadows don’t fall across the counter while someone is cooking. Accent lighting draws the eye toward open shelving, art, or architectural detail without adding glare to the room.
A builder who understands layered lighting design is already thinking about how the kitchen will actually be used, not just how it will photograph on day one.
Ambient Lighting: Setting the Kitchen’s Base Layer

Ambient lighting provides the general, even illumination that fills a kitchen when no task is actively being performed. It comes from ceiling fixtures, recessed cans, or a central flush mount, and it sets the overall brightness level the other two layers build on top of.
A kitchen with only a single centered fixture almost always reads as dim at the perimeter, even when the fixture itself is bright enough on paper.
Ceiling Fixtures & Flush Mounts
Flush mounts and semi-flush fixtures work well in kitchens with standard eight- or nine-foot ceilings, since they stay close to the ceiling plane and avoid crowding sightlines. Taller ceilings open up room for a statement fixture, but the ambient layer still needs to reach every corner evenly, not just the center of the room.
Task Lighting: Illuminating Work Zones
Task lighting places direct, focused light exactly where food prep, cooking, and cleanup happen, usually along countertops, over the island, and above the sink. This is the layer most new homeowners underestimate, and it’s the one that causes the most daily frustration when it’s missing.
I’ve walked through plenty of finished kitchens where the ambient layer looked great in photos, but the person actually chopping vegetables was working in their own shadow. Task lighting fixes that specific problem, and it needs to be planned at the same time as cabinet and counter layout, not added afterward.
Under-Cabinet Lighting
Under-cabinet fixtures mount to the bottom of upper cabinets and shine directly down onto the counter below, eliminating the shadow a person’s body casts when standing at the counter under overhead light alone. This is one of the few lighting layers that has zero decorative function and exists purely to solve a visibility problem.
Island & Countertop Task Light
Islands typically rely on pendant fixtures rather than recessed cans, since the light needs to be lower and more directional to properly illuminate a horizontal work surface. Countertop runs along a wall usually pair recessed task lighting with under-cabinet strips to cover both the far and near edge of the surface.
| Zone | Common Fixture Type | Primary Purpose |
| Island | Pendants (2–3) | Direct task light + visual anchor |
| Countertop (wall-mounted) | Recessed task cans | Even surface illumination |
| Under-cabinet | LED strip or puck lights | Shadow-free counter work |
| Sink | Single recessed can or pendant | Focused task light over basin |
This table shows where each task-lighting fixture type belongs and why its placement differs by zone.
Accent Lighting: Adding Depth and Visual Interest
Accent lighting highlights specific features in a kitchen, such as open shelving, glass-front cabinets, or a tile backsplash, without adding to the room’s general brightness level. It’s the layer most often skipped on a budget, but it’s also the one that makes a finished kitchen feel designed rather than simply lit.
Toe-Kick & Open Shelving Lighting
Toe-kick lighting runs along the base of lower cabinets and creates a soft glow at floor level, which works particularly well in kitchens with dark flooring. Open shelving lighting, usually a small puck or strip light mounted above or below a shelf, draws attention to dishware or decor while adding a secondary light source at eye level.
Pendant Lighting Placement Over Islands and Counters

Pendant lights over a kitchen island should hang so the bottom of the fixture sits 28 to 36 inches above the countertop surface, adjusted for the homeowner’s height and ceiling clearance. Get this measurement wrong, and the fixture either blocks sightlines across the island or floats too high to provide real task light.
I’ve seen pendant height treated as a purely aesthetic decision, but it’s really a functional one first. A pendant hung too high scatters light across the ceiling instead of the counter, and one hung too low puts the fixture at eye level for anyone standing on the opposite side of the island.
Spacing and Height Rules
For a standard island, two pendants spaced 24 to 30 inches apart work well over a surface roughly six feet long, while a longer island may call for three fixtures spaced more evenly across the full run. The goal is even coverage across the work surface, not symmetrical spacing for its own sake.
- Measure the island length and divide it into equal light zones
- Choose two or three pendants based on that zone count
- Set hanging height at 28–36 inches above the counter
- Center the fixture run over the island, not the room
- Confirm sightlines from the main kitchen entry point before finalizing
This sequence covers the core steps for sizing and positioning an island pendant layout.
Recessed Lighting Layout and Spacing
Recessed lighting in a kitchen is typically spaced 4 to 6 feet apart, depending on ceiling height and the fixture’s beam spread, to avoid both dark gaps and overlapping hot spots. A layout planned around the cabinet and counter positions performs better than one simply spaced evenly across the ceiling grid.
Builders who treat recessed spacing as a pure math exercise sometimes miss that the layout needs to follow where the counters and island actually sit, not just divide the ceiling into equal squares.
Under-Cabinet Lighting Types and Installation Basics
Under-cabinet lighting is most commonly installed as either LED strip lighting or individual puck lights, each mounted to the underside of upper cabinets facing down toward the counter. The choice between the two usually comes down to how continuous or how focused the homeowner wants the light to look.
LED Strip vs. Puck Lights
LED strips run the full length of the cabinet and produce a continuous, even glow with no visible hot spots, which tends to suit longer countertop runs. Puck lights install as individual fixtures spaced along the cabinet and create a more dramatic, pooled light effect that works well for shorter sections or accent purposes.
Natural Light and Window Placement in Kitchen Design

Window placement in a kitchen determines how much usable daylight reaches the work surfaces during the day, which directly affects how much artificial lighting is needed at night. A kitchen with a well-placed window over the sink or along the prep area reduces daytime reliance on the ambient layer almost entirely.
I always think about natural light as the fourth layer, even though it isn’t technically part of the three-layer system. A kitchen oriented to catch morning or afternoon light differently changes the entire lighting plan, since the artificial layers only need to carry the load once daylight fades.
Homes oriented to maximize southern or western exposure in most of California’s climate zones tend to need less daytime ambient lighting, though that same orientation can increase glare on glossy countertops without the right window treatment. The way natural light and window placement interact with a floor plan is really a construction-planning decision made long before any fixture gets selected.
Dimmers, Controls, and Smart Lighting Systems

Dimmer switches and smart lighting controls let a homeowner adjust brightness and color temperature independently across each lighting layer, rather than relying on a single on/off setting. This matters more in a kitchen than almost any other room, since the same space needs bright task light for cooking and softer ambient light for a dinner conversation an hour later.
Smart controls add the ability to group fixtures into scenes, schedule lighting changes, or integrate with a broader home automation system, though the dimmer itself is really doing the core work regardless of how it’s controlled.
Energy Efficiency and LED Standards in Kitchen Lighting
LED fixtures now account for the vast majority of new kitchen lighting installations because they use up to 75% less energy than incandescent bulbs while lasting significantly longer. For a room that runs lighting for several hours a day, every day, that efficiency gap adds up quickly over the life of the home.
California’s Title 24 energy code requires high-efficacy lighting in kitchens, which in practice means LED fixtures meeting specific lumens-per-watt thresholds rather than leaving the choice purely to style preference. A builder working in this state needs to account for Title 24 lighting compliance at the design stage, not as a late-stage substitution.
| Fixture Type | Typical Wattage | Average Lifespan |
| LED recessed can | 9–12W | 25,000+ hours |
| LED under-cabinet strip | 4–8W per foot | 20,000+ hours |
| Incandescent equivalent | 60W+ | 1,000–2,000 hours |
This table compares the wattage and lifespan differences between LED and incandescent kitchen fixtures.
Common Kitchen Lighting Design Mistakes
The most common kitchen lighting mistake is relying on a single ambient source instead of planning all three lighting layers before construction begins. This single oversight causes most of the complaints homeowners have about their kitchen lighting a year after moving in.
Other recurring mistakes include hanging pendants too high over an island, skipping under-cabinet lighting entirely, and spacing recessed cans without regard to where the cabinets and counters will actually sit. Each of these is a planning failure rather than a product failure, which is really the distinction worth paying attention to.
How Lighting Design Fits Into Overall Kitchen & Home Construction Quality
Kitchen lighting design is one of the clearest, most visible indicators of how carefully a builder plans the construction process as a whole. A builder who coordinates electrical rough-in with cabinet and counter layout early in the process produces a kitchen where every fixture lands exactly where it needs to, and a builder who treats lighting as a late-stage decision usually produces a kitchen where it doesn’t.
I look at lighting planning almost as a proxy for the rest of the build. It requires coordination between the electrician, the cabinet installer, and the general plan long before drywall goes up, and that kind of sequencing either happens deliberately or it doesn’t happen at all. Reading how a builder approaches construction quality standards across a whole project tells a homeowner more than any single fixture choice ever will.
Conclusion
Layered lighting, careful pendant and recessed placement, and attention to natural light and efficiency standards all come together to make a kitchen genuinely functional, not just well-decorated.
The details carry forward into how the rest of a home gets planned and built, since a kitchen rarely performs well in isolation from the construction quality around it.
We build every kitchen at Tiny Home Builders California with that same layered approach in mind, and we’d welcome the chance to walk you through it.
Frequently Asked Questions
How many lighting layers does a kitchen need?
A kitchen needs three lighting layers: ambient, task, and accent. Each serves a different function, and skipping any one layer typically leaves part of the kitchen underlit or harshly shadowed.
What height should pendant lights hang over an island?
Pendant lights should hang 28 to 36 inches above the countertop surface. This range keeps sightlines clear while still delivering usable task light to the work surface below.
Is recessed lighting enough for a kitchen?
Recessed lighting alone is not enough for most kitchens. It covers the ambient layer well but still needs task lighting under cabinets and over the island to avoid shadows on work surfaces.
How far apart should recessed lights be spaced in a kitchen?
Recessed lights are typically spaced 4 to 6 feet apart. The exact spacing depends on ceiling height, fixture beam spread, and where cabinets and counters actually sit.
What color temperature is best for kitchen lighting?
Most kitchens perform best with 2700K to 3000K bulbs for ambient and accent layers, paired with closer to 3500K under cabinets. This range feels warm for daily living while still supporting clear task visibility.
Do under-cabinet lights need to be hardwired?
Under-cabinet lights can be hardwired or plug-in, depending on the installation stage. Hardwired systems installed during construction offer a cleaner look with no visible cords or plugs.
How much does kitchen lighting design add to construction cost?
A full three-layer kitchen lighting plan typically adds a few thousand dollars to a new build budget. The exact figure depends on fixture count, fixture quality, and the complexity of the electrical rough-in required.