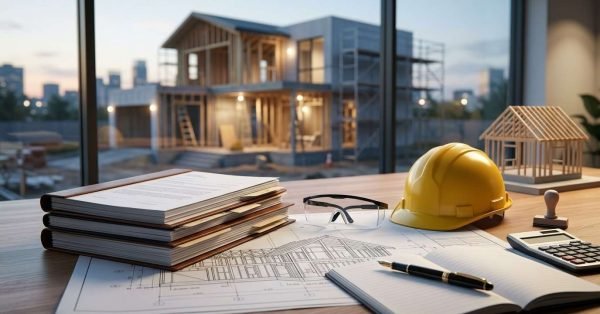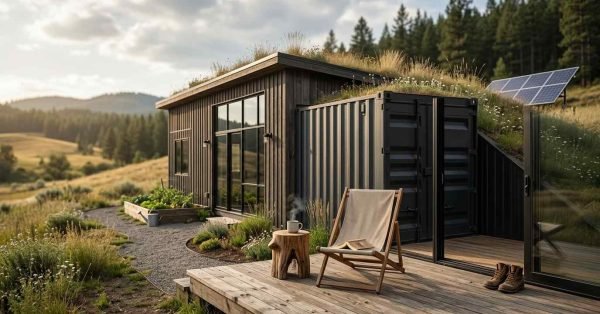
The exterior building envelope is the continuous shell of roofing, siding, flashing, windows, air barriers, and insulation that separates your home’s interior from everything outside. I treat it as the single most important quality indicator in residential construction, because it controls water, air, heat, and fire.
Most builders sell you finishes. I want you to understand the envelope instead, because a failed envelope destroys framing, drywall, insulation, and resale value quietly over years.
This guide covers envelope anatomy, roofing, siding, water management, air sealing, windows, California climate zones, codes, builder evaluation, cost, maintenance, and tiny-home specifics.
What the Exterior Building Envelope Actually Is
The exterior building envelope is a construction assembly that manages four flows: water, air, heat, and vapor. Every component works as part of one continuous system, not as a collection of separate products.
I explain it to homeowners this way. Your roof, walls, windows, and foundation edge form a single boundary, and that boundary either holds or it leaks.
The reason this matters is measurable. Buildings account for roughly 40% of total U.S. energy consumption, and envelope performance drives a large share of that in homes.
The Six Layers That Make Up a Home’s Envelope
I break the envelope into six functional layers: the structural layer, the water control layer, the air control layer, the thermal control layer, the vapor control layer, and the exterior cladding.
Cladding gets the attention. The control layers behind it do the actual work.
Each layer needs continuity. A thermal layer with gaps or a water layer with unsealed laps stops functioning as a layer and becomes a decoration.
Why Builders Treat the Envelope as One System
Roofers, siding crews, window installers, and insulation subcontractors all touch the same boundary. The transitions between their scopes are where most defects appear.
A quality builder owns those transitions. We coordinate the sequence so the roofer’s underlayment integrates with the wall’s weather-resistive barrier rather than terminating at it.
I have seen homes with premium roofing and premium siding fail at the roof-to-wall junction. The materials were excellent. The system integration was not.
Envelope Failure vs. Cosmetic Wear
Cosmetic wear is faded paint, chalked siding, or a few curled shingles. Envelope failure is water reaching sheathing, insulation losing R-value, or air moving freely through wall cavities.
The difference matters financially. Cosmetic wear costs hundreds to thousands. Envelope failure costs tens of thousands and often involves mold remediation and structural repair.
I tell buyers to inspect for stains, blistered paint, and musty smells rather than for color. Those symptoms signal control-layer problems behind the finish.
Roofing Systems: Materials, Assemblies & Lifespan
A roofing system includes the deck, underlayment, flashing, ventilation, and the visible covering. The shingle or tile is the last item I evaluate, not the first.
Homeowners ask about material. I ask about assembly, because a 50-year metal panel over failed underlayment leaks in year twelve.
Asphalt Shingle, Metal, Tile & Membrane Compared
Architectural asphalt shingles remain the volume choice in California and typically deliver 20 to 30 years of service. Standing seam metal reaches 40 to 70 years with far better fire performance.
Concrete and clay tile last decades but demand heavier framing and precise flashing at every hip and valley. Single-ply membranes handle the flat and low-slope roofs common on modern and compact homes.
Each material carries a different maintenance rhythm, and I match the roofing material to your climate zone rather than to a catalog preference.
Underlayment, Decking & Ventilation
Underlayment is the secondary water barrier that protects sheathing when the primary covering is compromised. Synthetic underlayments now dominate because they resist tearing and UV exposure better than felt.
Ventilation controls moisture and heat in the attic assembly. Ridge and soffit vents create continuous airflow, and unvented assemblies require dense insulation strategies instead.
Decking condition determines everything above it. We inspect and replace compromised sheathing rather than shingling over soft spots.
California Fire-Rated Roofing Requirements
California requires Class A roof assemblies across most of the state, and wildfire zones add further restrictions. Class A is the highest fire-resistance rating available for roof coverings.
Ember intrusion at vents and eaves causes many wildfire losses, not direct flame contact. Ember-resistant vents and enclosed eaves address that pathway directly.
I specify fire-rated assemblies as a baseline in California, then adjust upward based on the parcel’s designated hazard severity.
Siding & Cladding: Performance Beyond Curb Appeal
Siding is the cladding layer that shields the control layers behind it from rain, sun, and impact. It is a sacrificial rain screen, not a waterproof membrane.
That distinction changes how I evaluate installations. I look for drainage capacity and fastening discipline before I comment on color or profile.
Fiber Cement, Wood, Stucco, Metal & Composite
Fiber cement delivers strong fire performance and dimensional stability, which makes it a frequent choice in California wildfire zones. Wood offers warmth and repairability but demands consistent finish maintenance.
Three-coat stucco remains widespread across California and performs well when installed over a proper drainage plane. Metal and engineered composites bring long service life with minimal upkeep.
I select cladding based on exposure, fire requirements, and maintenance appetite, and the comparison between fiber cement and stucco drives many California decisions.
Rainscreens, Furring & Drainage Planes
A rainscreen is a ventilated gap between cladding and the weather-resistive barrier that lets incidental water drain and dry. Furring strips create that gap mechanically.
Coastal and high-rainfall sites benefit most. Drying capacity, not waterproofing, keeps walls healthy over decades.
Skipping the gap saves a small amount on material and adds significant long-term risk.
Fastening, Expansion Gaps & Installation Quality
Every cladding material expands and contracts with temperature and moisture. Manufacturers publish gap dimensions, fastener types, and edge distances for that reason.
Overdriven nails, missing gaps, and face-nailed lap siding are the three defects I find most often. They void warranties and cause buckling within a few seasons.
I document fastener patterns during installation. Photographic records settle warranty questions years later.
Water Management: Flashing, WRBs & Drainage
Water management is the envelope’s primary job, and it follows one principle: deflect, drain, dry. Every detail either supports that sequence or interrupts it.
I consider this the highest-skill area in residential construction. It is also the least visible once finishes go on.
Weather-Resistive Barriers and House Wrap
A weather-resistive barrier is a sheet or fluid-applied membrane that blocks liquid water while allowing vapor to escape. House wrap is the common sheet version.
Lap direction matters more than brand. Upper courses shingle over lower courses so gravity carries water outward rather than behind.
Fluid-applied barriers seal complex geometry well and cost more. I use them where penetration density is high.
Flashing Details at Windows, Roof-to-Wall & Penetrations
Flashing is sheet material that directs water away from joints and transitions. Sill pans, head flashing, kickout flashing, and step flashing each solve a specific geometry.
Kickout flashing at the roof-to-wall intersection prevents concentrated water from entering the wall. Its absence causes a large share of the wall rot I see in inspections.
Every pipe, vent, conduit, and light block is a penetration requiring deliberate sealing, and proper window flashing sequence protects the most vulnerable opening in any wall.
Where Most Water Intrusion Actually Starts
Intrusion rarely begins in the middle of a wall or roof field. It begins at transitions, penetrations, and terminations.
Windows, doors, decks, chimneys, and roof-wall junctions produce the majority of claims. Those are exactly the locations that reward careful workmanship.
I inspect transitions first during any envelope assessment. The field almost always looks fine.
Air Sealing, Insulation & Thermal Continuity
Air sealing stops uncontrolled airflow through the envelope, and insulation slows heat transfer. Together they determine comfort, energy cost, and moisture safety.
Air leakage carries moisture into assemblies, so sealing is a durability measure as much as an efficiency measure. I prioritize it accordingly.
Air Barriers vs. Vapor Retarders
An air barrier blocks bulk air movement. A vapor retarder slows diffusion of water vapor through materials. They are different functions and sometimes different products.
Confusing the two produces trapped moisture. California’s mild and mixed climates generally reward drying capacity over aggressive vapor blocking.
I specify continuous air barriers everywhere and apply vapor control selectively by climate zone.
Continuous Insulation and Thermal Bridging
Thermal bridging is heat moving through framing members that conduct faster than the insulation around them. Wood studs account for a meaningful share of a wall’s total heat loss.
Continuous exterior insulation interrupts that path across the entire wall plane. It also raises sheathing temperature, which reduces condensation risk.
Cavity insulation alone leaves the framing exposed as a bridge, and continuous exterior insulation strategies close that gap.
Blower Door Testing and Title 24 Compliance
A blower door test pressurizes the house and measures air leakage in air changes per hour. It converts workmanship claims into a number.
California’s Title 24 energy standards require verified envelope and duct performance on new residential construction. Testing is documentation, not decoration.
I want the test result in your closeout package. A builder who avoids testing is telling you something.
Windows, Doors & Envelope Penetrations
Windows and doors are the largest deliberate holes in the envelope. They control daylight, views, ventilation, and a disproportionate share of heat gain and loss.
Every opening is simultaneously an aesthetic decision and a water-management decision. I treat the second as the constraint.
U-Factor, SHGC and Glazing Selection
U-factor measures how readily heat passes through the assembly, and lower numbers perform better. Solar heat gain coefficient measures how much solar radiation enters, and lower numbers reduce cooling load.
California’s cooling-dominated zones reward low SHGC. Mountain zones weigh U-factor more heavily.
Low-emissivity coatings tune both values without sacrificing visible light.
Installation Method Over Product Rating
A high-performance window installed without a sloped sill pan leaks. The NFRC label describes the product, not the opening.
Flanged installation, sealant placement, shim locations, and interior air sealing all determine real performance. I specify the sequence in writing before the windows arrive.
Manufacturers void warranties over installation errors regularly.
California Climate Zones & Regional Envelope Design
California divides into 16 distinct climate zones for building energy purposes, and envelope requirements shift across them. A coastal Santa Cruz assembly performs poorly in Palm Springs.
I design the envelope for the parcel, not the state. That single decision separates competent regional builders from national template plans.
Coastal, Inland Valley, Desert & Mountain Demands
Coastal zones bring salt air, wind-driven rain, and persistent humidity, which favor corrosion-resistant fasteners and strong drying assemblies. Inland valleys deliver extreme summer heat and high cooling loads.
Desert zones punish solar exposure and demand aggressive shading, low SHGC glazing, and reflective roofing. Mountain zones add snow load, freeze-thaw cycling, and ice-related detailing.
Each profile changes insulation levels, glazing specs, and roofing choices, so designing for California climate zones is foundational rather than optional.
Wildfire Urban Interface (WUI) Chapter 7A
Chapter 7A of the California Building Code sets ignition-resistant construction standards for wildfire-prone areas. It governs roofing, siding, eaves, vents, decks, and windows.
Requirements include Class A roofs, ember-resistant vents, tempered or multi-pane glazing, and noncombustible or ignition-resistant cladding. Compliance is verified at permit and inspection.
I confirm hazard designation before design begins, because the envelope specification depends on it.
Seismic Movement and Envelope Detailing
California structures move. Cladding, flashing, and sealant joints have to accommodate that movement without cracking or tearing.
Rigid stucco over a flexing frame develops cracks that admit water. Control joints and appropriate reinforcement manage the stress.
I coordinate envelope detailing with the structural engineer’s lateral system rather than treating them as separate scopes.
Codes, Standards & Inspections That Govern the Envelope
Codes set the legal minimum for envelope performance. Quality builders exceed the minimum in the areas where failure costs the most.
I use code as a floor and manufacturer specifications as the working standard. Manufacturer requirements are usually stricter.
California Building Code and Title 24 Part 6
The California Building Code governs structural, fire, and weather-protection requirements for the envelope. Title 24 Part 6 sets the energy efficiency standards, including insulation, glazing, and air leakage limits.
California updates these standards on a three-year cycle. Each cycle tightens envelope performance further.
Compliance documentation follows the permit and belongs in your records.
Inspection Milestones Homeowners Should Attend
Four moments reveal envelope quality: sheathing and weather-barrier installation, window and flashing installation, insulation and air sealing before drywall, and roofing completion.
Everything gets covered after those points. I invite clients to walk the site at each stage with a camera.
Photographs taken before drywall have resolved more disputes than any contract clause I have written.
How to Evaluate a Builder’s Envelope Workmanship
This is where the guide becomes practical. Builders describe quality in adjectives, and I want you evaluating it in specifics.
Envelope quality is visible during construction and invisible afterward. So the evaluation has to happen while the walls are open.
Ten Questions to Ask Before You Sign
I ask builders these: Which weather-resistive barrier do you specify and why? Do you install rainscreen furring? Where do you place kickout flashing?
Then: What is your air sealing scope? Do you use continuous exterior insulation? Who performs the blower door test and what result do you target?
And finally: How do you document envelope stages? What is your workmanship warranty term? Which climate zone informed this design? Can I inspect before drywall?
Vague answers to specific questions tell you the answer.
Red Flags in Bids, Specs and Schedules
Bids that list “siding” and “roofing” as line items without material grade, underlayment type, or flashing scope hide the important decisions. Allowances replace specifications in low-quality proposals.
Schedules that place drywall immediately after insulation with no inspection window signal rushed sequencing. Sequencing errors cause envelope defects.
I compare bids on scope specificity rather than on total price, and evaluating home builder quality starts with reading what the bid does not say.
Documentation, Photos and Third-Party Verification
A quality builder produces a documentation package: material submittals, warranty registrations, photo records of concealed work, blower door results, and inspection sign-offs.
Third-party verification adds independent confirmation. HERS raters verify envelope and duct performance in California, and independent envelope consultants review critical details on complex projects.
We provide that package at closeout because it protects the homeowner for decades.
Envelope Cost Drivers & Long-Term Value
Envelope work typically consumes a meaningful share of the total construction budget, with roofing, cladding, windows, and insulation as the largest line items. Labor drives more of the variance than material.
I frame envelope spending as risk reduction. It is the part of the house that prevents the expensive failures.
Where Money Is Well Spent vs. Wasted
Money spent on flashing detail, air sealing labor, quality underlayment, and continuous insulation returns value for the life of the home. Those items cost little relative to their protective effect.
Money spent on elaborate cladding profiles over an unventilated, poorly flashed wall buys appearance without protection. I redirect that budget.
Upgrades I recommend first: better underlayment, rainscreen, kickout flashing, and verified air sealing.
Lifecycle Cost and Insurance Implications
Lifecycle cost accounts for purchase, energy, maintenance, and replacement across decades. A cheaper envelope frequently costs more over thirty years.
California insurers increasingly evaluate wildfire hardening when writing and pricing residential policies. Class A roofing, ember-resistant vents, and noncombustible cladding factor into that assessment.
Insurability has become a real design consideration in much of the state, and wildfire-resistant home construction affects both safety and coverage.
Maintenance, Warranties & Envelope Service Life
An envelope is a maintained system. Small, consistent attention extends service life dramatically, and neglect shortens it just as fast.
I hand every client a maintenance schedule at closeout. It takes a few hours a year.
Annual and Seasonal Inspection Habits
Clear gutters and downspouts twice yearly, and inspect roof penetrations and sealant joints each fall before the rainy season. Check flashing after major storms.
Wash cladding annually, trim vegetation back from walls, and repaint or refinish wood on the manufacturer’s cycle. Watch for interior stains and musty odors.
Fifteen minutes of looking each season catches problems while they cost hundreds.
Material Warranty vs. Workmanship Warranty
A material warranty covers manufacturing defects in the product and often runs decades. A workmanship warranty covers installation errors and typically runs one to ten years.
Most envelope failures are installation errors. So the workmanship warranty matters more than the impressive number on the shingle wrapper.
I read exclusions carefully, because improper installation voids most material warranties outright.
Envelope Considerations for Tiny & Compact Homes
Compact homes concentrate envelope challenges. Less interior volume sits behind proportionally more exterior surface, which amplifies every thermal and moisture decision.
I build these with tighter tolerances than conventional homes. The margin for error is smaller.
Higher Surface-Area-to-Volume Ratio
A small home loses and gains heat faster per square foot of floor area because its envelope surface is proportionally larger. Insulation quality and air sealing carry more weight as a result.
Interior moisture also concentrates faster in small volumes. Ventilation strategy becomes essential rather than optional.
High-performance glazing and continuous insulation deliver outsized returns at this scale.
Transport, Movement and Sealing Durability
Homes built on trailers experience road vibration, torsion, and wind loads that stationary houses never see. Cladding fasteners, sealant joints, and roofing edges take real abuse.
Mechanical fastening, flexible sealants, and robust flashing details handle that movement. Adhesive-dependent assemblies do not.
Our tiny home construction standards treat the envelope as a transport-rated assembly from the first drawing.
Conclusion
You now understand the envelope as one integrated system: roofing, cladding, water management, air sealing, glazing, and code compliance working together across California’s climate zones.
Each section here opens into deeper resources on materials, flashing details, climate-zone design, and builder evaluation for the decisions ahead.
We build envelopes that hold for generations. Talk to Tiny Home Builders California about a home engineered from the outside in.
Frequently Asked Questions
What is the building envelope of a house?
The building envelope is the continuous shell separating inside from outside. It includes roofing, siding, windows, doors, air barriers, insulation, and the foundation perimeter.
How long does a residential exterior envelope last?
Component lifespans vary widely. Asphalt roofing lasts 20 to 30 years, fiber cement siding 40 to 50, and quality flashing and air sealing last the life of the home.
Which envelope component fails most often?
Flashing at transitions fails most often. Windows, roof-to-wall junctions, and penetrations produce far more water intrusion than roof or wall fields.
Does California require special envelope construction?
Yes. Title 24 sets energy performance requirements, and Chapter 7A adds ignition-resistant standards for roofing, siding, vents, and glazing in wildfire-prone areas.
Is continuous exterior insulation worth the cost?
It is. Continuous insulation interrupts thermal bridging through framing, raises sheathing temperature, reduces condensation risk, and lowers heating and cooling loads permanently.
How do I verify a builder’s envelope quality?
Inspect before drywall. Review the weather barrier, flashing details, insulation, and air sealing, then request blower door results and photo documentation of concealed work.
What does a blower door test measure?
It measures whole-house air leakage in air changes per hour. Lower numbers indicate tighter construction, better comfort, lower energy bills, and reduced moisture risk.