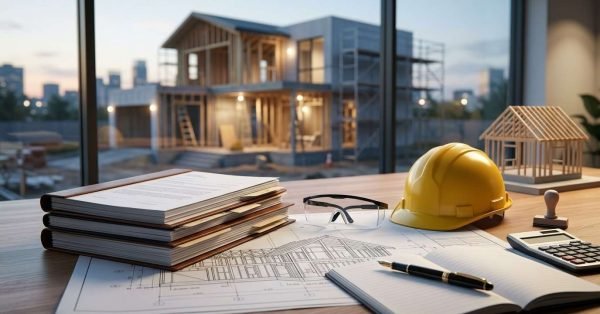
The home building process is the sequence of planning, approval, and construction stages that turn raw land into a finished, code-compliant home. I have watched families walk into this process expecting a few months of work and discover a dozen distinct phases, each with its own decisions, costs, and quality checkpoints.
Understanding the order matters because every stage locks in the one before it. Framing hides plumbing. Drywall hides framing. Mistakes buried early cost the most to fix later.
This guide walks through budgeting, land, builder selection, design, permits, foundation, framing, rough-in systems, finishes, handover, timelines, quality markers, builder communication, and the mistakes that trip up first-time builders.
What the Home Building Process Actually Involves
Most people picture home building as hammers and lumber. The truth is that construction is the middle third of a much longer process, and the decisions made before anyone breaks ground carry the most weight.
I break the whole thing into three phases. Pre-construction covers financing, land, builder selection, design, and permitting. Construction covers site work through final finishes. Closeout covers inspection, walkthrough, warranty, and occupancy.
The Three Phases: Pre-Construction, Construction, and Closeout
Pre-construction is where budgets get set and risk gets managed. This phase often runs longer than people expect, especially in California, where plan check and environmental review add real calendar time.
Construction is the visible phase. It moves in a strict sequence because each trade depends on the one before it.
Closeout is short but decisive. This is where quality gets verified, defects get documented, and the warranty period begins.
Who Is Involved at Each Stage
A build brings together a lender, a real estate agent or land broker, a designer or architect, a structural engineer, a Title 24 energy consultant, a general contractor, a project manager, and a long list of subcontractors.
The general contractor is the hub. A good one coordinates trades, manages the schedule, handles inspections, and keeps the owner informed without requiring the owner to chase updates.
I always tell clients that the quality of a home tracks closely with the quality of coordination. Craftsmanship matters, but sequencing failures cause more callbacks than bad workmanship does.
Typical Timeline From Land to Move-In
A straightforward single-family build in California runs roughly 12 to 24 months from land purchase to move-in. Census data puts the national average at about 8.3 months from permit issuance to completion for single-family homes, and California permitting adds months on the front end.
Smaller footprints compress that window considerably. A compact build such as an ADU or tiny home often finishes in a fraction of the time a full custom residence requires.
Step 1: Budgeting and Financing Your Build
Budget comes first because it defines everything downstream. Land, square footage, finish level, and builder selection all get filtered through the number you can actually fund.
I ask clients to establish three numbers before we talk design. Total project budget, cash available at closing, and the maximum monthly payment they are comfortable carrying.
Construction Loans vs. Traditional Mortgages
A construction loan funds the build in draws tied to completed stages, not in one lump sum. It typically carries a variable rate and converts to a permanent mortgage at completion.
Traditional mortgages fund existing homes. They do not work for ground-up construction, which surprises a lot of first-time builders.
Lenders release each draw after an inspection confirms the stage is complete. That structure protects the lender and, honestly, it protects the owner too.
Hard Costs, Soft Costs, and Contingency
Hard costs are physical: materials, labor, equipment. Soft costs are everything else: design fees, permits, impact fees, engineering, insurance, and financing charges.
Soft costs regularly land between 20 and 30 percent of a California project. People underestimate them constantly.
I build a contingency of 10 to 15 percent into every project. Unknown soil conditions, code interpretations, and owner-driven changes consume it.
What Drives Cost Per Square Foot in California
Site difficulty, structural complexity, finish level, and local fee schedules move the number more than anything else. A flat lot with existing utilities costs dramatically less to develop than a sloped parcel needing retaining walls and a new septic system.
Understanding what actually drives home construction costs helps owners spend where it shows and save where it does not.
Step 2: Finding and Evaluating Land
Land is not just a location. It is a set of constraints that will shape the home before a single line gets drawn.
I have seen buyers fall in love with a view lot and then learn that the driveway grade alone adds six figures. Due diligence prevents that.
Zoning, Setbacks, and Buildable Area
Zoning determines what you are allowed to build. Setbacks, height limits, lot coverage ratios, and floor area ratios shrink the theoretical buildable area down to the real one.
A one-acre parcel does not mean an acre of building room. After setbacks, easements, and slope restrictions, the usable footprint sometimes shrinks by half.
Utilities, Access, and Site Conditions
Water, sewer or septic, power, and gas each carry a connection cost and a lead time. Rural parcels frequently need a well, a septic system, and a utility extension that runs longer than the driveway.
Legal access matters just as much. A parcel without recorded access is a parcel you cannot build on.
Soil Reports, Surveys, and Feasibility Checks
A geotechnical soil report tells the engineer what foundation the ground will support. Expansive clay, fill soil, and high water tables all change the foundation design and the budget.
I never recommend closing on land without a feasibility review. Reviewing what to check before buying a building lot during the inspection contingency period costs a fraction of what a bad parcel costs later.
Step 3: Choosing the Right Home Builder
This decision determines the quality of the finished home more than any material selection will. A great builder using mid-range materials produces a better house than a weak builder using premium ones.
Marketing claims tell you nothing. Verifiable credentials, documented process, and past client experience tell you everything.
License Verification and Insurance Requirements
Every California contractor performing work over $500 must hold an active license. You can verify any license, bond status, and complaint history directly through the California Contractors State License Board, and I consider that a non-negotiable first step.
Confirm general liability coverage and workers’ compensation. An uninsured injury on your property becomes your exposure.
Ask for the license number in writing and check it yourself. Reputable builders expect this and welcome it.
Questions That Reveal Real Construction Quality
I tell owners to skip the glossy questions and ask operational ones. How many projects run concurrently? Who is on site daily? What is the change order process? Which subcontractors are employees versus contracted?
Ask to walk an active jobsite. A clean, organized, well-protected site reflects how the company works when nobody is watching.
Request references from projects completed two to three years ago, not last month. Time reveals workmanship. Working through a structured home builder evaluation process keeps the comparison objective rather than emotional.
Reading a Builder Contract and Allowance Schedule
The contract defines scope, payment schedule, timeline, warranty, and dispute resolution. Vague scope language is the single most common source of conflict I see.
Allowances are budget placeholders for items not yet selected. Low allowances make a bid look competitive and then blow the budget at selection time.
Compare allowance schedules line by line across bids. Two proposals separated by $40,000 sometimes differ only in how honestly the allowances were set.
Step 4: Design, Architectural Plans, and Engineering
Design translates a budget and a lot into a buildable document set. This phase produces the drawings that permits, bids, and construction all depend on.
Changes are cheap here and expensive later. Moving a wall on paper costs a revision fee. Moving it after framing costs thousands.
Custom Plans vs. Modified Stock Plans
Fully custom plans give complete control over layout, proportion, and site response. They cost more and take longer.
Modified stock plans start from a proven design and adapt it to the lot and to code. For many owners, this delivers most of the benefit at a fraction of the design cost.
Structural and Title 24 Energy Calculations
Structural engineering sizes beams, footings, and lateral bracing for the specific soil and seismic conditions. California’s seismic requirements make this non-optional.
Title 24 energy compliance requires documented calculations for insulation, glazing, HVAC efficiency, and increasingly for solar. The California Energy Commission’s building standards set these requirements and they update on a three-year cycle.
Design Decisions That Affect Long-Term Performance
Orientation, roof overhangs, window placement, and wall assembly determine comfort and energy cost for the life of the home. These are nearly impossible to change later.
I push clients to invest in envelope performance before finishes. Insulation and air sealing pay back every month. A stone countertop does not.
Step 5: Permits, Approvals, and Inspections
Permitting converts approved drawings into legal authorization to build. In California this stage frequently takes longer than the foundation and framing combined.
Every jurisdiction runs its own process. Timelines vary widely between a small city, an unincorporated county, and a coastal zone.
The Plan Check and Permit Timeline
Plan check is the review process where building, planning, fire, and public works departments examine your drawings. Corrections come back, the design team responds, and the cycle repeats until approval.
Two to three correction rounds is normal. Budgeting three to six months for permitting on a custom home keeps expectations realistic.
California Building Code and Local Amendments
The California Building Standards Code sets the statewide baseline. Local jurisdictions then layer on amendments for fire severity zones, seismic conditions, grading, and stormwater.
Coastal, hillside, and wildland-urban interface parcels carry additional review. Understanding the residential permit process in California before design begins prevents redrawing plans that were never going to be approved.
Required Inspections Through Construction
Inspectors verify work at defined milestones: foundation, underground utilities, framing, rough electrical and plumbing, insulation, drywall, and final.
Work cannot legally proceed past a failed inspection until it is corrected and re-inspected. A builder who schedules inspections proactively keeps the job moving.
Step 6: Site Work and Foundation
This is where the project becomes physical. Site work prepares the ground and the foundation transfers the entire structure’s load into it.
Everything above depends on this being right. Foundation defects are the most expensive category of construction failure to repair.
Grading, Excavation, and Drainage
Grading shapes the site for drainage, access, and the building pad. Water must move away from the structure on every side.
Poor drainage causes more long-term damage than almost any other site issue. Standing water undermines foundations, saturates soil, and creates moisture problems inside the home.
Slab, Stem Wall, and Raised Foundations
Slab-on-grade pours a single concrete surface directly on prepared soil. It is common, cost-effective, and works well on flat, stable ground.
Stem wall foundations use perimeter footings with a raised concrete wall. Raised foundations create a crawl space that improves access to plumbing and mechanical runs.
Soil conditions, slope, flood zone, and climate drive the choice. The geotechnical report makes the recommendation.
Step 7: Framing, Roofing, and the Building Envelope
Framing creates the skeleton. Roofing and envelope work seal it against water and air.
I consider this stage the best window for owners to observe quality. Everything is visible now and hidden forever after drywall.
Framing Quality Indicators to Watch For
Look for consistent stud spacing, straight and plumb walls, properly sized headers, and hardware installed per the structural drawings. Nail patterns at shear panels matter more than they look.
Check that plates are level and corners are square. Framing errors telegraph into every finish that follows.
Weather Barriers, Flashing, and Roof Assembly
The weather-resistive barrier, flashing, and roof assembly work as one continuous water management system. Water always finds the weakest detail.
Flashing at windows, doors, roof penetrations, and wall-to-roof transitions deserves close attention. Most residential water intrusion traces back to a flashing detail, not a material failure.
Reviewing the building envelope components that protect a home helps owners know what to inspect while it is still exposed.
Step 8: Rough-In Systems: Plumbing, Electrical, and HVAC
With the structure dried in, the trades install everything that will live inside the walls. Plumbing, electrical, HVAC ducting, and low-voltage wiring all go in now.
This stage rewards planning. Every outlet, fixture, and duct run should already be located on the drawings.
Sequencing and Trade Coordination
Plumbing typically goes first because drain lines need slope and cannot be rerouted easily. HVAC follows, then electrical, which is the most flexible.
When trades collide, someone loses. Good project management resolves conflicts on paper before crews arrive.
Insulation, Air Sealing, and Energy Performance
Air sealing happens before insulation and does more for comfort than insulation thickness alone. Gaps at top plates, penetrations, and rim joists leak conditioned air continuously.
The Department of Energy notes that air sealing and insulation improvements rank among the most cost-effective ways to reduce heating and cooling costs. Getting this right during construction costs a fraction of retrofitting it later.
Insulation inspection happens before drywall. This is the last chance to verify the work.
Step 9: Interior Finishes and Fixtures
Finishes are what owners see and touch every day. They are also where budgets go sideways fastest.
The sequence is fairly rigid. Drywall, then paint, then trim and cabinetry, then flooring, then fixtures and appliances.
Drywall, Trim, Cabinetry, and Flooring
Drywall finish level affects how paint reads on the wall. Trim carpentry reveals workmanship immediately in miters, reveals, and caulk lines.
Cabinetry installation quality shows in consistent gaps, level runs, and doors that align. Flooring transitions and thresholds are a reliable tell for care.
Selections, Change Orders, and Budget Control
Every selection should be locked before its trade mobilizes. Late selections cause delays and premium pricing.
Change orders during finishes carry the highest cost multiplier of any phase. Deciding early protects both schedule and budget.
Step 10: Final Inspection, Walkthrough, and Handover
The build ends with verification. Inspectors confirm code compliance and the owner confirms workmanship.
Take this stage seriously. It is your leverage point.
The Punch List Process
The punch list documents every incomplete or defective item found during the final walkthrough. Paint touch-ups, hardware adjustments, caulking, and trim corrections make up most of it.
Walk the home slowly and in daylight. Open every door, run every faucet, test every switch and outlet.
Get the list in writing with completion dates attached. A builder who resists documentation is telling you something.
Certificate of Occupancy and Warranty Coverage
The certificate of occupancy is the jurisdiction’s confirmation that the home is legally habitable. Final utility connections and move-in depend on it.
Warranty coverage typically layers a one-year workmanship period, a two-year systems period, and a ten-year structural period. California statute also establishes defect liability timeframes under the state’s construction defect law.
Understanding what a new home warranty actually covers before signing prevents disputes in year two.
How Long Each Stage Takes and What Causes Delays
Owners ask about timeline more than any other topic. The honest answer is that pre-construction is unpredictable and construction is fairly predictable.
I plan schedules with float built in. A schedule with zero slack fails on the first rain day.
Realistic Stage-by-Stage Duration Ranges
Design and engineering typically run two to four months. Permitting runs three to six. Site work and foundation take three to six weeks, framing four to eight weeks, rough-in three to five weeks, and finishes eight to sixteen weeks.
Closeout adds two to four weeks. Add those together and 12 to 18 months is a realistic custom home window in most of California.
Permitting, Weather, and Supply Chain Variables
Permitting is the largest single variable and the hardest to control. Correction cycles and interdepartmental review drive it.
Rain stops site work, concrete, and roofing. Winter builds in Northern California routinely lose weeks.
Material lead times on windows, cabinetry, and specialty equipment still run long. Ordering early is the only real defense.
Construction Quality Markers at Every Stage
Quality is not a feeling. It is a set of observable, verifiable conditions at each stage of the build.
I judge builders by what they do when nothing is visible. That is where corners get cut or standards get held.
Materials and Specification Transparency
A quality builder documents exactly which products go into the home: framing lumber grade, sheathing type, weather barrier brand, insulation R-value, window performance ratings, and roofing specification.
Vague specs invite substitution. “Builder-grade” is not a specification.
Ask for a written specification sheet with the bid. Compare it against competing bids before comparing price.
Workmanship Standards and Third-Party Verification
Third-party verification separates claims from proof. Blower door testing measures actual air leakage. HERS rating verifies energy performance. Independent inspections catch what a busy jurisdiction inspector might not.
I recommend an owner-hired inspector at foundation, framing, and pre-drywall. The cost is small against what it catches.
Programs like ENERGY STAR certified new homes provide documented performance benchmarks rather than marketing language. Learning how to identify a well built home gives owners a practical checklist for every site visit.
Working With Your Builder Through the Build
The owner-builder relationship shapes the experience as much as the construction itself. Clear expectations early prevent friction later.
I set communication protocols before the first shovel hits dirt.
Communication Cadence and Progress Reporting
A weekly written update with photos, completed work, upcoming work, and open decisions keeps everyone aligned. A standing site meeting handles anything the report cannot.
Establish one point of contact. Owners who direct subcontractors individually create confusion and cost.
Managing Change Orders Without Losing Control
Every change should be documented with scope, cost, and schedule impact before work begins. Verbal changes cause disputes.
Set a personal change budget and track against it. Small changes compound quietly across a twelve-month build.
Common Mistakes First-Time Home Builders Make
I see the same handful of errors repeatedly, and nearly all of them are preventable with better front-end planning.
Underbudgeting soft costs and skipping contingency tops the list. Owners fund the house and forget the fees.
Selecting a builder on price alone runs a close second. The lowest bid usually reflects the thinnest allowances, not the best value.
Other frequent mistakes include buying land before a feasibility review, delaying selections past the deadline, changing design after permits are issued, and skipping independent inspections at the stages where problems are still visible.
Conclusion
You now understand the full arc: budget, land, builder selection, design, permits, foundation, framing, systems, finishes, handover, timelines, and quality verification at every stage.
Each stage connects to a deeper topic worth exploring on its own, from cost drivers and permitting to warranty coverage and construction quality standards.
We build homes designed to last, and we would be glad to walk your project through every step. Reach out to Tiny Home Builders California today.
Frequently Asked Questions
How long does it take to build a house in California?
Most custom homes take 12 to 18 months from design start to move-in. Permitting alone often consumes three to six months of that timeline.
Do I need an architect to build a home?
Not always. Many builds use a designer plus a structural engineer, though complex custom homes and difficult sites benefit from full architectural involvement.
What is the most expensive stage of home building?
Framing and finishes carry the largest hard-cost shares. Site development sometimes exceeds both on difficult lots with grading and utility challenges.
How do I verify a home builder’s license in California?
Search the contractor’s name or license number on the Contractors State License Board website. It shows license status, bond, and complaint history.
What happens if my build fails an inspection?
Work stops on the affected scope until the issue is corrected and re-inspected. A responsive builder resolves most corrections within days.
Should I hire my own independent inspector?
Yes. An owner-hired inspector at foundation, framing, and pre-drywall catches issues while they remain visible and inexpensive to fix.
What does a new home warranty typically cover?
Standard coverage runs one year on workmanship, two years on systems, and ten years on structural elements. Terms vary by builder and contract.