A tiny home lives or dies on its insulation. I have walked into small builds that felt like ovens in July and iceboxes in January, and the difference always traces back to the thermal envelope. Get the insulation and climate control right, and a 300-square-foot home stays comfortable on a fraction of the energy a normal house burns.
Small spaces punish bad decisions fast. A tiny home has far more exposed surface for its volume than a full-size house, so heat escapes quicker and moisture builds faster. That is why insulation stops being a background detail and becomes the single system that shapes daily comfort, monthly bills, and how long the home lasts.
I wrote this guide to cover the whole system from the ground up. We work through the fundamentals of thermal performance and insulation types, then move zone by zone through the home, tackle air sealing and moisture, compare heating and cooling systems, map out California climate strategies, and finish with what it all costs and how to judge a builder’s approach.
What Tiny Home Insulation and Climate Control Actually Mean
Tiny home insulation is the layer of thermal-resistant material inside the walls, floor, and roof that slows heat from moving in or out of the living space. Climate control is the set of heating, cooling, and ventilation systems that manage temperature and humidity once that shell is sealed. The two work as one connected system, not as separate line items.
I treat them together for a reason. A great heat pump wastes half its output in a leaky, under-insulated shell. Strong insulation with no ventilation traps moisture and rots the frame.
Defining a tiny home’s thermal envelope
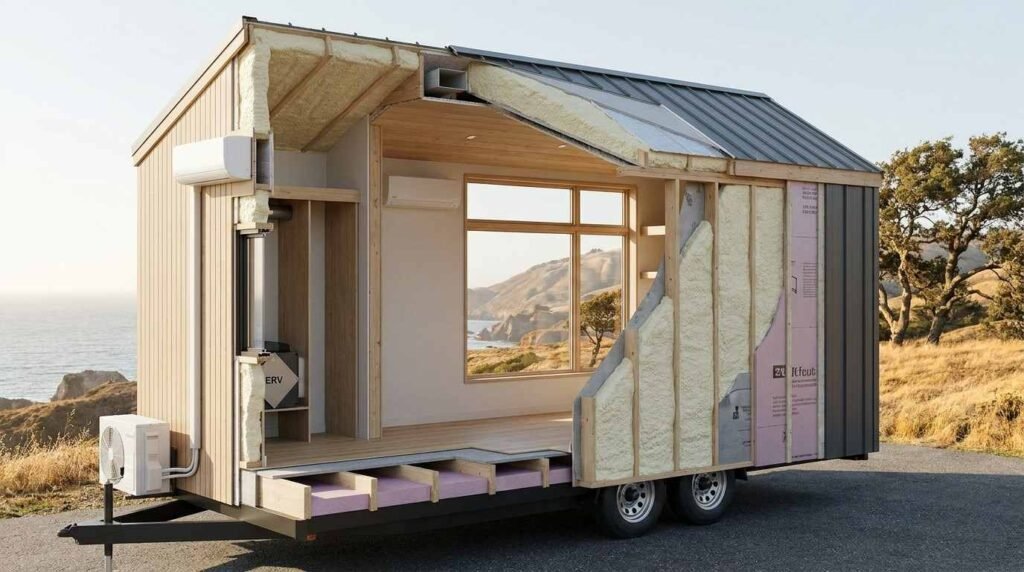
The thermal envelope is every surface that separates conditioned indoor air from the outside. In a tiny home that means the floor deck, all four walls, the roof, and every window and door. Each of these surfaces either holds comfort in or bleeds it out.
I picture the envelope as a sealed shell. Any weak point becomes the path of least resistance for heat and moisture.
Why small spaces behave differently thermally
A tiny home swings temperature far faster than a standard house. There is less air volume to buffer against outdoor conditions, so the interior heats up and cools down in minutes rather than hours. That responsiveness cuts both ways.
Good insulation turns that quick response into an advantage. The home warms fast and holds it. Bad insulation turns the same trait into constant discomfort.
Insulation vs. climate control: two connected systems
Insulation is passive. It does its job with no power, no moving parts, and no maintenance for decades. Climate control is active, drawing energy to add or remove heat and moisture.
The smarter your passive layer, the smaller and cheaper your active systems can be. I always spend on insulation first, because every dollar there shrinks the heating and cooling load for the life of the home.
Why Insulation Matters More in a Tiny Home Than a Standard House
Insulation carries more weight in a tiny home because the physics work against you. The same features that make a tiny home efficient to build also make it prone to rapid heat loss and moisture buildup. Skipping quality insulation costs far more here than in a large home.
Surface-area-to-volume ratio
A tiny home exposes a large amount of outer surface relative to its interior space. Heat escapes through surfaces, so more surface per cubic foot means faster energy loss. A 400-square-foot home can lose heat proportionally quicker than a 2,000-square-foot house.
This ratio is the core reason tiny homes demand better-than-code insulation. You are fighting a geometry disadvantage from the start.
Comfort, energy cost, and moisture consequences
Poor insulation shows up in three ways. The home feels drafty and uneven, the electric bill climbs, and condensation gathers on cold surfaces. In a small volume those problems compound quickly.
I have seen mold appear within a single winter in a poorly built tiny home. The fix is always harder than doing it right the first time.
Understanding R-Value and Thermal Performance in Small Spaces
R-value is the measure of how well a material resists heat flow, with higher numbers meaning better insulation. It is the single most useful number when comparing insulation options for a tiny home. Understanding it helps you judge whether a wall assembly will actually perform.
What R-value measures
R-value rates the thermal resistance of a given thickness of material. A spray foam layer might deliver R-6 per inch, while a fiberglass batt delivers closer to R-3.5 per inch. More R-value per inch matters enormously when wall cavities are only a few inches deep.
Thin walls are the tiny home reality. That is why per-inch performance drives most of my material choices.
Target R-values for walls, floors, and roofs
For most California tiny homes I aim for roughly R-13 to R-21 in walls, R-19 to R-30 in floors, and R-30 or higher in roofs. Roofs get the highest priority because heat rises and the roof faces the harshest sun exposure. Colder mountain builds push these numbers up.
These are working targets, not rigid rules. The right number depends on your climate zone and wall depth.
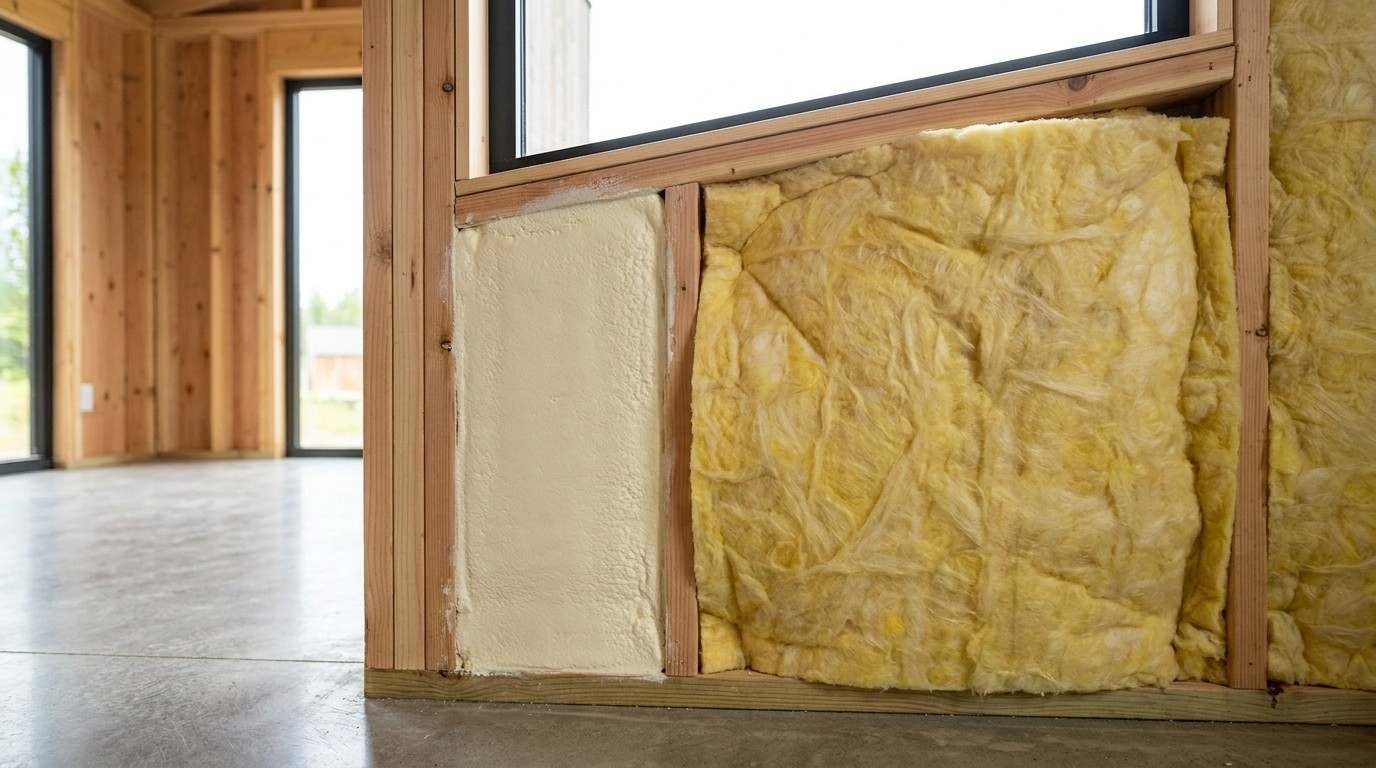
Types of Insulation for Tiny Homes
Choosing the right insulation type is the biggest decision in the thermal envelope. Each material trades off R-value, cost, moisture resistance, and installation difficulty. The best choice depends on your climate, budget, and build method.
Spray foam insulation
Closed-cell spray foam is my go-to for tiny homes. It delivers high R-value per inch, seals air leaks, and blocks moisture in one application. The downside is cost and the need for professional installation.
For a space where every inch counts, foam’s density is hard to beat. It also adds structural rigidity to the walls.
Rigid foam board insulation
Rigid foam boards offer strong R-value and moisture resistance in a DIY-friendly format. They work especially well under floors and as continuous exterior sheathing that breaks thermal bridging. Careful sealing at the seams makes or breaks their performance.
I often pair rigid board with cavity insulation for a layered approach. That combination hits high R-values in thin walls.
Batt and blanket insulation
Fiberglass and mineral wool batts are the budget-friendly option. They install easily into standard cavities and cost far less than foam. The tradeoff is lower R-value per inch and no built-in air seal.
Mineral wool earns its place with fire resistance and better moisture tolerance than fiberglass. I lean toward it when batts are the plan.
Sheep wool and natural insulation
Sheep wool and other natural fibers appeal to owners wanting a low-toxicity, breathable material. Wool handles moisture gracefully, absorbing and releasing it without losing much performance. It costs more than synthetic batts.
For chemically sensitive owners, wool solves a real problem. Its moisture behavior suits humid coastal builds well.
Reflective and radiant barrier insulation
Radiant barriers reflect heat rather than resist its conduction. They shine in hot, sunny climates where they cut roof and wall heat gain dramatically. They work best as a supplement, not a standalone insulation layer.
In California’s desert zones I treat a radiant barrier as near-essential. Paired with strong cavity insulation, it keeps summer heat out.
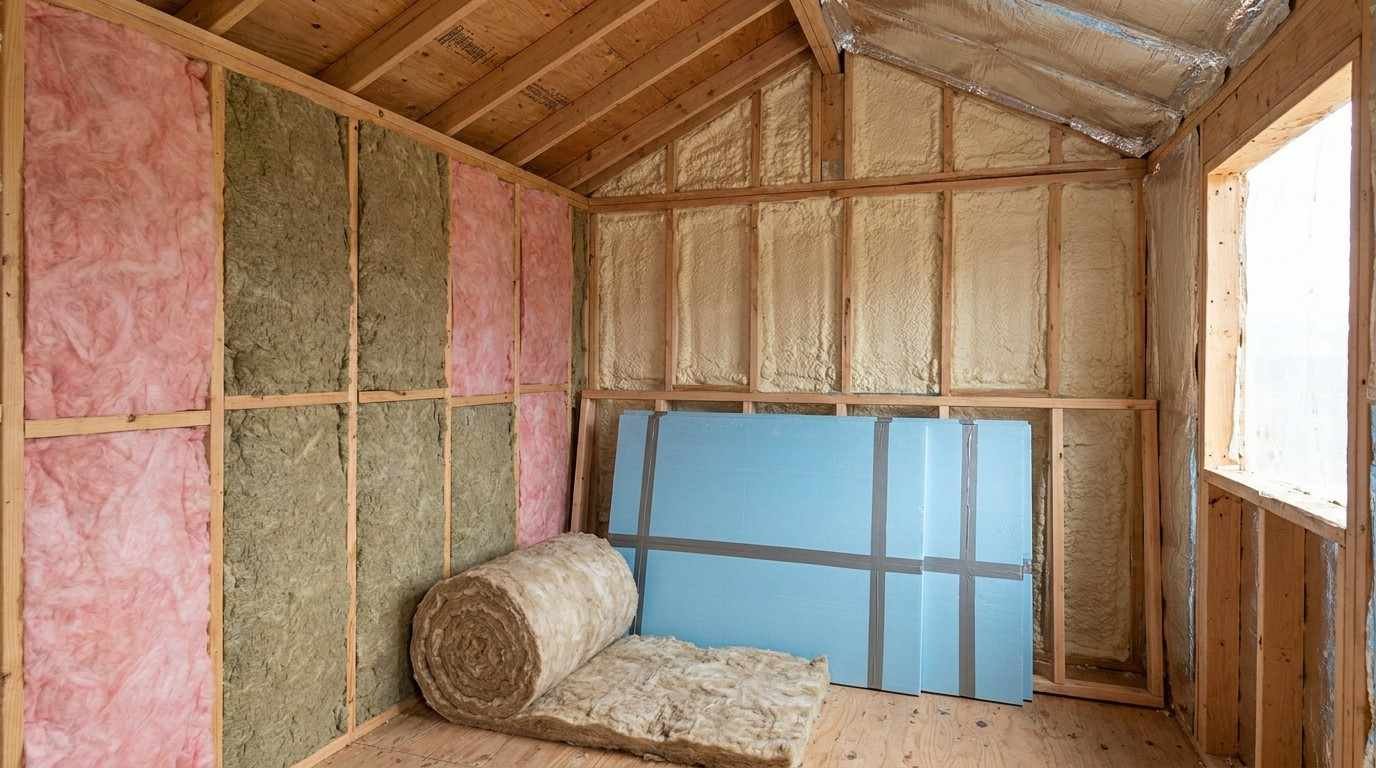
Insulating Every Zone of a Tiny Home
Insulation only works when every zone gets treated as part of one continuous shell. A weak floor or a gap around a window undoes the good work everywhere else. I walk each build through four distinct zones.
Floor and subfloor insulation
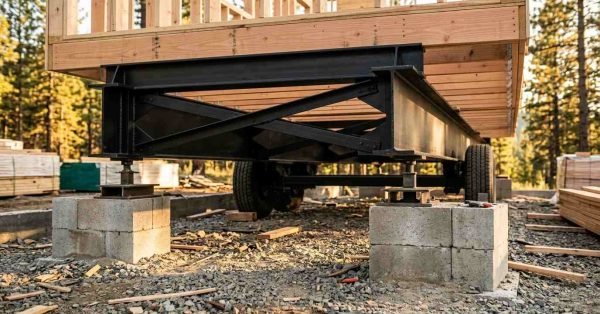
The floor sits exposed to outdoor air and often to a trailer chassis below. Rigid foam board or closed-cell spray foam works best here because both resist ground moisture. Under-insulated floors make a home feel cold no matter how warm the air is.
I always seal the floor cavity fully before sheathing. A cold floor is one of the most common tiny home complaints.
Wall cavity insulation
Walls carry the bulk of the envelope’s surface. The challenge is fitting enough R-value into a shallow cavity, usually two-by-four or two-by-six framing. Spray foam or a rigid-plus-batt layered system solves the thin-wall problem.
Continuous exterior insulation adds R-value without eating interior space. That trick matters when floor area is precious.
Roof and ceiling insulation
The roof takes the most sun and loses the most heat. I push the highest R-value here and often combine spray foam with a radiant barrier. Ventilation above the insulation prevents heat and moisture buildup in the roof assembly.
A hot roof cooks the whole interior in summer. Getting it right pays back every season.
Windows, doors, and thermal bridges
Windows and doors are the weakest points in any envelope. Double-pane, low-E glazing and tight weatherstripping cut their losses sharply. Thermal bridges, where framing conducts heat straight through the wall, quietly drain performance.
Breaking those bridges with continuous exterior foam makes a measurable difference. I never treat openings as an afterthought.
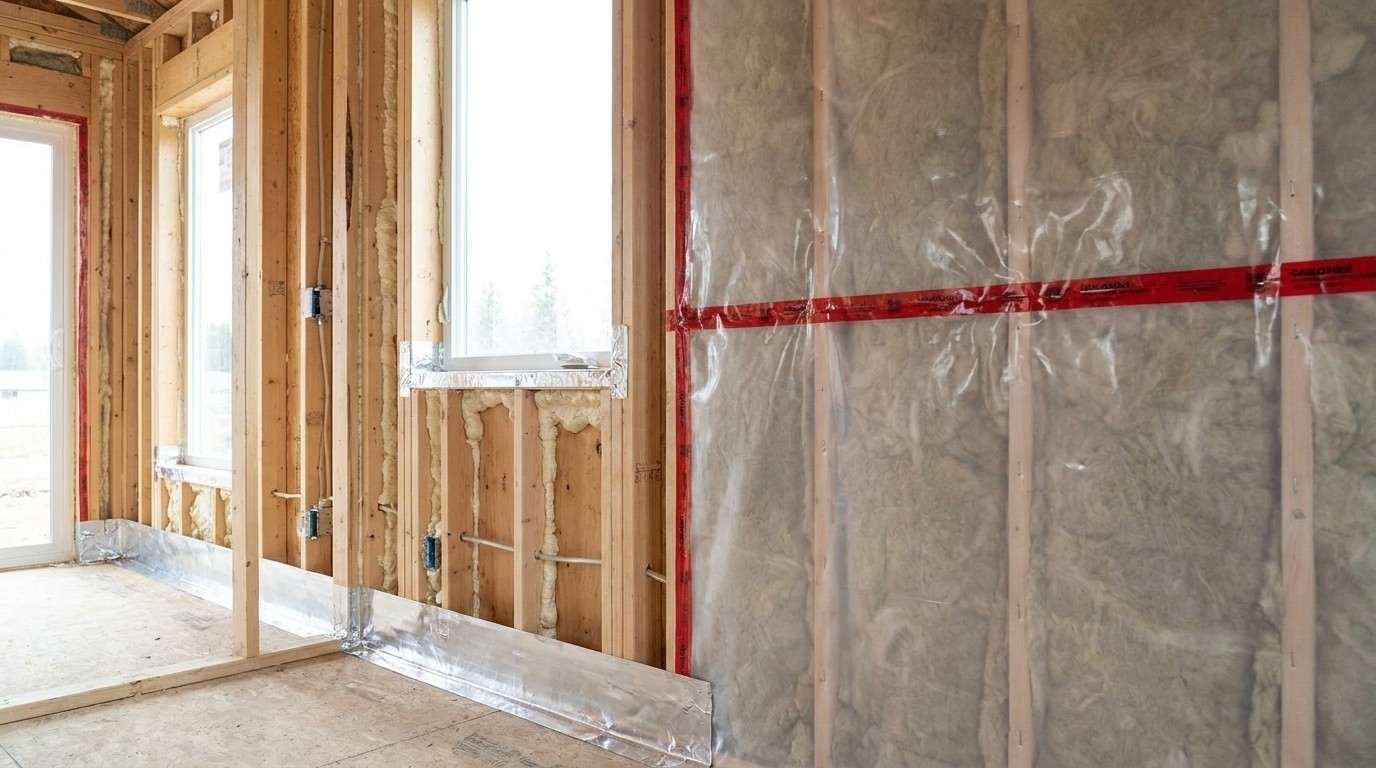
Air Sealing and Vapor Barriers
Air sealing and vapor barriers manage the two invisible forces that ruin insulation: air leakage and water vapor. Insulation slows heat, but only a sealed, moisture-managed assembly performs as designed. I handle both before the drywall goes up.
Why air sealing comes before insulation
Air leaks carry heat and moisture straight through gaps that insulation cannot stop on its own. Sealing every penetration, seam, and joint locks in the insulation’s rated performance. A blower door test confirms the shell is tight.
I seal first, then insulate. Skipping this step leaves R-value on the table.
Vapor barriers and condensation control
A vapor barrier controls how water vapor moves through the wall assembly. Placed correctly for the climate, it stops warm moist air from condensing inside the wall where it would rot framing. Placed wrong, it traps moisture and causes the exact damage it should prevent.
California’s varied climates change where the barrier belongs. This is a detail I never leave to guesswork.
Moisture, Ventilation, and Condensation Management
Moisture management keeps a tightly sealed tiny home healthy rather than harmful. A sealed envelope holds heat beautifully, but it also traps the moisture people generate by breathing, cooking, and showering. Controlled ventilation is the release valve.
The moisture problem in small volumes
A few people in a tiny space produce a lot of water vapor fast. With little air volume to dilute it, humidity spikes and condensation forms on cold surfaces. Left unmanaged, that moisture breeds mold and degrades insulation.
Small volume means fast moisture buildup. Ventilation is not optional here.
Mechanical ventilation and airflow strategies
An energy recovery ventilator exchanges stale indoor air for fresh outdoor air while retaining most of the heat. Exhaust fans in the kitchen and bathroom handle moisture at its source. Together they keep humidity in check without wasting the energy the envelope worked to save.
I design ventilation into the build, not bolt it on later. A tight home needs deliberate airflow.
Heating Systems for Tiny Homes
Heating a tiny home is easy once the envelope is right, because the load is small. The goal is matching a compact, efficient system to a well-insulated shell. Oversizing wastes money and comfort.
Mini-split heat pumps
A ductless mini-split heat pump is my default recommendation. It heats and cools efficiently, needs no ductwork, and modulates output to match a small load. A single small unit often handles an entire tiny home.
Modern heat pumps stay efficient even in cold weather. For most California builds, one mini-split does everything.
Electric and radiant options
Electric resistance heaters and radiant floor systems offer simple, quiet warmth. Radiant floors feel wonderful underfoot and pair well with a well-sealed shell. Their tradeoff is higher running cost than a heat pump.
I use radiant as a comfort upgrade, not the primary source. Electric baseboards work as backup in cold zones.
Wood and propane heating
Small wood stoves and propane heaters serve off-grid and cabin-style tiny homes. They deliver strong heat with no reliance on the electrical grid. Both demand careful clearances and ventilation for safe operation.
For a remote mountain build, a wood stove can be the right call. I always plan the combustion air and clearances first.
Cooling and Humidity Control
Cooling a tiny home is about removing both heat and humidity efficiently. A well-insulated shell keeps the cooling load small, so modest equipment does the job. The trick is managing humidity alongside temperature.
Mini-split cooling and portable units
The same mini-split that heats the home cools it too, which makes it the most cost-effective choice. Portable and window units offer a lower-cost entry point but run less efficiently. For a permanent build I always favor the mini-split.
One efficient unit handling both seasons keeps the mechanical footprint tiny. That simplicity fits the tiny home ethos.
Dehumidification and passive cooling
A standalone dehumidifier tackles humidity in muggy coastal climates where cooling alone leaves the air clammy. Passive strategies like shading, cross-ventilation, and light-colored roofing cut heat gain before it enters. These moves shrink the cooling load for free.
I combine passive design with active cooling. The passive layer does the heavy lifting in mild climates.
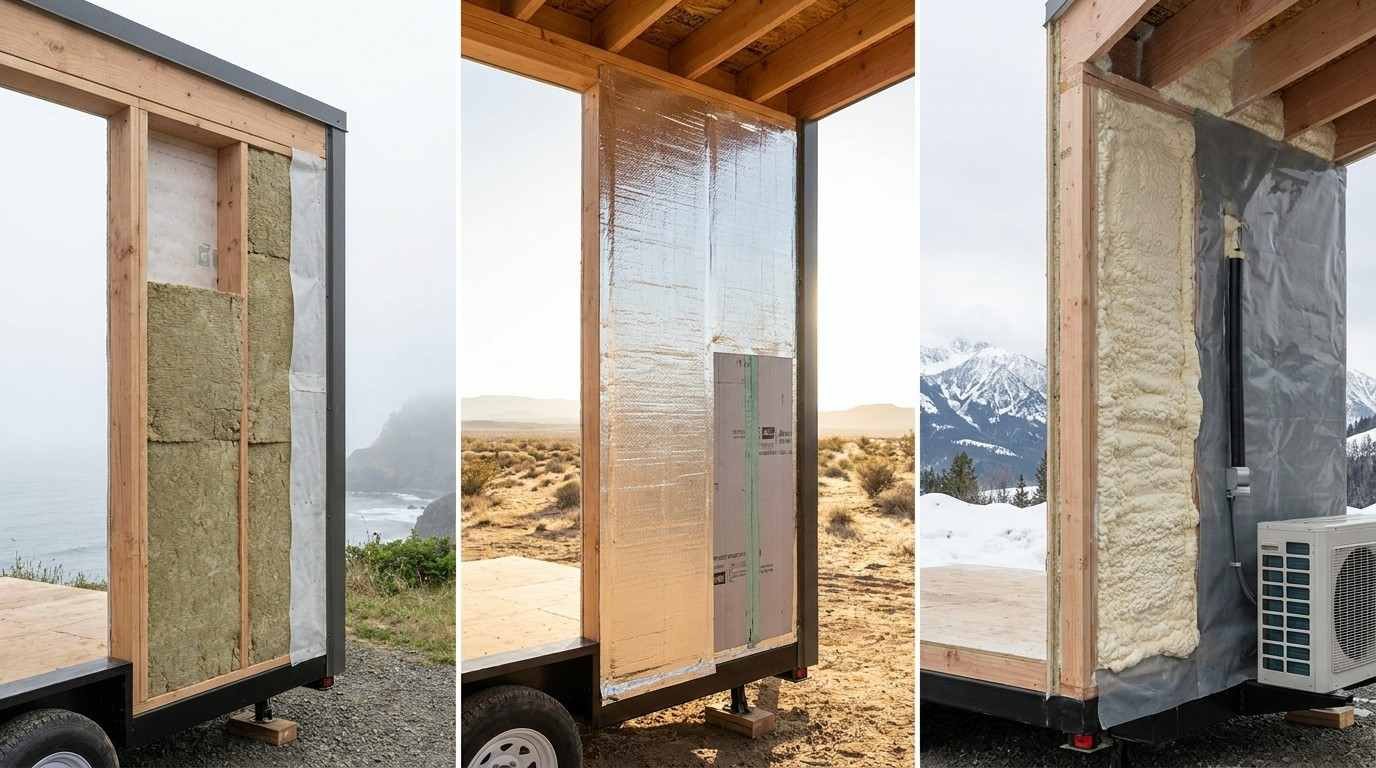
Climate-Specific Insulation Strategies for California
California packs several distinct climates into one state, and each one demands a different insulation and climate control strategy. A build that thrives on the foggy coast fails in the desert. I tailor the envelope to the specific zone.
Coastal and mild zones
Coastal California stays mild but damp, so moisture control outranks raw R-value. Breathable insulation like mineral wool or sheep wool handles the humidity well. Modest heating and good ventilation cover the gentle temperature swings.
The enemy here is moisture, not cold. I prioritize vapor management and airflow.
Inland heat and desert zones
Inland valleys and deserts bring intense summer heat and cold desert nights. High roof R-value paired with a radiant barrier blocks the brutal sun. Air sealing keeps the cooled air in during triple-digit afternoons.
Cooling drives the design in these zones. Reflective strategies earn their keep every summer.
Mountain and cold-weather zones
Sierra and mountain builds face real cold and snow load. I push wall and roof R-values well above coastal targets and lean on closed-cell spray foam for its high performance in thin assemblies. A robust heating source, often a heat pump plus wood stove backup, handles the deep cold.
Cold-zone builds forgive nothing. Every gap shows up as a heat loss and a higher bill.
What a Well-Insulated Tiny Home Costs and Saves Over Time
A quality insulation and climate system costs more upfront and pays that back through years of low energy bills and lasting durability. Prospective owners often fixate on the initial number and miss the long-term math. I walk clients through both sides.
Upfront insulation and system investment
Closed-cell spray foam, high-performance windows, and an efficient mini-split cost more than budget alternatives. That premium buys a shell that performs for decades with no rework. Cutting corners here almost always costs more later in comfort, repairs, and energy waste.
I treat insulation as an investment, not an expense. It is the one system you cannot easily upgrade after the walls close.
Long-term energy savings and durability payoff
A well-insulated tiny home runs on remarkably little energy, often heating and cooling for a few dollars a month. Beyond the bills, a dry, well-sealed shell protects the frame and finishes from moisture damage. That durability preserves the home’s value and comfort for the long haul.
The payoff compounds every year. A quality envelope is the difference between a home that lasts and one that fights you.
How to Evaluate a Builder’s Insulation and Climate Approach
The clearest sign of a quality tiny home builder is how they talk about insulation and climate control. Builders who treat the envelope as a system, not a checkbox, deliver homes that actually perform. I judge builders on their answers to a few direct questions.
Questions to ask before you build
Ask what R-values they target for your specific climate zone and why. Ask how they handle air sealing, vapor barriers, and ventilation together. Ask to see a blower door test result from a past build.
Vague answers are a red flag. A skilled builder explains the reasoning behind every choice.
Quality signals that separate builders
Strong builders design the insulation, sealing, ventilation, and mechanical systems as one integrated package. They document their assemblies, size equipment to the actual load, and stand behind measurable performance. That level of care separates a home that lasts from one that disappoints.
At Tiny Home Builders California, we engineer every envelope for its exact California climate. We build homes that stay comfortable, dry, and efficient for decades.
Conclusion
A tiny home’s comfort, energy cost, and lifespan all trace back to one connected system: insulation, air sealing, moisture control, and right-sized climate equipment working together. Get the envelope right and everything else follows.
The physics of small spaces reward careful building and punish shortcuts. A well-designed thermal envelope turns a tiny footprint into a year-round advantage across any California climate.
We build tiny homes engineered for lasting comfort and performance. Talk to Tiny Home Builders California, and we will design an insulation and climate system tailored to your exact site.
Frequently Asked Questions
What is the best insulation for a tiny home?
Closed-cell spray foam is the best all-around choice because it delivers high R-value per inch, seals air leaks, and blocks moisture in one step. It suits thin tiny home walls exceptionally well.
What R-value do I need for a tiny home?
Aim for roughly R-13 to R-21 in walls, R-19 to R-30 in floors, and R-30 or higher in roofs. Colder California mountain climates push these targets higher.
Do tiny homes get too hot or too cold easily?
Yes, tiny homes swing temperature faster than large houses because they have less air volume and more exposed surface. Quality insulation and a right-sized mini-split solve this completely.
How do I stop condensation and mold in a tiny home?
Combine air sealing, a correctly placed vapor barrier, and mechanical ventilation like an energy recovery ventilator. Managing moisture at its source keeps a sealed tiny home dry and healthy.
What is the best heating and cooling system for a tiny home?
A ductless mini-split heat pump is the top choice because one efficient unit both heats and cools with no ductwork. It matches the small load of a well-insulated tiny home perfectly.
How much does it cost to insulate a tiny home properly?
Quality insulation and climate systems cost more upfront than budget options, but they pay back through years of very low energy bills and lasting durability. It is an investment you cannot easily add later.
Does insulation strategy change across California climates?
Yes, coastal builds prioritize moisture control and breathable insulation, desert builds need radiant barriers and high roof R-value, and mountain builds demand maximum R-value and strong heating. Each zone gets a tailored envelope.
How do I know if a builder handles insulation well?
Ask about target R-values, air sealing, vapor barriers, ventilation, and blower door test results. A quality builder explains the reasoning and treats the envelope as one integrated system.