I’ll say this upfront: ADU plumbing costs more per square foot than main house plumbing, usually somewhere between $8,000 and $25,000 depending on how far you sit from existing utility lines. That gap catches a lot of homeowners off guard mid-project.
Every ADU needs a plumbing system that meets California code, handles real daily use, and connects cleanly to either the main house or independent utilities. Get the design wrong early, and you’re looking at expensive rework once walls close up.
This guide walks through plumbing fundamentals and design decisions, how utility connections and core systems come together, the equipment and code compliance pieces you can’t skip, and what it actually costs to hire the right contractor. By the end, you’ll know what questions to ask and what a solid installation looks like.
What an ADU Plumbing System Actually Involves
An ADU plumbing system is the network of pipes, fixtures, and connections that supply clean water and remove wastewater from an accessory dwelling unit. It includes supply lines, drain-waste-vent piping, fixture connections, and either a shared or independent tie-in to sewer and water utilities.
I think of it in three layers: supply (getting water in), drainage (getting waste out), and venting (letting air pressure equalize so drains actually work). Miss any one of those, and you get slow drains, gurgling toilets, or worse.
Core Components of a Residential Plumbing System
Every functioning system needs a water supply line, a drain-waste-vent assembly, shutoff valves, and fixture connections for the sink, toilet, shower, and any appliances. A detached ADU typically needs its own complete set of these components rather than borrowing partial infrastructure from the main house.
I always tell homeowners to think about fixture count early. A studio ADU with one bathroom and a kitchenette needs far less plumbing infrastructure than a two-bedroom unit with a laundry hookup.
How ADU Plumbing Differs from Main House Plumbing
Main house plumbing usually has decades of established infrastructure to build from. ADU plumbing, especially in a detached unit, often starts closer to scratch, which means longer trenching runs and more decisions about where to tie in.
That distance from existing lines is the single biggest cost driver I see on ADU projects. A garage conversion sitting fifteen feet from the main sewer line costs dramatically less to plumb than a detached unit at the back of a large lot.
Plumbing Design Considerations Before You Build
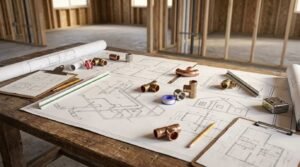
Plumbing design starts long before pipe goes into the ground. Getting the layout right on paper saves thousands in the field.
Fixture Count and Water Demand Planning
Fixture count directly determines pipe sizing, water heater capacity, and drain line diameter. A one-bathroom ADU with a kitchen sink and washer hookup needs a different supply and drain design than a two-bathroom unit built for a family of four.
I map out every fixture before finalizing floor plans. Adding a bathroom after plumbing is roughed in almost always costs more than planning for it from day one.
Layout Decisions That Affect Cost and Complexity
Stacking wet areas (bathroom above or adjacent to kitchen) keeps plumbing runs short and simple. Spreading fixtures across opposite ends of the unit multiplies pipe runs, vent stacks, and labor hours.
A compact, centralized wet wall design cuts material costs and reduces the number of penetrations through walls and floors. I push clients toward this layout whenever the floor plan allows it.
Connecting to the Main House vs. Independent Utility Lines
This decision shapes the entire project budget and timeline. Connecting to existing lines is usually cheaper upfront; independent utilities give more flexibility and can matter for resale or rental use.
Shared Sewer and Water Line Connections
Tying into the main house’s existing sewer and water lines works well for attached ADUs and units close to the main structure. It keeps trenching to a minimum and avoids the cost of new utility taps.
The tradeoff is capacity. An older main line built for a three-bedroom house doesn’t always have headroom for an added unit without an engineer confirming flow capacity first.
Separate Utility Metering for ADUs
Some California jurisdictions require or allow separate water metering for ADUs, particularly rental units. Separate metering adds upfront cost but simplifies billing if the unit gets rented out long-term.
I’ve seen this pay for itself within a few years on rental ADUs. Owners who plan to rent the unit almost always come out ahead with separate metering.
Water Supply Line Sizing and Installation
Supply line sizing determines whether fixtures get adequate pressure and flow, especially when the ADU runs simultaneously with the main house.
Pipe Material Options for Water Supply
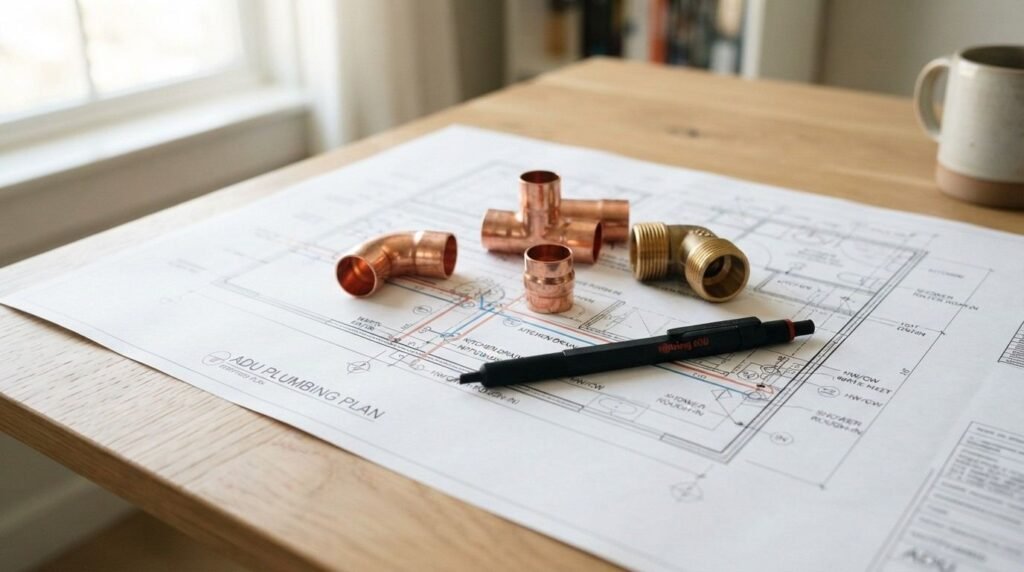
PEX has become the standard for ADU water supply lines because it resists freezing, handles minor ground shifts, and installs faster than copper. Copper still shows up in some California jurisdictions for exposed runs or code-specific applications.
The International Association of Plumbing and Mechanical Officials maintains the Uniform Plumbing Code that most California jurisdictions adopt, and it permits both materials under specified conditions. I default to PEX unless the local building department requires otherwise.
Pressure and Flow Rate Requirements
A supply line undersized for fixture count causes pressure drops the moment two fixtures run at once, like a shower and a washing machine. Proper sizing accounts for peak simultaneous demand, not just average use.
Plumbers calculate this using fixture unit values assigned to each fixture type. Skipping this calculation is one of the most common causes of weak water pressure complaints after move-in.
Drain-Waste-Vent (DWV) System Design
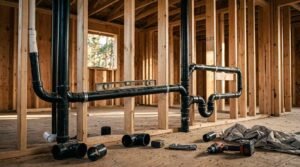
The DWV system removes wastewater and maintains proper air pressure so traps don’t get siphoned dry, which would let sewer gas into the living space.
Venting Requirements for Detached ADUs
Detached ADUs need their own vent stack that penetrates the roof or ties into an existing vent system with adequate capacity. California code sets minimum vent pipe diameters based on fixture unit load.
Skipping proper venting is a mistake I see on unpermitted work constantly. It shows up later as slow-draining sinks and sewer gas odor, both expensive to fix after finishes go in.
Drain Slope and Trap Placement
Drain lines need consistent slope, generally a quarter inch of fall per foot, to keep waste moving without running so fast that liquid outpaces solids. Every fixture needs a properly sized trap positioned to prevent sewer gas backflow.
Getting slope wrong is invisible until it isn’t. A flat run that looked fine on inspection day can back up within a year of regular use.
Sewer Line and Septic System Integration
How the ADU connects to sewage disposal, whether municipal sewer or septic, needs confirmation before any other plumbing decision gets finalized.
Tying Into Existing Sewer Lines
Municipal sewer connections generally involve tapping into the existing lateral line or running a new lateral to the street connection point. Distance from the existing tap point to the ADU heavily influences trenching cost.
Local building departments require permits and inspection at this stage regardless of connection method. I’ve never seen a jurisdiction skip this step.
Septic Capacity Considerations for ADUs
Properties on septic systems need an evaluation confirming the existing tank and leach field can handle added occupancy. Undersized septic systems are one of the more common reasons ADU permits get delayed in rural California counties.
The California State Water Resources Control Board sets statewide standards for septic system capacity that count toward this evaluation. I always recommend a septic evaluation early, before finalizing ADU square footage or bedroom count.
Water Heater Selection and Installation for ADUs
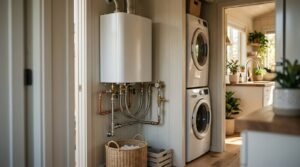
Water heater choice affects both energy efficiency and available space, which matters more in a compact ADU than in a full-size home.
Tankless vs. Tank Water Heaters for Small Spaces
Tankless water heaters save significant floor and wall space, an advantage that matters in units under 800 square feet. Tank units cost less upfront but take up a footprint that eats into usable square footage.
The U.S. Department of Energy notes tankless units can be 8-34% more energy efficient than storage tank models, depending on daily hot water usage. I lean toward tankless on smaller ADUs where space carries real value.
Sizing a Water Heater to ADU Occupancy
Water heater capacity should match expected occupancy and simultaneous fixture use, not just unit square footage. A one-person studio needs far less capacity than a two-bedroom unit built for a family.
Undersizing shows up immediately as inconsistent hot water. Oversizing wastes energy and money on a unit that never runs at capacity.
California Plumbing Code Requirements for ADUs
California plumbing code sets baseline requirements every ADU must meet, and these requirements shift periodically as the state updates efficiency standards.
CALGreen and Water Efficiency Standards
California’s CALGreen code requires water-efficient fixtures throughout new construction, including ADUs. Low-flow toilets, faucets, and showerheads are mandatory, not optional upgrades.
The California Energy Commission tracks these standards and updates them periodically, so I confirm current fixture flow requirements before every project rather than relying on prior job specs.
Permit and Inspection Checkpoints
Plumbing permits typically require inspection at the rough-in stage, before walls close, and a final inspection after fixtures are installed. Skipping either inspection creates real problems at resale, when a lender or buyer’s inspector flags unpermitted work.
I schedule a rough-in inspection as a hard checkpoint on every project timeline. Nothing gets covered until that inspection passes.
Common Plumbing Installation Costs for ADU Projects
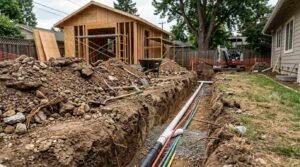
Plumbing typically runs 8-12% of total ADU construction cost, though that percentage swings significantly based on site conditions.
Cost Factors That Drive Price Variation
Distance from existing utility connections is the single largest cost variable. A detached unit at the back of a large lot pays substantially more in trenching and pipe than a garage conversion sitting adjacent to existing lines.
Fixture count, pipe material choice, and whether the site needs a septic evaluation all add to the total. I break these out separately in every estimate, so homeowners see exactly where the money goes.
Budgeting for Site Conditions and Trenching
Rocky soil, existing hardscape, and mature landscaping all add labor hours to trenching work. A straightforward dirt trench costs a fraction of what it takes to cut through existing concrete or navigate around established trees and root systems.
I always walk the actual trenching route with a client before finalizing a bid. What looks simple on a site plan sometimes isn’t once you’re standing on the actual dirt.
Choosing a Plumber and Avoiding Installation Mistakes
The contractor doing the physical installation matters as much as the design itself. A great plan executed poorly still fails inspection or fails a homeowner years later.
Questions to Ask a Licensed Plumbing Contractor
Ask for a C-36 plumbing contractor license number, verifiable through the California Contractors State License Board. Ask how many ADU-specific installations they’ve completed, since ADU plumbing differs enough from standard remodels that experience matters.
I also ask contractors directly how they handle unexpected site conditions, like discovering an undersized existing sewer lateral mid-project. The answer tells you a lot about how the rest of the job will go.
Red Flags That Signal Poor Plumbing Work
Watch for contractors who skip permits to save time, quote prices dramatically below competitors, or can’t clearly explain their venting and slope approach. Unpermitted plumbing work creates real liability that surfaces at resale or during a future remodel.
A contractor unwilling to walk you through their DWV design in plain language is a contractor I’d avoid. Good plumbers can explain their reasoning without hiding behind jargon.
Conclusion
ADU plumbing design touches supply lines, drainage, venting, water heating, and code compliance, and each piece connects directly to overall project cost and long-term reliability.
Getting these decisions right before construction starts protects your budget and your timeline, while poor planning surfaces as expensive problems years down the road.
We build ADUs with plumbing systems designed to last, and we’d welcome the chance to walk through your specific site conditions and answer your questions directly.
Frequently Asked Questions
How much does ADU plumbing typically cost in California?
ADU plumbing generally costs $8,000 to $25,000, depending mainly on distance from existing utility connections and total fixture count.
Can an ADU share the same sewer line as the main house?
Yes, attached and nearby ADUs commonly share the existing sewer line, provided an evaluation confirms the line has adequate capacity for added flow.
Does an ADU need its own water heater?
Most ADUs need a dedicated water heater sized to the unit’s occupancy, since sharing the main house heater often causes pressure and temperature issues during simultaneous use.
What pipe material is best for ADU plumbing?
PEX piping is the most common choice for ADU water supply lines because it resists freezing, handles ground shift, and installs faster than copper.
Do ADUs require separate water meters in California?
Some California jurisdictions require or permit separate metering for ADUs, particularly rental units, though requirements vary by city and county.
How long does ADU plumbing installation take?
Plumbing installation typically takes one to three weeks, depending on trenching distance, inspection scheduling, and whether the unit ties into existing lines or needs new utility taps.
What happens if ADU plumbing fails inspection?
Failed inspections require corrections before construction proceeds, which can delay the project by days to weeks depending on the issue and inspector availability.
Is a septic evaluation required for every ADU?
Only properties using septic systems, rather than municipal sewer, need this evaluation, and it confirms the existing tank and leach field can handle added occupancy.
Can I install ADU plumbing myself to save money?
California requires licensed plumbing contractors for permitted work, and unpermitted plumbing creates liability issues that surface at resale or during future inspections.