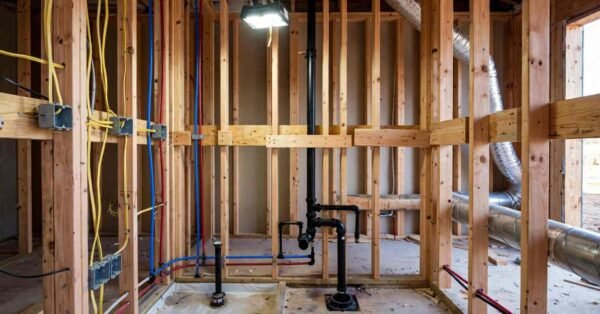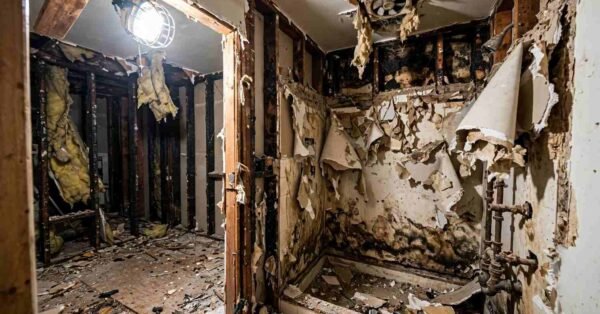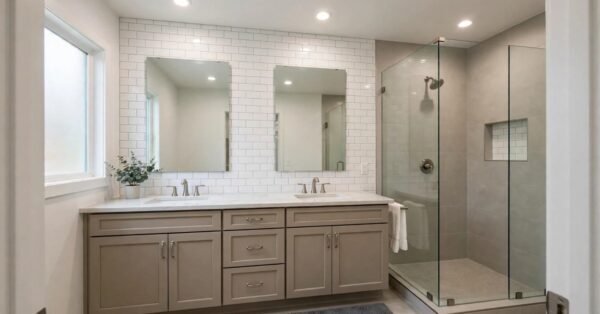

Shower waterproofing is the layered system of membranes, slopes, and sealed penetrations that keeps water from migrating past the tile surface into a home’s framing and subfloor. Most homeowners never see this system because it lives entirely behind the tile, yet it determines whether a shower lasts twenty years or starts rotting out a subfloor in two. I’ve walked into enough post-failure demolitions to know the tile was never the problem.
Getting this wrong costs thousands in hidden repairs and mold remediation. Getting it right starts with knowing what’s supposed to happen behind the wall before the tile ever goes up.
This guide covers what waterproofing actually does and the codes that govern it, the major membrane systems builders choose between, how pans, drains, niches, and curbs get integrated into the system, the mistakes that cause most failures, and how to evaluate whether your builder is doing any of this correctly.
What Shower Waterproofing Actually Means
Shower waterproofing is a continuous barrier system, not a single product designed to stop water from reaching the wood framing, subfloor, or insulation behind a shower enclosure. I think of it as three layers working together: the pan at the floor, the wall membrane, and the sealed transitions where they meet drains, curbs, and niches. Miss one connection point and the whole system is compromised.
Tile and grout are porous. Water passes through both constantly during normal use, which is why the membrane sits behind them, not the tile itself. The waterproofing layer is what actually stops the water, and everything above it is cosmetic.
Why Showers Are the Highest-Risk Wet Area in a Home
Showers see more sustained water exposure than any other surface in a home, often multiple hours per week concentrated on a few square feet of wall and floor. That concentration is exactly why showers fail more often than tubs or sinks, which spread exposure across a larger area and shorter duration.
What Happens When Waterproofing Fails
Failed waterproofing lets water migrate into wood framing, where it feeds rot and mold growth long before any visible sign appears on the tile surface. I’ve opened up walls where the tile looked flawless and the studs behind it were black with rot.
The Building Codes That Govern Shower Waterproofing
Shower waterproofing in the United States is governed primarily by the International Residential Code (IRC) Section R702.4 and the International Building Code (IBC), both of which require a water-resistant barrier behind all wet-area wall and floor assemblies. These codes don’t specify a single product; they specify performance requirements, which is why so many different membrane systems exist to satisfy the same standard.
IRC and IBC Requirements for Wet Areas
The IRC requires a continuous waterproof or water-resistant barrier for any shower or tub-shower wall assembly, extending to a minimum height above the finished floor. Builders following code minimums versus builders exceeding them is one of the clearest early signals of construction quality.
California-Specific Code Considerations (CRC/Title 24)
California adopts the California Residential Code, which incorporates and in places strengthens the base IRC requirements for wet-area assemblies. Title 24 energy standards don’t directly regulate waterproofing membranes, but they do affect vapor barrier placement decisions in exterior shower walls, which interacts with how the waterproofing system is detailed.
Sheet Membrane Waterproofing Systems
A sheet membrane is a pre-manufactured waterproofing material, usually a polyethylene or rubberized sheet, that gets bonded to the substrate using thin-set mortar or adhesive. I like sheet membranes because the thickness and material quality are consistent straight out of the roll, with none of the application variability you get from a trowel-applied product.
How Sheet Membranes Are Installed
Installers bond the sheet to the substrate with thin-set, overlapping seams by a specified minimum width and sealing those overlaps with the manufacturer’s specified bonding method. Seam quality is where sheet membrane installations succeed or fail, since a gap at an overlap behaves exactly like a hole in the system.
Where Sheet Membranes Perform Best
Sheet membranes perform best on flat, planar wall and floor surfaces where seams can run in straight, predictable lines with minimal cutting around complex geometry. Showers with heavy niche, bench, and curved-wall detailing introduce more seams and more risk, which pushes some builders toward liquid systems instead.
Liquid-Applied Waterproofing Membranes

A liquid-applied membrane is a roll-on or spray-applied waterproofing coating that cures into a seamless, continuous barrier directly over the substrate. I use liquid membranes constantly on showers with niches, benches, and curved walls because there’s no seam geometry to plan around the coating just follows the shape of whatever is underneath it.
How Liquid Membranes Cure and Bond
Liquid membranes cure through moisture evaporation or chemical reaction, typically requiring multiple coats applied at specified thickness to reach their rated waterproofing performance. Thin, rushed coats are the single most common installation error with this system, since the membrane can look complete long before it’s actually thick enough.
Common Liquid Membrane Product Types
| Product Type | Base Material | Typical Cure Time | Best Use Case |
| Sheet-reinforced liquid | Polymer + fabric reinforcement | 24–48 hours | High-movement joints, corners |
| Single-component liquid | Acrylic or polymer-modified | 24 hours per coat | Flat walls, standard pans |
| Two-component liquid | Cementitious + polymer | 4–24 hours | Fast-track commercial jobs |
This table reflects the three liquid membrane categories most commonly specified in residential shower construction and how their cure times affect project scheduling.
Foam Backer Board Waterproofing Systems
A foam backer board system uses extruded polystyrene panels with a factory-applied or field-applied waterproof coating, which then also serve as the tile substrate. I’ve found these systems appeal to builders because the waterproofing and the substrate arrive as a single product, cutting installation steps compared to a separate membrane over cement board.
Foam Board vs. Traditional Cement Backer Board
Foam board is inherently waterproof at the panel level, while cement backer board is only water-resistant and requires a separate membrane layer over its surface to achieve full waterproofing. That distinction matters because cement board alone, without an added membrane, does not meet most code waterproofing requirements for shower walls.
Traditional Cement-Based (Hot Mop) Waterproofing
Hot mop waterproofing is a traditional shower pan method where hot liquid asphalt is applied in multiple layers with embedded fiber reinforcement to create a built-up waterproof membrane at the shower floor. I still see this method specified occasionally in California, largely because some local jurisdictions and older-generation inspectors still favor it for shower pans specifically.
Why Hot Mop Is Declining in Modern Construction
Hot mop requires specialized equipment, open-flame or hot-kettle application, and a longer installation window than sheet or liquid systems, which raises both labor cost and jobsite safety considerations. Newer liquid and sheet systems achieve comparable or superior waterproofing performance with less specialized labor, which is why most production builders have moved away from hot mop.
Comparing Waterproofing Methods Side by Side
Each shower waterproofing method trades off differently across installation cost, labor skill requirement, and long-term durability, which is why no single system dominates every project type. I choose between these systems based on shower geometry, budget, and schedule more than personal preference, since each one genuinely performs well when installed correctly.
Cost, Durability, and Labor Differences
| Method | Relative Cost | Labor Skill Needed | Typical Lifespan | Best For |
| Sheet membrane | Moderate | Moderate | 20–30 years | Flat, simple geometry |
| Liquid-applied | Moderate-High | Moderate-High | 20–30+ years | Complex shapes, niches, curbs |
| Foam backer board | Moderate | Low-Moderate | 20–25 years | Fast installs, DIY-adjacent |
| Hot mop | High | High (specialized) | 25–30+ years | Shower pans, traditional spec |
This table compares the four primary waterproofing systems across the factors that most affect a homeowner’s decision.
The Shower Pan and Pre-Slope Explained

A shower pan is the waterproofed floor assembly of a shower, built with a slope that channels water toward the drain rather than allowing it to pool. Most pan failures I’ve diagnosed trace back to the slope being wrong, not the membrane itself water that can’t reach the drain efficiently sits against the waterproofing far longer than the system was designed for.
Why Pre-Slope Comes Before the Membrane
A pre-slope is a mortar bed sloped toward the drain that gets installed beneath the waterproofing membrane, giving the membrane itself a properly angled surface to follow. Skipping the pre-slope and relying on the membrane or top mortar bed alone to create the slope is one of the most common shortcuts I see on rushed jobs.
Niche, Bench, and Curb Waterproofing Details
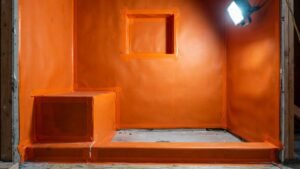
Niches, benches, and curbs are the geometric transitions inside a shower where waterproofing most commonly fails, because every added corner, seam, or penetration is another point that must be sealed correctly. I pay closer attention to these details than to the flat wall areas, since flat walls rarely fail on their own.
Why Niches Fail More Than Flat Walls
A niche creates six interior corners and a horizontal shelf surface, all of which concentrate standing water and require extra membrane reinforcement at every seam. Pre-formed waterproof niche inserts have become common specifically because field-built niches introduce so many opportunities for seam failure.
Curbless Shower Waterproofing Challenges
Curbless showers remove the physical dam that normally contains water at the shower threshold, which puts significantly more reliance on the floor slope and drain placement to keep water inside the wet area. Linear drains paired with a single-direction slope have become the standard solution for managing this added risk.
Drain Assemblies and Waterproofing Integration
A shower drain assembly must bond directly to the waterproofing membrane at the pan level, since any gap between the drain and the membrane becomes a direct path for water into the subfloor. This connection point fails more often than the membrane field itself, in my experience, because it’s a transition between a rigid plastic or metal part and a flexible membrane sheet or coating.
Bonding Flange vs. Traditional Clamping Drains
A bonding flange drain has a built-in collar designed to bond directly with sheet or liquid membrane material, creating a continuous waterproof connection without mechanical clamping. Traditional clamping drains rely on a compression ring to sandwich the membrane in place, which works but depends heavily on correct torque and membrane positioning during installation.
Grout, Tile, and Sealant Interaction With Membranes
Tile and grout sit entirely above the waterproofing membrane and are not themselves waterproof; they’re a wear surface, which means the membrane underneath is doing all of the actual water-stopping work. I remind clients of this constantly, because grout color and tile selection get far more attention during planning than the membrane that actually protects the house.
Why Tile Is Not the Waterproofing Layer
Grout is porous by nature and absorbs water readily, even when sealed, which is why a shower with excellent tile work can still leak if the membrane behind it was installed poorly. Silicone sealant at corners and transitions supplements the membrane but was never designed to replace it as the primary barrier.
The Most Common Shower Waterproofing Mistakes
The most common shower waterproofing mistakes are skipping the flood test, improperly overlapping membrane seams, failing to waterproof niches and curbs correctly, and rushing liquid membrane coats before they reach full thickness. I’ve traced the large majority of leak repairs I’ve been called to back to one of these four errors, almost never to the membrane product itself.
Skipping Flood Testing
Flood testing involves plugging the drain and filling the shower pan with water for a minimum period, usually 24 hours, to confirm the waterproofing holds before tile installation begins. Builders who skip this step are betting the entire project on an installation they never actually verified.
Improper Membrane Overlaps and Seams
Membrane seams require a minimum overlap width specified by the manufacturer, and any seam sealed below that minimum creates a weak point that can open under normal thermal movement. This mistake is largely invisible once tile goes up, which is exactly why it causes so many delayed failures.
How to Flood Test a Shower Pan
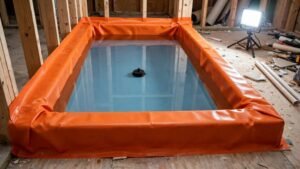
A flood test confirms a shower pan’s waterproofing by sealing the drain, filling the pan with at least two inches of water, and monitoring for any water loss over a minimum 24-hour period. I treat this test as non-negotiable on every project, since it’s the only verification step that happens before the waterproofing gets permanently covered by tile.
What a Passing vs. Failing Flood Test Looks Like
A passing flood test shows no measurable water level drop and no moisture appearing at the subfloor or ceiling below after the full test period. A failing test shows a dropping water line, visible moisture below the slab, or water appearing at penetrations like the drain collar or wall transitions.
Signs of Waterproofing Failure After Installation
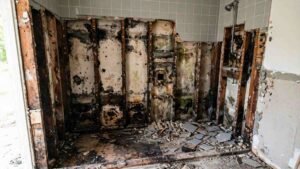
Signs of shower waterproofing failure include soft or spongy flooring near the shower, discoloration or staining on walls or ceilings below the bathroom, a persistent musty smell, and grout that stays damp long after the shower is used. I tell homeowners that by the time tile is visibly cracking or grout is crumbling, the water has usually been migrating behind the wall for months already.
Early Warning Signs Behind Tile
Loose or hollow-sounding tile, often detected by lightly tapping the surface, frequently indicates the substrate behind it has absorbed water and is beginning to deteriorate. Catching this early, before full tile failure, is usually the difference between a localized repair and a full shower demolition.
How to Evaluate a Builder’s Waterproofing Standards
Evaluating a builder’s waterproofing standards means asking specifically which membrane system they use, whether they flood test every pan, and whether they can show documentation or photos of the waterproofing before it was covered by tile. I think this is the single most revealing conversation a homeowner can have during the builder selection process, because marketing materials rarely mention any of it.
Questions to Ask Before Construction Begins
Homeowners should ask which specific waterproofing product and brand the builder uses, whether flood testing is standard practice or an optional add-on, and whether photo documentation of the waterproofing stage is provided before closing up the walls. A builder who answers these questions specifically and confidently, rather than vaguely, is usually the builder doing this correctly.
Long-Term Durability and Maintenance of Waterproofed Showers
A properly installed shower waterproofing system is designed to last 20 to 30 years or longer, roughly matching the expected lifespan of the tile and fixtures installed above it. I tell clients that maintenance mostly means paying attention, not performing active upkeep, since the membrane itself sits sealed behind the tile for the system’s entire life.
What Shortens a Membrane’s Lifespan
Unaddressed grout cracks, failed caulking at corners, and standing water left to sit in a pan with poor drainage all accelerate membrane stress well before its rated lifespan. Resealing grout and corner caulk every few years is the one real maintenance task that extends a waterproofing system’s effective life.
Conclusion
Shower waterproofing comes down to a continuous membrane, a correctly sloped pan, and sealed transitions at every drain, niche, and curb. We see builders separate themselves from competitors through documentation, flood testing, and material choice long before tile ever goes up. Ready to build a shower that lasts decades instead of years? Reach out to Tiny Home Builders California today.
Frequently Asked Questions
What is the best waterproofing method for a shower?
Liquid-applied and sheet membranes both perform well when installed correctly, with liquid systems favored for complex geometry like niches and curbs. The best method depends more on installation quality and flood testing than the product itself.
How long does shower waterproofing last?
Properly installed shower waterproofing typically lasts 20 to 30 years. Lifespan depends heavily on installation quality, flood testing, and ongoing grout and caulk maintenance.
Do I need a vapor barrier behind shower waterproofing?
Vapor barrier placement depends on climate zone and wall assembly, and code requirements vary by location. A qualified builder should specify vapor barrier placement based on the specific wall design.
Can you waterproof a shower without a flood test?
Waterproofing can be installed without a flood test, but the installation is never verified before being covered by tile. Skipping this test significantly increases the risk of undetected leaks.
What is the difference between a liquid membrane and a sheet membrane?
A liquid membrane cures into a seamless coating applied directly to the substrate, while a sheet membrane is a pre-manufactured material bonded on with overlapping seams. Liquid membranes handle complex shapes better; sheet membranes offer more consistent material thickness.
Is hot mop waterproofing still used in California?
Hot mop waterproofing is still specified occasionally in California, particularly for shower pans in certain jurisdictions. Most production builders have shifted to liquid or sheet membrane systems for cost and labor reasons.
How much does professional shower waterproofing cost?
Professional shower waterproofing costs vary significantly based on method, shower size, and geometry complexity. Niches, curbs, and curbless designs typically add cost due to increased labor and detailing requirements.