I have walked through hundreds of ADU bathrooms in various stages of framing, rough plumbing, and finish work, and the well-built ones share the same handful of decisions made early. A well-designed ADU bathroom starts with plumbing placement, not tile selection. Getting the wet wall right before anything else determines whether the space feels generous or cramped for the next thirty years.
Most homeowners walk into ADU planning focused on finishes and walk out realizing the real decisions happened months earlier. A bathroom crammed into leftover square footage fights you daily, while one planned around actual clearances and plumbing logic disappears into daily life.
I cover what makes an ADU bathroom well-planned from the start, the layout types and size minimums California code actually enforces, how plumbing and ventilation choices affect both function and cost, the fixture and accessibility decisions that matter in a small footprint, and where materials and budget deserve the most attention.
What Defines a Well-Designed ADU Bathroom
A well-designed ADU bathroom is a bathroom layout optimized for a compact footprint that still meets full code clearances, functional plumbing runs, and durable material choices. That definition matters because ADU bathrooms carry the same code obligations as a full house bathroom, just inside a much smaller shell.
The room works when clearances, plumbing, and ventilation get solved together rather than in sequence. I have seen beautiful tile jobs ruined because nobody checked door swing against the toilet centerline first.
Root Attributes of Quality ADU Bathroom Design
Every well-executed ADU bathroom shares a few root attributes regardless of size or style. Clearances meet code without feeling tight in daily use. Plumbing runs stay short and aligned with existing lines. Ventilation actually removes moisture instead of just meeting a paper requirement.
I look for these attributes first before I even discuss finishes with a homeowner. Get these wrong, and no amount of nice tile fixes the daily friction of a cramped, poorly vented room.
How ADU Bathrooms Differ from Main-House Bathrooms
An ADU bathroom answers to the same plumbing code as a primary residence bathroom, but it usually has far less square footage to work with and often shares a wall or slab with the main house’s utility lines. That shared infrastructure changes where the wet wall can realistically go.
Main-house bathrooms get built with room to spare. ADU bathrooms get built with inches to spare, so every layout decision compounds.
ADU Bathroom Size Requirements and Code Minimums
California building code sets specific clearance minimums for ADU bathrooms regardless of the unit’s overall square footage. These aren’t suggestions. An inspector measures them, and a layout that misses them gets sent back for rework.
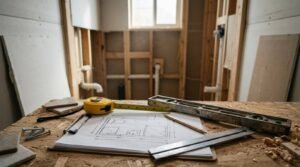
I plan every ADU bathroom against these numbers before a single fixture gets selected. Working backward from code minimums, rather than forward from a Pinterest board, saves real money later.
California Building Code Clearances
California’s plumbing code requires 21 inches of clear floor space in front of a toilet and a minimum 24-inch clearance in front of a shower or tub, based on the California Building Standards Commission’s residential code adoption. Sinks need adequate clearance for door swing and fixture access without obstruction.
I treat these as the floor, not the target. A bathroom built exactly to minimum clearance feels tight the moment two people need the room at once.
Minimum Square Footage by Fixture Count
A three-quarter bathroom with toilet, sink, and shower functions in roughly 35 to 40 square feet when the layout is planned well. A full bathroom with a tub typically needs closer to 45 to 55 square feet to meet clearances comfortably.
I have built functional three-quarter bathrooms in under 35 square feet, but it takes careful plumbing wall alignment to get there without feeling like a closet.
Common ADU Bathroom Layout Types
Three layout patterns cover the vast majority of ADU bathrooms I have designed or built. Each one solves the clearance and plumbing challenge differently, and the right choice depends on the unit’s overall footprint and the wall it shares with existing plumbing.
Picking the wrong layout type early costs far more to fix later than it does to plan correctly from the start.
Three-Quarter Bathroom Layout
A three-quarter bathroom is a bathroom layout that includes a toilet, sink, and shower stall without a full tub. This is the most common ADU bathroom configuration because it delivers full functionality in the smallest reasonable footprint.
I recommend this layout for most single-occupant or small-footprint ADUs. It cuts the square footage requirement without cutting daily usability.
Full Bathroom Layout
Full bathrooms with a tub-shower combination make sense in ADUs designed for families, long-term rentals, or resale value where a tub adds market appeal. The tradeoff is roughly 10 to 15 additional square feet compared to a three-quarter layout.
I ask homeowners directly who the ADU is for. A tub matters a lot for a family with young kids and barely at all for a single tenant.
Wet Room / European-Style Layout
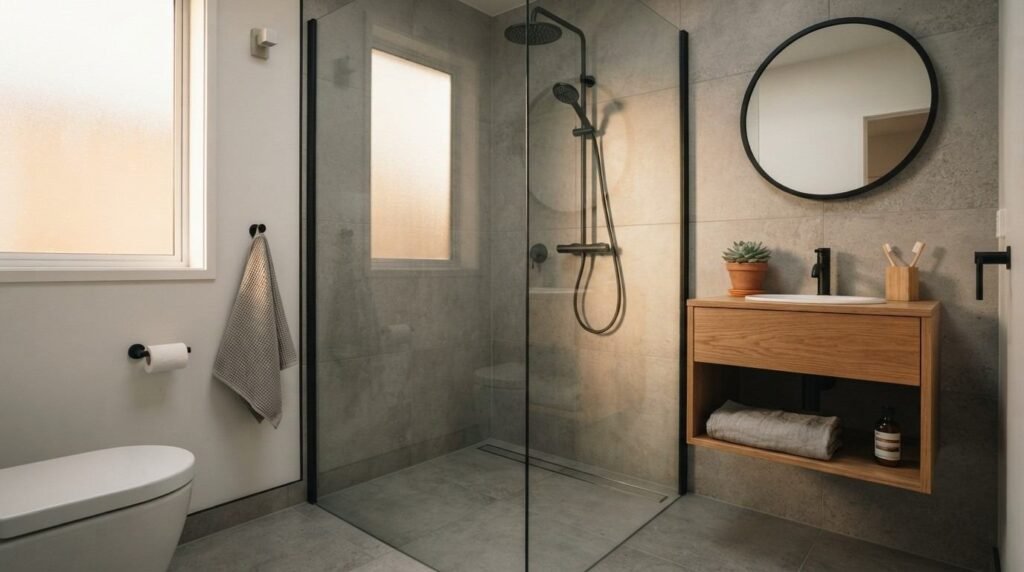
A wet room layout removes the separate shower enclosure entirely, waterproofing the whole floor and using a floor drain instead. This layout maximizes usable space in very tight footprints and works well for accessibility.
I have used this approach successfully in ADUs under 400 square feet total, where every inch of separate shower framing was inches the rest of the room could not afford to lose.
Plumbing Placement and Wet Wall Strategy
Plumbing placement decides almost everything else about an ADU bathroom’s layout, cost, and long-term reliability. Get the wet wall wrong, and every downstream decision gets more expensive and more constrained.
I make this the first conversation in any ADU bathroom project, well before finishes or fixture style come up.
Wet Wall Alignment with Main Plumbing
Aligning the ADU bathroom’s wet wall with the main house’s existing plumbing stack shortens pipe runs dramatically and reduces the need for a separate ejector pump system. This single decision often determines whether the ADU plumbing budget stays reasonable or balloons.
I always check the main house’s plumbing location on the site plan before finalizing the ADU bathroom’s position. It is the cheapest planning step that saves the most money.
Cost Impact of Plumbing Runs
Long plumbing runs from the ADU back to the main sewer line add cost through additional pipe, potential trenching, and sometimes a lift station if gravity flow is not achievable. According to the National Association of Home Builders’ cost analysis, plumbing rough-in costs can vary substantially based on run length and grade requirements.
Short runs are not just cheaper up front. They mean less pipe that can eventually clog, settle, or need repair down the line.
Ventilation and Moisture Control Design
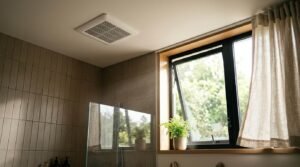
Moisture control in an ADU bathroom is not optional, and it is not just about comfort. A poorly ventilated bathroom in a small footprint traps humidity fast, and that humidity finds its way into drywall, subfloor, and framing.
I treat ventilation sizing as seriously as I treat plumbing layout because the failure mode, mold and rot, is expensive and slow to notice.
Exhaust Fan Sizing and CFM Requirements
Bathroom exhaust fans are sized by cubic feet per minute, or CFM, and the general rule requires 1 CFM per square foot of bathroom floor area at minimum, per guidance referenced by the U.S. Department of Energy’s building science resources. A small ADU bathroom under 50 square feet still needs a fan rated for continuous, effective air exchange.
I always size up rather than to the exact minimum. A slightly oversized fan run on a timer costs little and moves moisture out far more reliably.
Window Versus Mechanical Ventilation
Some ADU bathrooms have room for an operable window, which helps but rarely replaces the need for mechanical exhaust in a small, moisture-heavy room. Mechanical ventilation runs regardless of weather or whether someone remembers to open a window.
I install both when the layout allows it. A window helps with daylight and occasional airflow, but the fan does the actual moisture work.
Fixture Selection for Small ADU Bathrooms
Fixture choice in a small ADU bathroom is a clearance problem before it is a style problem. The wrong-sized toilet or vanity eats the clearance margin that makes the room feel functional instead of cramped.
I measure fixture footprints against the layout before a homeowner falls in love with a look that will not physically fit.
Compact Toilets, Sinks, and Vanities
Compact or “elongated compact” toilets save 2 to 3 inches of depth compared to standard models, which matters enormously in a room measured in inches, not feet. Wall-mounted or corner sinks free up floor clearance that a pedestal or vanity-mounted sink consumes.
I default to compact fixtures in any ADU bathroom under 40 square feet. The style difference is minor. The clearance difference is not.
Shower Versus Tub Decisions
A shower-only configuration typically needs a smaller footprint than a tub-shower combination, and it usually costs less to waterproof correctly. Tubs add resale and rental appeal but consume real square footage that a small ADU may not have to spare.
I walk homeowners through this tradeoff early, because reversing the decision after plumbing rough-in is expensive.
Accessibility and Aging-in-Place Design Features
ADUs frequently house aging parents, returning adult children, or homeowners planning to age in place themselves. Building accessibility features in from the start costs far less than retrofitting them later.
I raise this conversation even when the current occupant does not need it yet, because ADU bathrooms get used differently over a 20-year span.
Grab Bars and Zero-Threshold Showers
Zero-threshold, or curbless, showers eliminate the step-over that becomes a fall hazard as mobility changes, and blocking for grab bars costs almost nothing when installed during framing versus after drywall. This is one of the cheapest accessibility upgrades available in new construction.
I install grab bar blocking in every ADU bathroom regardless of current need. It is inexpensive insurance against a future retrofit.
ADA-Adjacent Clearances for Wheelchair Use
A wheelchair-accessible bathroom layout needs a minimum 60-inch turning radius or a T-shaped turning space, per standards outlined by the U.S. Access Board’s accessibility guidelines. Most ADU bathrooms cannot hit full ADA compliance in the available footprint, but getting close matters for long-term flexibility.
I treat full ADA clearance as a stretch goal in small ADUs, not always achievable, but worth pursuing wherever the layout allows.
Space-Saving Layout Strategies for Small Footprints
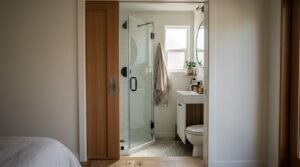
Small ADU bathrooms benefit from a handful of layout tricks that reclaim usable inches without touching the plumbing plan. These strategies matter most in bathrooms under 40 square feet, where every inch has a job to do.
I use these approaches constantly, and they add almost nothing to the construction budget.
Pocket Doors and Sliding Door Solutions
A pocket door eliminates the swing radius a standard hinged door requires, reclaiming several square feet of usable floor space in a small bathroom. That reclaimed space often means the difference between a cramped layout and a comfortable one.
I specify pocket doors in nearly every ADU bathroom under 40 square feet. The added framing cost is minor compared to the space it frees up.
Corner and Diagonal Fixture Placement
Placing a shower or sink in a corner, or angling a vanity diagonally, can unlock clearance that a straight-wall layout cannot achieve in an oddly shaped room. This works especially well in ADUs with non-rectangular floor plans.
I reach for diagonal placement whenever a straight layout leaves the room feeling like a hallway rather than a bathroom.
Materials and Finishes That Extend Durability
Material choice in an ADU bathroom directly affects how long the room performs before repairs become necessary. A small, moisture-heavy room punishes poor material decisions faster than a large primary bathroom does.
I steer homeowners toward durability first and aesthetic preference second, because a beautiful bathroom that fails at year five is not actually a good value.
Moisture-Resistant Flooring Options
Porcelain tile, luxury vinyl plank rated for wet areas, and sealed concrete all perform well in ADU bathroom conditions, while standard laminate and unsealed hardwood do not belong in this room at all. Flooring choice matters more here than almost anywhere else in the ADU.
I have replaced failed laminate flooring in bathrooms less than three years old. The material cost savings up front never justified the redo.
Waterproofing Behind Tile and Fixtures
A properly waterproofed shower assembly uses a bonded waterproofing membrane behind the tile, not just grout and caulk as the primary barrier. This step happens before tile goes up and is invisible once the room is finished, which is exactly why it gets skipped by builders cutting corners.
I never let this step get rushed. It is the single most common source of expensive bathroom failures I encounter in older construction.
Budgeting for ADU Bathroom Design and Construction
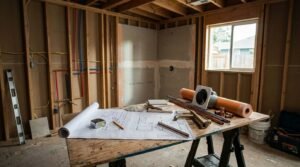
ADU bathroom costs vary widely based on layout complexity, plumbing distance, and material selection, and homeowners benefit from understanding where the money actually goes before construction starts. A realistic budget conversation upfront prevents mid-project surprises.
I break costs down by category so homeowners can see exactly where value gets added or lost.
Cost Ranges by Layout Complexity
A straightforward three-quarter bathroom with a short plumbing run typically costs less than a full bathroom requiring a longer run or a lift station, sometimes by several thousand dollars. Layout complexity, not square footage alone, drives much of the cost variation between ADU bathrooms.
I price plumbing distance and layout type before I price finishes, because that is where the largest swings in the budget actually happen.
Where Homeowners Overspend Unnecessarily
Homeowners commonly overspend on premium tile in rooms too small to showcase it and underspend on waterproofing and ventilation, the two things that determine whether the room lasts. That imbalance shows up as expensive-looking bathrooms with early moisture failures.
I redirect budget toward the invisible systems first every time. The tile choice matters far less than what is happening behind the wall.
Conclusion
A well-designed ADU bathroom balances code clearances, smart plumbing placement, real ventilation capacity, and materials built to handle daily moisture. Getting these fundamentals right early prevents costly rework and years of frustration later.
The best ADU bathrooms I have seen never started with a tile sample. They started with a plumbing plan and a clear-eyed look at the actual footprint available.
We build ADU bathrooms this way at Tiny Home Builders California, planning the systems first so the finishes last. Reach out, and we will walk your specific footprint through these exact decisions together.
Frequently Asked Questions
What is the minimum size for an ADU bathroom in California?
A functional three-quarter ADU bathroom needs roughly 35 to 40 square feet to meet code clearances comfortably. Full bathrooms with a tub typically require 45 to 55 square feet.
How much does it cost to build an ADU bathroom?
Costs vary significantly based on plumbing run length, layout type, and material selection. Short plumbing runs with standard finishes cost meaningfully less than layouts requiring lift stations or premium materials.
Can an ADU bathroom share plumbing with the main house?
Yes, and aligning the ADU wet wall with the main house’s existing plumbing stack is the most effective way to reduce cost and avoid needing a separate ejector pump system.
What ventilation does an ADU bathroom need?
An ADU bathroom needs a mechanical exhaust fan rated for at least 1 CFM per square foot of floor area. A window helps but does not replace mechanical ventilation in a small, moisture-heavy room.
Is a wet room layout a good option for a small ADU?
A wet room layout works well in very tight footprints because it removes the separate shower enclosure and waterproofs the entire floor, maximizing usable space and improving accessibility.
What is the most common mistake in ADU bathroom design?
The most common mistake is prioritizing finishes over plumbing placement and waterproofing. Poor wet wall alignment and rushed waterproofing cause the most expensive long-term failures.
Should I include accessibility features even if I don’t need them yet?
Yes. Installing grab bar blocking and planning a zero-threshold shower during framing costs very little compared to retrofitting these features later as mobility needs change.