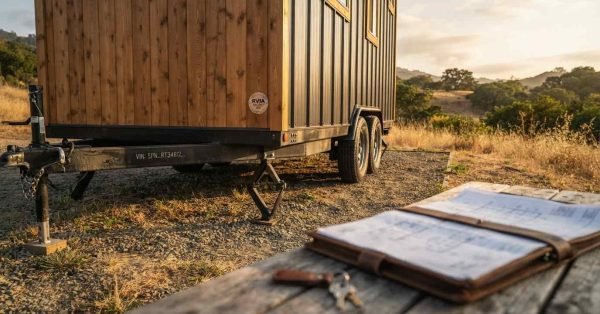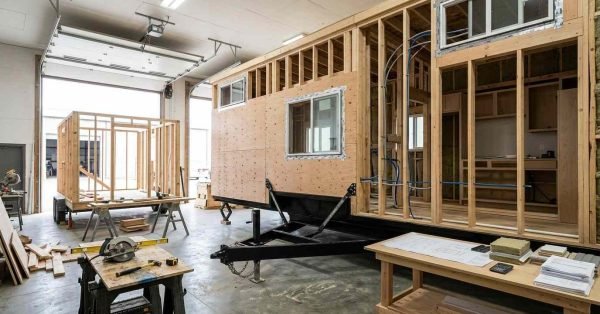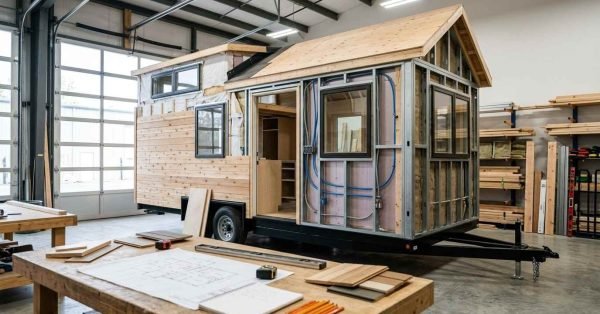
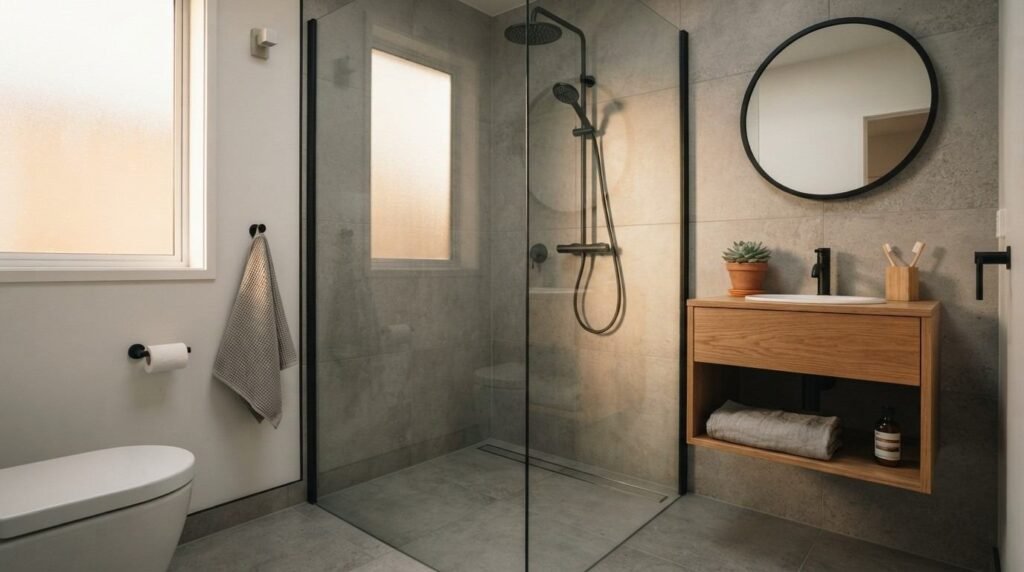
An ADU bathroom is the full wet-room system inside an accessory dwelling unit, combining plumbing, ventilation, waterproofing, fixtures, and finishes into the smallest and hardest-working room in the build. I treat it as the room that reveals a builder’s real standards.
Bathrooms cause more moisture damage, callbacks, and failed inspections than any other room in a small dwelling. Getting this room right protects rental income, resale value, and daily comfort.
Here I cover definitions, California code, layout, plumbing, ventilation and waterproofing, fixtures, accessibility, efficiency, cost drivers, builder evaluation, and the mistakes I see most often.
What Is an ADU Bathroom and Why Its Design Matters
An ADU bathroom is a complete, code-compliant bathing and sanitation space serving a legally independent living unit. It needs its own water supply, waste connection, ventilation, and electrical circuits. That independence is what separates it from a bonus-room half bath.
I care about this room more than most because it concentrates risk. Water, heat, air movement, and electricity all meet inside forty to sixty square feet.
When I walk a finished accessory dwelling unit with a client, I take them to the bathroom first.
How ADU Bathrooms Differ From Primary-Home Bathrooms
Primary-home bathrooms usually have slack: extra square footage, existing plumbing walls, and a second bathroom nearby. An ADU bathroom has none of that. It is the only bathroom, so every fixture choice carries full weight.
Space discipline changes the math. A vanity that reads generous in a main house swallows the clear floor area an ADU needs for a door swing.
I also plan for heavier use per square foot. One bathroom serving a tenant or family member full time sees more cycles than a guest bath ever does.
Junior ADU, Detached ADU, and Conversion ADU Bathroom Needs
A junior ADU shares a wall with the primary home, which often shortens plumbing runs and simplifies venting. A detached ADU requires new trenching, new supply lines, and its own vent stack. A garage or basement conversion sits somewhere between, and slab conditions drive the difference.
Each type carries a different bathroom cost curve. Conversions surprise people most, because cutting a slab for drainage adds real labor.
I map the bathroom location during the earliest ADU floor plan conversations, not after framing starts.
How Bathroom Quality Signals Overall Build Quality
I judge builders by the parts nobody photographs. Waterproofing membranes, blocking behind walls, fan duct slope, and tile substrate all live behind finish surfaces.
A builder who documents these details with photos and inspection records is telling you something reliable about the rest of the structure. A builder who skips that documentation is telling you something too.
Ask for pre-drywall photos. That single request separates careful teams from fast ones.
California ADU Bathroom Code and Permit Requirements
California ADU bathrooms follow the California Residential Code, the California Plumbing Code, and CALGreen, layered with local amendments. State law under California Government Code Section 66314 limits how far local agencies can restrict ADUs, but health and safety provisions still apply in full.
Permits cover the bathroom as part of the whole dwelling. Plumbing, mechanical, and electrical trades each get their own inspection points.
I keep code conversations concrete, because vague code talk is where budgets slip.
Minimum Clearances, Ceiling Height, and Egress Basics
The California Plumbing Code requires a minimum clear space in front of a water closet and a defined width for the fixture itself. Doors, vanities, and shower entries all compete for that same clear floor area.
Ceiling height minimums apply to the bathroom just as they do to living areas, with limited allowances at sloped sections. Conversions run into this most often.
I confirm these dimensions on the drawing set before ordering a single fixture. Deeper clearance tables belong in a dedicated ADU building code requirements resource.
Ventilation, Moisture, and CALGreen Considerations
Bathrooms need mechanical exhaust or an operable window, and I specify mechanical exhaust every time. CALGreen adds fixture flow-rate limits and moisture-control expectations that inspectors check.
Duct routing matters as much as fan rating. A powerful fan pushing air through a crushed flex duct moves almost nothing.
I terminate every bathroom duct to the exterior, never into an attic or soffit cavity.
Inspection Milestones That Affect Bathroom Work
Bathroom work touches four inspections: underground or rough plumbing, rough mechanical and electrical, shower pan water test, and final. Each one gates the next trade.
The shower pan test is the one people forget. A failed pan after tile costs far more than a slow, careful test before it.
I schedule these milestones into the build calendar so the trades stack in the right order. The full sequence sits in our ADU permit process walkthrough.

ADU Bathroom Layout and Space Planning
Layout decides whether an ADU bathroom feels tight or comfortable, and it happens on paper long before framing. I start with the plumbing wall, then place the toilet, then the shower, then the vanity. That order reflects how hard each element is to move later.
Most ADU bathrooms land between 35 and 60 square feet. Within that range, small decisions produce big differences in usable space.
Door swing is the most common layout killer I encounter.
Common Small-Bathroom Layouts That Work
A single-wall layout stacks all three fixtures along one plumbing wall, which keeps costs down and simplifies venting. A three-quarter bath with a corner shower opens up floor area in the middle of the room. An L-shaped arrangement works when the entry sits at a corner.
I avoid layouts that force a toilet directly behind a swinging door. It reads awkward and it wastes the room’s best clear space.
Compact tubs still make sense for family-occupied units. For most rentals, a shower-only layout uses the footprint better.
Fixture Clearances and Traffic Flow
Clearances are not decoration; they are the difference between passing inspection and rebuilding a wall. I hold the code minimum in front of the toilet and add an inch wherever the plan allows.
Vanity depth deserves a hard look. Dropping from 21 inches to 18 inches often recovers the circulation space a small bathroom needs.
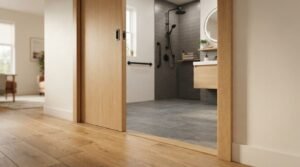
Pocket doors and outswing doors both solve swing conflicts, and I use whichever the framing supports.
Wet Rooms, Curbless Showers, and Compact Footprints
A wet room treats the entire floor as a shower zone with full waterproofing and a single slope to drain. It makes small bathrooms feel larger because there is no curb, no threshold, and often no enclosure.
Curbless entry requires a recessed pan or a pre-sloped assembly set into the framing. That detail gets planned at framing, not at tile.
I favor curbless design in ADUs built for aging parents. It buys accessibility without a remodel later, and it pairs naturally with small bathroom design ideas that maximize a compact footprint.
Plumbing, Drainage, and Utility Connections
Plumbing is the least visible and most expensive part of an ADU bathroom. Supply lines, waste lines, and venting all have to reach the unit and function independently. Distance from the main house drives most of the cost.
I locate the bathroom as close to the existing sewer lateral as the design allows. Every additional foot of trench adds labor, backfill, and risk.
Sewer capacity gets verified early, not assumed.
Water Supply, Waste Lines, and Vent Stacks
Supply lines size to the fixture load, and a single-bathroom ADU rarely needs oversized pipe. Waste lines need consistent slope, typically a quarter inch per foot, held across the entire run.
Venting prevents siphoning and keeps traps sealed. An air admittance valve solves some situations, and a conventional vent through the roof solves more of them.
I prefer a full vent stack where the roof design cooperates. It performs better over decades.
Water Heating Options for a Single Bathroom
A tankless gas unit delivers continuous hot water and frees floor space. A compact heat pump water heater runs efficiently and fits all-electric designs. A small point-of-use electric tank works when the run to the fixture is very short.
Electrical capacity drives this decision more than preference. A heat pump unit and an induction range together push panel demand quickly.
I run a load calculation before specifying any water heater. Full comparisons live in our ADU utility connections breakdown.
Trenching, Setbacks, and Site Constraints
Trench routing has to respect setbacks, tree protection zones, and existing hardscape. Cutting a driveway costs real money and adds restoration work.
Rock, high water tables, and mature root systems all slow trenching. I flag these during site assessment so the budget reflects reality.
Utility easements deserve a title review. Nobody wants to discover one mid-excavation.
Ventilation, Waterproofing, and Moisture Control
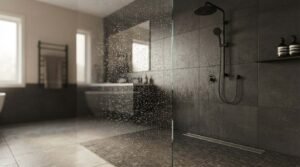
This is the section that determines whether an ADU bathroom lasts twenty-five years or fails in five. Moisture damage is the leading cause of hidden repair costs in small dwellings, and it starts with assemblies, not fixtures. I specify these details in writing on every project.
Ventilation removes vapor. Waterproofing stops liquid. Both are required, and neither substitutes for the other.
I test and document each layer before it gets covered.
Exhaust Fan Sizing and Duct Routing
ASHRAE Standard 62.2 sets residential ventilation baselines, and most ADU bathrooms need at least 50 CFM of intermittent local exhaust. I size up when the shower is enclosed, or the ceiling is tall.
Rigid or smooth-wall duct beats flex duct for airflow. Short runs, gentle bends, and a proper exterior termination cap all preserve rated performance.
I add a timer or humidity sensor so the fan runs long enough after a shower. Manual switches get turned off too soon.
Shower Pan and Wall Assembly Waterproofing
A shower needs a continuous waterproof plane from the drain up the walls to above the showerhead. Sheet membranes, liquid-applied membranes, and bonded foam pans all achieve this when installed to manufacturer specification.
The failure points are predictable: inside corners, curb tops, drain flanges, and mixing valve penetrations. Every one gets detailed treatment.
I water-test every pan for twenty-four hours before tile. That test has saved more projects than any product choice.
Substrates, Backer Board, and Vapor Management
Cement backer board or foam board belongs behind tile in wet areas, never standard drywall. Greenboard resists moisture but does not waterproof, and I never rely on it inside a shower.
Fastener spacing and seam treatment follow the manufacturer’s instructions exactly. Skipped seam tape is a slow leak waiting to happen.
Ceiling and wall assemblies also need vapor management appropriate to the climate zone. Coastal, valley, and mountain conditions each behave differently, and thoughtful ADU insulation and moisture control planning addresses that variation.
Fixtures, Finishes, and Material Selection
Fixtures and finishes are the visible layer, and they are also where owners spend the most decision time. I push clients toward durability first and aesthetics second, because a small bathroom shows wear fast.
Serviceability matters in rentals. Parts availability for a valve or cartridge beats a discontinued designer model.
Consistency across the unit reads as quality.
Toilets, Vanities, and Shower Systems
A comfort-height, dual-flush toilet with a common flush valve serves ADUs well. Wall-hung and skirted models simplify cleaning in tight rooms.
Vanities perform best with solid construction, drawer storage, and a single-piece top. Pedestal sinks look clean but sacrifice the storage a small unit needs.
Pressure-balancing or thermostatic shower valves protect against scald events. I specify them as standard.
Tile, Grout, and Surface Durability
Porcelain tile handles ADU wet areas better than most alternatives because of low absorption and high durability. Floor tile needs adequate slip resistance, and I keep that spec in the submittal.
Grout choice matters more than color. High-performance cementitious or epoxy grout resists staining and holds up in daily-use showers.
Movement joints belong at changes of plane and around the perimeter. Tile assemblies move, and joints let them.
Hardware, Lighting, and Mirror Placement
Solid brass or stainless trim outlasts plated zinc in a humid room. I check finish warranties before specifying.
Layered lighting works best: a ceiling fixture for general light, plus vanity-level light at face height. Sconces flanking a mirror beat a single downlight for grooming.
Mirror size and height get set to the fixture layout, not the wall center. Small rooms benefit when the mirror carries visual width.
Accessibility and Universal Design in ADU Bathrooms
Accessible design serves aging parents, tenants with mobility needs, and resale value at the same time. California requires accessibility features in specific project types, and I build many ADUs to those principles voluntarily. It costs little during construction and a lot afterward.
Universal design also improves the room for everyone. Wider doors and level thresholds help people carrying laundry as much as people using walkers.
I raise this topic early because retrofitting is expensive.
Aging-in-Place and Rental-Ready Features
Curbless showers, lever handles, comfort-height toilets, and hand-held shower wands all support aging in place without looking institutional. Nonslip flooring adds safety at almost no cost.
A 32-inch or 36-inch door improves access and moves furniture more easily. I default to the wider option when framing allows.
These features also market well to tenants. Accessibility broadens your renter pool.
Blocking, Grab Bars, and Turning Radius
Blocking behind the wall costs almost nothing at framing and enables grab bars whenever they are needed. I install blocking at the toilet and shower on every ADU, whether or not bars go in now.
Turning radius drives layout. A 60-inch turning circle or a T-shaped turn needs deliberate planning in a compact footprint.
Reinforced walls also support future seats and rails. That flexibility is the point of universal design principles applied at the framing stage.
Energy and Water Efficiency in ADU Bathrooms
Efficiency in an ADU bathroom shows up on monthly bills and in code compliance. California’s Title 24 energy standards and CALGreen water provisions both apply, and the bathroom carries several of those requirements. I treat efficiency as a performance target, not a marketing line.
Small rooms respond well to efficiency measures. Short hot water runs, LED lighting, and low-flow fixtures compound quickly.
Verification happens at final inspection.
WaterSense Fixtures and Flow Rates
The EPA WaterSense program certifies fixtures that use at least 20% less water than federal baselines while meeting performance criteria. California limits showerheads to 1.8 gallons per minute and lavatory faucets to 1.2 gallons per minute.
Low-flow does not mean weak. Modern aerating and laminar heads maintain pressure feel at reduced volume.
I select certified fixtures because they clear code review without argument.
Insulation, Lighting, and Electrical Load
Insulated hot water lines shorten wait time and reduce standby loss. That single detail improves daily comfort in a way owners notice immediately.
LED lighting on a dimmer handles both task and ambient needs efficiently. Fan-light combination units simplify wiring in tight ceilings.
Bathroom circuits need GFCI protection and a dedicated receptacle circuit. I coordinate this against the whole-unit load calculation during ADU energy efficiency planning.
ADU Bathroom Cost Factors and Budget Planning
An ADU bathroom typically represents one of the highest cost-per-square-foot areas of the entire unit. Plumbing, waterproofing, tile labor, and fixtures concentrate in a small space. I give clients a range early and refine it as selections firm up.
Cost drivers separate into structural and cosmetic. Structural decisions cost more to change and matter more to performance.
Transparency here prevents mid-project friction.
What Drives Cost Up or Down
Distance to existing sewer and water raises cost fastest. Slab cutting, long trenches, and driveway restoration all add labor.
Tile scope drives finish cost. A full-height tiled wet room costs considerably more in labor than a tiled shower with painted walls.
Fixture tier matters less than people expect. I have delivered excellent bathrooms with mid-tier fixtures and flawless installation.
Allowances, Change Orders, and Contingency
I set written allowances for tile, fixtures, and hardware so owners know their spending envelope. Vague allowances create the change orders everyone resents.
Change orders happen. Documented pricing and signed approval keep them from becoming disputes.
I recommend a contingency for unforeseen site conditions on every project. Trenching and conversions justify the larger end of that range, and full numbers appear in our ADU cost breakdown analysis.

How to Evaluate a Builder’s ADU Bathroom Workmanship
Here is the question most owners actually want answered: how do I know a builder will get my ADU bathroom right? I answer it by looking at documentation, specification detail, and willingness to explain hidden assemblies. Marketing photos show finish work; documentation shows craft.
A quality builder talks about membranes and slope before talking about tile patterns. That sequence reveals priorities.
I hand clients a spec sheet, not a mood board.
Questions to Ask Before You Sign
Ask which waterproofing system they use and who installs it. Ask whether they water-test shower pans and for how long. Ask to see pre-drywall photos from three recent ADUs.
Ask about fan CFM, duct material, and termination point. A builder who answers instantly has thought about it before.
Ask who supervises the tile setter. Subcontractor oversight is where quality lives or dies. Our questions to ask a home builder checklist covers the broader interview.
Red Flags in Bids, Specs, and Scope
A bid that lists “bathroom, complete” with a lump sum tells you nothing. I look for line items covering waterproofing, substrate, fixtures, and ventilation separately.
Missing allowances signal a change-order strategy. So does reluctance to name specific products.
Vague warranty language on wet areas concerns me most. I want the moisture-related coverage stated plainly, alongside verifiable construction quality standards.
Common ADU Bathroom Design Mistakes to Avoid
The mistakes repeat across projects, which makes them easy to prevent. Undersized exhaust fans top my list, followed by fans ducted into attics instead of outside.
Standard drywall behind shower tile ranks second. It fails, and it takes the tile with it.
Layout errors come third: doors that collide with vanities, toilets crammed against walls, and showers placed where the trench costs most. I catch these on paper.
Skipped blocking is a quiet mistake. It costs nothing at framing and hundreds later.
Conclusion
I covered ADU bathroom definitions, California code, layout, plumbing, ventilation, waterproofing, fixtures, accessibility, efficiency, cost, and builder evaluation as one connected system.
Each of these areas deserves deeper study, and dedicated resources on layout, permits, cost, and utility connections carry that detail further for you.
We build ADUs where the hidden work matches the finish work. Talk with Tiny Home Builders California about your bathroom plan today.
Frequently Asked Questions
How big does an ADU bathroom need to be?
Most ADU bathrooms work between 35 and 60 square feet. Code sets minimum fixture clearances rather than a total room size, so layout efficiency matters more than raw area.
Does an ADU need a full bathroom in California?
Yes. A legal ADU requires a bathroom with a toilet, sink, and bathing fixture, along with its own kitchen and independent living space.
Can an ADU bathroom share plumbing with the main house?
It connects to the same sewer lateral and water service in most cases. The bathroom still needs its own supply lines, waste lines, and venting.
What is the best shower type for a small ADU bathroom?
A curbless or low-threshold shower with a glass panel works best. It removes visual barriers, improves accessibility, and makes a compact room feel larger.
How much does an ADU bathroom cost to build?
Costs vary widely with trenching distance, tile scope, and fixture tier. Plumbing and waterproofing labor drive the budget more than fixture selection does.
Do ADU bathrooms need to be ADA accessible?
Full ADA compliance applies to specific project types, not all ADUs. I still recommend blocking, wider doors, and curbless showers for long-term flexibility.
What ventilation does an ADU bathroom require?
Mechanical exhaust of at least 50 CFM, ducted directly outside. Humidity sensors or timers keep the fan running long enough to clear moisture properly.