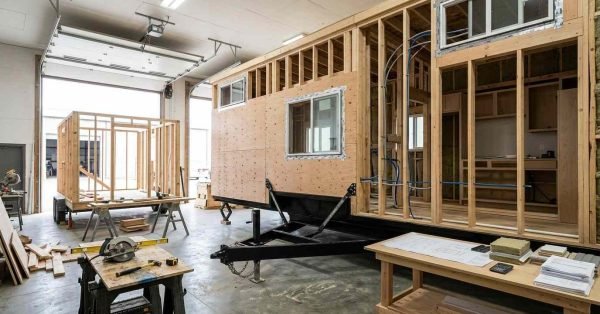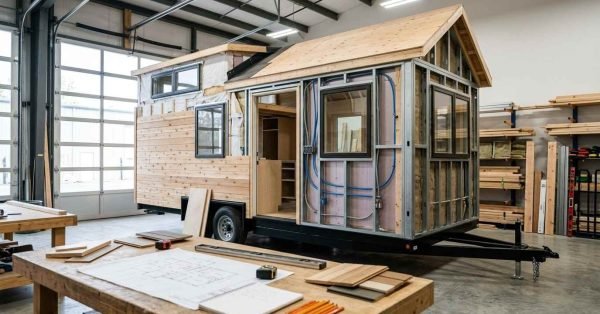
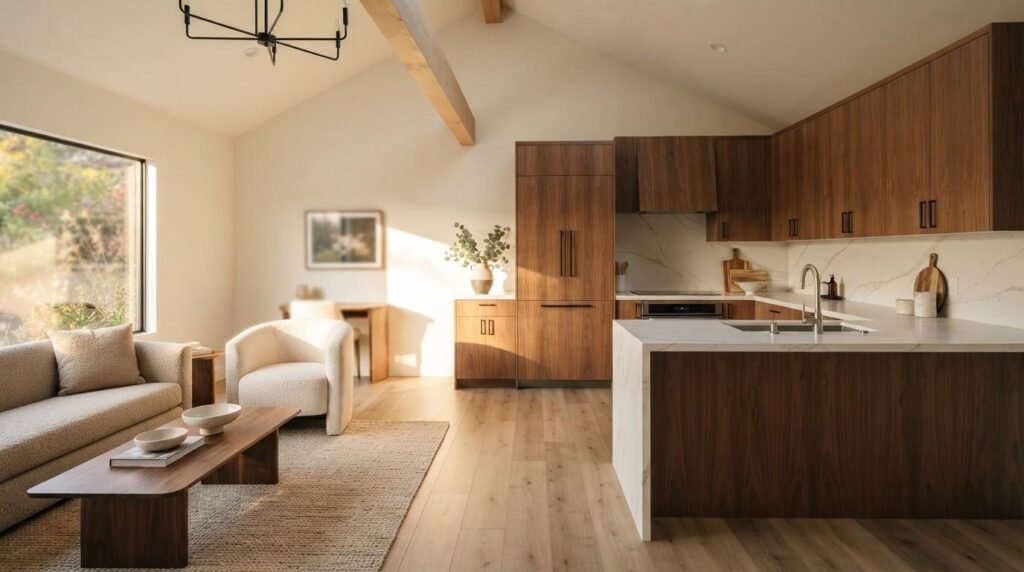
Interior finishes are the visible, touchable layer of an accessory dwelling unit: the flooring, wall treatments, cabinetry, countertops, tile, trim, doors, hardware, and lighting that turn framed space into a home. They set how the unit looks, feels, and holds up over decades of daily use.
In a 400 to 1,200 square foot ADU, every finish choice carries more weight than it does in a large house. One wrong material shows everywhere, and it costs real money to correct later.
This guide covers flooring, walls, ceilings, kitchens, bathrooms, doors, lighting, storage, palettes, durability, healthy materials, budgeting tiers, and the selection timeline we run on every project.
What Interior Finishes Mean in an ADU Build
I separate a build into two layers. The structure keeps the unit standing and dry, and the finish layer is everything you see and touch after the drywall goes up.
Finishes include flooring, paint, tile, cabinets, countertops, trim, interior doors, hardware, plumbing fixtures, and light fixtures. They typically represent 30% to 40% of an ADU’s total construction cost, which makes them the largest discretionary category in the budget.
The Difference Between Finishes and Structure
Structure is fixed by engineering and code. Finishes are chosen, and that choice is where your taste, budget, and long-term maintenance plan all collide.
I tell every client the same thing. Spend on the assemblies you cannot easily replace, and stay flexible on the ones you can swap in ten years.
Why Small Footprints Change Finish Decisions
A small unit reads as one continuous visual field. Sightlines run from the entry through the kitchen to the far wall, so a busy floor pattern or a heavy cabinet color dominates the whole interior.
Compact space also means fewer square feet of every material. That opens the door to upgrading one or two finishes without moving the total budget much.
How Finish Selections Affect Cost and Schedule
Finishes drive both dollars and dates. Custom cabinetry, imported tile, and specialty windows carry lead times that stretch weeks past standard stock items.
I lock major selections before framing inspection. That single habit prevents most of the delays I see on ADU projects.
Flooring Materials for ADUs
Flooring is the first finish I settle, because it anchors every other selection in the unit. It covers more continuous surface area than anything else, and it takes the hardest abuse.
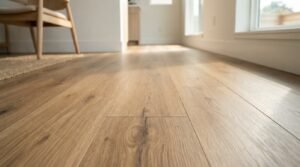
Luxury vinyl plank dominates ADU work right now, and for good reason. It handles moisture, installs over concrete slabs, resists dents from furniture, and delivers a convincing wood look at a fraction of hardwood cost. For a deeper breakdown of wear layers and installation methods, our ADU flooring options comparison walks through each product class side by side.
Luxury Vinyl Plank, Tile, and Engineered Wood
Rigid core LVP with a 20 mil wear layer handles rental duty without complaint. Porcelain tile outlasts everything but feels cold underfoot and costs more to install.
Engineered wood gives real wood grain and refinishing potential. I use it in owner-occupied units where the client wants warmth and accepts more careful maintenance.
Moisture, Slab-on-Grade, and Subfloor Realities
Most California ADUs sit on a concrete slab. Slabs release vapor, and that vapor destroys solid hardwood and cheap laminate over time.
I test slab moisture before ordering anything. A vapor barrier or a moisture-tolerant product turns a future failure into a non-issue.
Continuous Flooring and Visual Space Expansion
One flooring material through the entire unit makes a small footprint read larger. Transitions chop space into small rooms visually, even when the walls stay open.
I run the same plank from the entry through the bedroom, then switch only at the bathroom threshold when tile makes sense there.
Wall Finishes, Paint, and Surface Treatments
Walls are the cheapest big lever in an ADU interior. Paint changes the entire feel of a unit for a few hundred dollars in material.
The default in production ADU work is Level 4 drywall finish with a light orange peel or smooth texture. Smooth walls look sharper and cost more in labor, since every imperfection shows under raking light.
Drywall Levels, Texture, and Paint Sheen
I specify Level 4 for painted walls and Level 5 when a client wants smooth walls under strong natural light. Level 5 adds a skim coat and adds cost.
Sheen matters more than people expect. I use matte or eggshell on walls, satin on trim and doors, and semi-gloss in bathrooms where moisture and scrubbing are constant.
Accent Walls, Paneling, and Wood Treatments
Vertical shiplap, board and batten, or a slatted wood panel adds texture without eating floor area. One accent wall gives a studio unit a focal point and a sense of intention.
I keep accent treatments to a single plane. Two competing textures in a 500 square foot room fight each other.
Light Reflectance Value in Compact Rooms
Light reflectance value describes how much light a surface bounces back. Higher LRV paint makes a compact room feel open, especially on ceilings and walls facing limited window area.
I pick wall colors in the 60 to 80 LRV range for interiors with a single exposure. Deeper colors work when the unit has generous glazing.
Ceilings, Trim, and Millwork Details
Ceilings and trim are the details people notice without naming. They carry the perceived quality of the whole unit.
A flat eight-foot ceiling is the baseline. Raising it, vaulting it, or exposing framing transforms how a small unit feels for a modest structural cost.
Ceiling Height, Vaulting, and Exposed Framing
California ADU rules permit generous height in most jurisdictions, and a vaulted ceiling along the roof slope adds volume without adding footprint. I use it constantly in detached units.
Exposed rafters or a painted structural beam add character. They also demand clean framing work, because nothing hides.
Baseboard, Casing, and Reveal Detailing
Taller baseboard reads as higher quality. I run five and a quarter-inch base in most units, and I keep casing profiles simple to match a contemporary palette.
Some clients prefer a modern reveal detail with no trim at all. That approach demands precise drywall work and costs more than trim, not less.
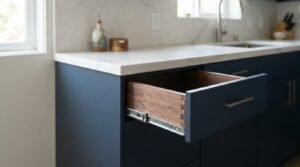
Kitchen Finishes and Cabinetry for Small Spaces
The kitchen absorbs the largest share of finish budget in almost every ADU I build. It also determines whether the unit functions as a real home or a glorified hotel room.
Cabinetry is the biggest line item. Frameless European-style boxes maximize interior storage volume, which matters when total linear footage is limited. The construction details behind box quality deserve their own read, and I cover them in our kitchen cabinet quality guide.
Cabinet Construction, Boxes, and Hardware
I look at three things: box material, drawer box construction, and hinge quality. Plywood boxes outperform particleboard in humid environments and hold fasteners far better.
Dovetailed drawer boxes with full-extension soft-close slides last decades. Cheap slides fail first and announce the quality of everything around them.
Countertop Materials: Quartz, Butcher Block, Laminate
Quartz is my default. It resists staining, needs no sealing, and delivers consistent color across small runs where natural stone variation looks accidental.
Butcher block brings warmth and costs less, with the tradeoff of oiling and scratch patina. Modern laminate has improved dramatically and works well in rental-focused units where budget rules.
Backsplash, Sink, and Appliance Coordination
A full-height backsplash behind the range simplifies cleaning and adds visual height. Subway tile stays the value choice, and a slab backsplash matching the counter reads far more expensive.
Appliance sizing drives kitchen layout in compact units. I plan around 24-inch appliances constantly, and I verify clearances before cabinet ordering, not after.
Bathroom Finishes and Waterproofing Systems
The bathroom is the highest-risk finish assembly in any ADU. Water failures here cause the most expensive callbacks in residential construction.
Waterproofing sits behind the tile, invisible and non-negotiable. I use sheet or liquid-applied membranes over the entire wet area, and I never rely on cement board alone.
Tile Assemblies and Waterproof Membranes
A proper shower assembly stacks in order: framing, backer board, waterproof membrane, thinset, tile. Skipping the membrane saves a few hundred dollars and risks tens of thousands in rot repair.
I pull pan and membrane details from TCNA installation standards and hold the tile subcontractor to them. Documented assemblies protect the homeowner years after handoff.
Vanities, Fixtures, and Ventilation
Wall-mounted or floating vanities free floor area and make a small bathroom feel larger. A 24 to 30 inch vanity fits most ADU bathrooms without crowding the door swing.
Ventilation gets ignored and matters enormously. I install a properly sized exhaust fan on a humidity sensor, because moisture removal protects every finish in the room.
Curbless Showers and Accessible Detailing
A curbless shower removes a trip hazard and makes a compact bathroom read as one continuous space. It requires a recessed pan or a sloped slab, planned during framing.
Blocking for future grab bars costs almost nothing during construction. I add it to every ADU, since many of these units eventually house aging parents.
Doors, Windows, and Interior Hardware
Doors and hardware are touched every day, which is exactly why cheap versions feel cheap immediately. This is a category where modest upgrades pay back in daily experience.
Solid core interior doors deaden sound between a bedroom and living area. Hollow core doors cost less and telegraph every conversation through the unit.
Interior Door Types and Swing Planning
Swing space is real floor area in a small unit. I use pocket doors and barn-style sliders where a swing would block a walkway or collide with a fixture.
Door width matters for accessibility. I specify a 32-inch minimum on primary interior openings whenever the layout allows.
Hardware Finish Families and Consistency
I pick one hardware finish family and hold it across doors, cabinets, plumbing, and lighting. Matte black, brushed nickel, and unlacquered brass each read intentional when used consistently.
Mixing two metals works when it is deliberate and repeated. Mixing four looks like a series of separate decisions, because it is.
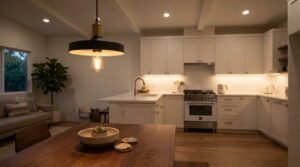
Lighting Design and Electrical Finish Layer
Lighting shapes perception of space more than any other finish. A well-lit 500 square foot unit feels generous, and a poorly lit one feels like a basement.
California requires high-efficacy lighting under Title 24, which in practice means LED throughout. That standard also gives us excellent control over color and dimming.
Layered Lighting: Ambient, Task, Accent
I build three layers in every unit. Recessed or surface ambient fixtures cover general light, undercabinet and vanity lighting handle tasks, and a pendant or sconce provides accent and character.
A single ceiling fixture per room is the most common lighting mistake I correct. Layers cost little more and change everything.
Color Temperature, CRI, and Dimming
I specify 2700K to 3000K for residential warmth and keep every fixture in a unit at the same temperature. Mixed color temperatures make a home feel unfinished.
Color rendering index above 90 makes finishes, wood, and skin tones look accurate. Dimmers on ambient circuits let a studio shift from workspace to living room after dark.
Switch, Outlet, and Device Placement
Outlet placement gets designed, not defaulted. I map furniture layouts first, then place receptacles where beds, desks, and sofas actually land.
Current code drives GFCI, AFCI, and tamper-resistant requirements, and the California Energy Commission Title 24 standards govern controls and efficacy. I walk clients through switch locations during rough electrical.
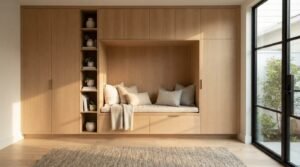
Storage, Built-Ins, and Space-Saving Design
Storage separates an ADU that works from one that frustrates its occupants. Small units fail when belongings have nowhere to live.
Built-in casework beats freestanding furniture in tight footprints, because it uses full wall height and leaves no dead gaps. Our small space storage design ideas collection expands on the details I use most.
Built-In Casework and Vertical Storage
I run cabinetry to the ceiling in kitchens and closets. The top shelf holds seasonal items, and the visual line makes the ceiling read higher.
Bench seating with drawers, stair storage in loft units, and a full-height entry closet each recover space that otherwise disappears.
Multi-Function and Convertible Furniture Zones
One room serving two purposes is normal in a studio ADU. I plan a wall for a Murphy bed or a desk that folds flat, then finish that wall to look deliberate.
Blocking and electrical for these systems go in during framing. Retrofitting them later costs multiples of the original allowance.
Color, Material Palettes, and Design Cohesion
A palette is a set of decisions made once and applied everywhere. Without one, an ADU accumulates finishes that never quite agree.
I build every project around a fixed palette before the first order goes out. It keeps selections fast and prevents the mismatched look that comes from choosing materials one at a time.
Building a Three-Tier Material Palette
Tier one is the dominant surface: flooring and wall color, roughly 60% of the visual field. Tier two is cabinetry and countertops at about 30%.
Tier three is the accent layer, around 10%: hardware, tile, and lighting. Keeping the ratios stable is what makes a small interior feel calm.
Texture, Contrast, and Visual Weight
Light palettes expand a small room, and pure white everywhere feels sterile. I add texture through wood grain, matte tile, and woven materials instead of adding more colors.
Contrast belongs at focal points. A darker vanity or a single deep cabinet run gives the eye somewhere to land.
Matching Finishes to the Primary Residence
An ADU on the same lot as a main house does not need to match it exactly. I aim for a relationship, not a copy, usually through shared trim profiles or a shared hardware finish.
Appraisers and future buyers respond to coherence across a property. Deliberate continuity protects value on both structures.
Durability, Maintenance, and Rental Performance
Many California ADUs generate rental income, and rental units live harder than owner-occupied homes. Finish selection changes accordingly.
I specify materials by wear rating, not appearance alone. A finish that looks good on day one and rough on year three costs more than the durable option did.
Wear Ratings and Tenant-Grade Selections
For flooring, I look for a 20 mil or thicker wear layer in vinyl and a PEI 4 rating in floor tile. Both survive years of turnover.
Semi-gloss trim paint and scrubbable wall paint let a unit be cleaned rather than repainted. That difference shows up every time a tenant moves out.
Repairability and Replacement Cycles
I favor finishes that can be repaired in sections. Plank flooring, modular tile, and stock cabinet doors all allow partial replacement.
I also keep attic stock on every project: extra tile, extra plank, matched paint. That box saves a homeowner hundreds on the first repair.
Healthy Materials, Indoor Air Quality, and Compliance
Small volume means concentrated air. An ADU with 500 square feet and one occupant reaches higher pollutant concentrations from off-gassing than a large house with the same materials.
The EPA notes indoor pollutant levels commonly run two to five times higher than outdoor levels. That gap makes finish chemistry a genuine performance issue, not a marketing angle.
Low-VOC Products and CARB Compliance
I specify low-VOC or zero-VOC paints, adhesives, and sealants on every unit. The cost premium is small and the difference in the first weeks of occupancy is obvious.
Composite wood products must meet CARB Phase 2 formaldehyde limits in California. I confirm certification on cabinetry and shelving before delivery.
Title 24, CALGreen, and Finish-Related Code Items
CALGreen sets mandatory limits on VOC content for adhesives, sealants, paints, and flooring in new residential construction. Title 24 governs lighting efficacy and controls.
These requirements touch finish selections directly. I hand clients a compliance list at selection time so nothing gets ordered that cannot be installed.
How much should I budget for ADU interior finishes, and when do I choose them?
ADU Finish Budgeting and Allowance Tiers
Allowances turn abstract finish decisions into numbers a homeowner can act on. I set them per category before design finalizes.
Interior finishes commonly land between $40 and $120 per square foot of ADU floor area, depending on tier. The spread comes almost entirely from cabinetry, countertops, tile, and fixtures.
Good, Better, Best Allowance Bands
The good tier uses stock cabinets, laminate or entry quartz counters, LVP flooring, and standard fixtures. It produces a clean, durable rental-ready interior.
The better tier upgrades to plywood-box cabinets, full quartz, larger-format tile, and layered lighting. The best tier adds custom millwork, slab backsplashes, and designer fixtures.
Where Upgrades Return Value
I push clients to upgrade flooring, cabinet boxes, and lighting first. Those three carry the most daily contact and the highest replacement cost.
I hold the line on decorative tile quantity and specialty plumbing finishes. Those deliver less return per dollar in a small unit.
The Finish Selection Timeline in an ADU Project
Selection timing determines whether a project runs smoothly or stalls. I treat the selection calendar as seriously as the construction schedule.
Major finishes get locked before framing completes. That gives fabrication and shipping the runway they need.
Long-Lead Items and Ordering Windows
Custom cabinetry, specialty windows, imported tile, and some appliances carry the longest lead times. I order those first, often months ahead of installation.
Paint, trim, and hardware can be decided later without risk. Sequencing selections by lead time is the single biggest schedule protection available.
Change Orders and Selection Deadlines
Every category gets a deadline, and after that date a change becomes a change order with cost and time impact. I state this plainly at the start.
Clear deadlines protect both sides. Clients get certainty, and the build keeps moving.
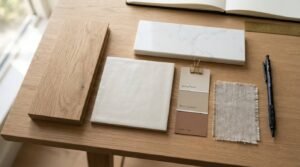
How We Manage Interior Finishes at Tiny Home Builders California
I run finish selection as a guided process, not a pile of catalogs. We start with a palette conversation, then move to category-by-category selections with allowances attached to each one.
Clients see physical samples, a written selection sheet, and a confirmed order date for every item. That documentation eliminates the guesswork that generates most finish disputes.
We coordinate installers, verify compliance items, and hold subcontractors to documented assemblies for waterproofing and substrate prep. The result is an interior that looks the way it was planned and performs for decades.
Conclusion
You now understand how flooring, walls, cabinetry, tile, lighting, palettes, durability, and compliance combine into a coherent ADU interior finish package.
These decisions connect to broader construction quality, budgeting, and long-term property value, and each category deserves deeper study on its own.
We build ADUs with documented finishes and disciplined selections. Contact Tiny Home Builders California to plan your interior with confidence.
Frequently Asked Questions
What are the most popular flooring materials for ADUs?
Luxury vinyl plank leads by a wide margin. It handles moisture over concrete slabs, resists wear, and delivers a wood look at moderate cost.
How much do interior finishes cost in an ADU?
Interior finishes typically run $40 to $120 per square foot. Cabinetry, countertops, tile, and fixtures account for most of that variation.
Should ADU finishes match the main house?
They need a relationship, not an exact match. Shared trim profiles or a shared hardware finish create coherence across the property.
What finishes hold up best in a rental ADU?
Thick-wear-layer vinyl plank, PEI 4 floor tile, plywood cabinet boxes, and scrubbable paint. All four survive tenant turnover well.
Do California ADUs have material requirements for finishes?
Yes. CALGreen limits VOC content in paints, adhesives, and flooring, and CARB Phase 2 governs formaldehyde in composite wood products.
When do I need to choose my ADU finishes?
Major selections lock before framing completes. Long-lead items like custom cabinetry and specialty tile get ordered months ahead of installation.
How do I make a small ADU feel larger through finishes?
Run one flooring material throughout, use higher light reflectance paint, vault the ceiling where possible, and build storage vertically.