I’ve walked hundreds of homeowners through this exact journey, and the custom home building process moves through ten distinct phases: lot evaluation, design, permitting, foundation, framing, systems installation, insulation, interior finishes, and final handover. Each phase depends on the one before it, and skipping steps is where most quality problems start.
California adds its own layer of complexity here. Title 24 energy codes, seismic requirements, and county-specific permitting timelines shape almost every decision you make before a shovel touches the ground.
I’m going to walk you through how a lot becomes a finished home, phase by phase. We’ll cover what happens before construction even starts, how the structure comes together, what protects your comfort and energy performance long after move-in, and what the final walkthrough actually checks for before you get your keys.
What Determines the Length and Cost of a Custom Home Build
I get asked this constantly, and the honest answer involves more variables than most homeowners expect going in. Lot condition, design complexity, material selections, and local permitting speed all move the timeline independently of each other.
A flat, utility-ready lot in a fast-permitting county moves faster than a sloped lot requiring retaining walls and extended county review. Custom home builds in California typically run 8 to 14 months from permit approval to completion, though complex sites push well past that window.
Cost follows a similar pattern. Square footage matters less than most people assume foundation type, roofline complexity, and finish-level selections usually swing the budget more than raw size does.
Rough Framing, Sheathing, and Roof Structure
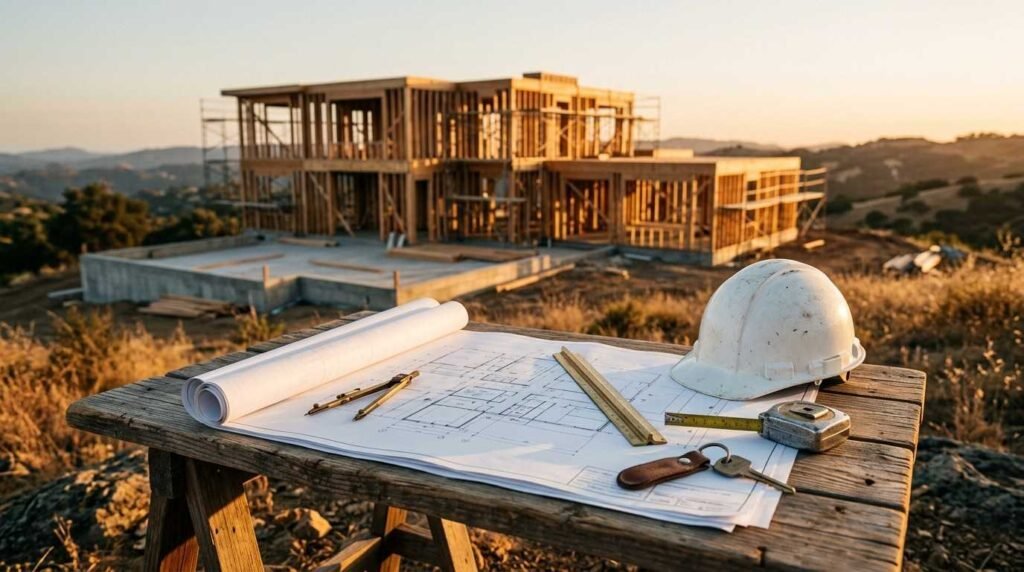
The framing phase is where the home’s actual shape appears for the first time, and it happens fast. Crews typically frame walls, floors, and roof structure within two to four weeks on a standard single-family lot.
Sheathing goes over the framed walls next, creating the structural skin that ties the frame together and gives the building envelope its rigidity. Roof trusses or rafters follow, and this is usually the point where the home starts looking real to a homeowner watching from the curb.
I always tell clients to walk the site during framing if they can. Structural issues are far easier and cheaper to fix here than after drywall goes up.
Evaluating and Preparing Your Lot Before Construction
Every build starts with the lot, and not every lot is ready for one. Soil composition, drainage patterns, slope, and access all affect what kind of foundation and site work the project needs.

Soil Testing, Surveys, and Site Access Requirements
A geotechnical soil test tells the structural engineer what kind of foundation the soil can actually support. Expansive clay soils, common across parts of California, often require deeper footings or engineered slab designs to prevent future cracking.
A boundary survey confirms exact property lines before anything gets built, which protects you from setback violations and neighbor disputes down the road. Site access matters too — a lot with a narrow easement or steep grade can add real cost to equipment mobilization and material delivery.
I’ve seen projects stall for weeks simply because nobody checked access width before ordering a concrete pump truck.
Design and Pre-Construction Planning
This phase shapes everything that follows, and rushing it almost always costs more later. Architectural plans, structural engineering, and material selections all get finalized here, before permits get submitted.

Architectural Plans, Engineering, and Material Selection
Architectural drawings define the layout, square footage, and visual design of the home. Structural engineering translates those drawings into load calculations, framing specs, and foundation requirements that satisfy California’s seismic design standards.
Material selection happens in parallel; window types, siding, roofing, and structural lumber grade all get locked in during this phase. The American Institute of Architects notes that early material decisions account for roughly 60% of a project’s total cost variability, based on AIA’s 2025 construction industry analysis.
I push clients to finalize these choices before permitting, not during construction. Mid-build material changes create delays and change orders that add up fast.
Permitting and Approvals Before Groundbreaking
Permitting is the phase homeowners underestimate most, and it’s also the one they have the least control over. Timelines depend entirely on the county or city processing the application.
Building Codes, Inspections, and Local Requirements in California
California enforces Title 24 energy efficiency standards on every new residential build, along with statewide seismic design requirements under the California Building Code. Local jurisdictions layer their own zoning rules, setback requirements, and sometimes architectural review board approval on top of state code.
California’s permitting timelines for custom single-family homes commonly run 3 to 6 months, according to the California Department of Housing and Community Development. Rural counties tend to move faster than dense urban jurisdictions with heavier review backlogs.
Every inspection during construction foundation, framing, electrical, plumbing, and final ties back to the approved permit set. Deviating from approved plans without a change order can stall a project entirely.
Site Preparation and Foundation Work
Once permits clear, site work begins. This phase turns a raw or graded lot into a construction-ready pad with a foundation that matches the engineer’s specifications.
Excavation, Grading, and Foundation Types
Excavation removes topsoil and shapes the pad to the correct elevation, and grading directs water away from the future foundation. Poor grading here causes drainage problems that surface years later, often as foundation cracking or basement moisture.
Slab-on-grade, crawlspace, and full basement are the three primary foundation types used across California, and soil conditions largely dictate which one an engineer specifies. Foundation curing typically takes 7 to 10 days before framing crews can start building on top of it.
I always tell homeowners not to rush this step. A foundation poured too fast, without proper curing time, creates problems no amount of good framing can fix later.
Mechanical, Electrical, and Plumbing Installation
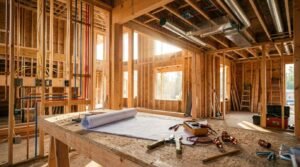
Once the shell is framed, the home’s internal systems go in. This is often called the “rough-in” phase, and it’s largely invisible once drywall covers it.
HVAC, Wiring, and Rough Plumbing Coordination
HVAC ductwork, electrical wiring, and plumbing lines all get installed before insulation and drywall close up the walls. Coordination between these three trades matters enormously here; a duct run placed without checking the electrical plan creates rework that costs time and money.
Rough plumbing sets drain lines, water supply lines, and vent stacks in their final wall and floor positions. Electrical rough-in runs wiring to every outlet, switch, and fixture location before the county inspector signs off on this phase.
I’ve found that builders who run weekly trade coordination meetings during rough-in avoid the vast majority of the conflicts that plague less organized projects.
Insulation, Drywall, and Energy Efficiency Standards
This is where a home’s long-term comfort and utility costs get decided, even though almost none of this work stays visible once it’s done.
Building Envelope Performance and Long-Term Comfort
Insulation R-value requirements in California vary by climate zone, and Title 24 sets minimum thresholds that builders must meet or exceed. Spray foam, batt, and blown-in insulation each perform differently depending on wall cavity type and climate.
The U.S. Department of Energy reports that proper insulation and air sealing can reduce heating and cooling costs by up to 20% over a home’s lifetime, based on DOE’s building energy efficiency guidance. Drywall goes up after insulation passes inspection, creating the interior wall surface that finish work builds on.
I tell every homeowner the same thing: insulation quality matters more to your monthly utility bill than almost any other single decision in the build.
Interior Finishes and Final Craftsmanship Details
This phase is where a house starts feeling like a home, and it’s also where craftsmanship differences between builders become most visible.

Cabinetry, Flooring, Fixtures, and Trim Work
Cabinetry installation, flooring, tile work, and trim carpentry all happen in sequence during this phase, typically over four to eight weeks depending on finish complexity. Paint, lighting fixtures, plumbing fixtures, and hardware installation round out the finish schedule.
This is the phase where small craftsmanship gaps show up fastest: uneven trim joints, inconsistent tile spacing, or misaligned cabinet doors. I always recommend homeowners walk the home during rough finish stages, not just at the final walkthrough, so issues get caught while they’re still easy to fix.
Final Inspections, Walkthrough, and Handing Over the Keys
The last phase confirms everything built matches code, plans, and the quality standard you were promised from day one.
Punch Lists, Certificate of Occupancy, and Closing Steps
A final building inspection checks the completed home against the approved permit set before the local jurisdiction issues a Certificate of Occupancy. The punch list walkthrough happens alongside or shortly after this, documenting any remaining touch-ups the builder needs to complete before closing.
Once the punch list clears and final paperwork closes out, you get the keys. This final phase typically takes two to four weeks from final inspection to move-in, assuming no major punch list items surface.
I always sit down with clients during this walkthrough and go through every system in the house together, not just a checklist on paper.
Conclusion
Building a custom home moves through ten connected phases, and quality at each stage shapes the home’s long-term performance. Craftsmanship, material selection, and code compliance separate lasting homes from problem-prone ones.
Understanding this process gives you the confidence to ask better questions during builder selection. It also helps you recognize quality work as it happens, not just after move-in.
We build every custom home with this same transparency and attention to detail. Reach out to Tiny Home Builders California to start planning your lot-to-keys journey with a team that stands behind every phase.
Frequently Asked Questions
How long does the custom home building process take from start to finish?
Most custom home builds in California take 12 to 20 months total, combining permitting, construction, and final inspections. Lot complexity and county processing speed both affect this timeline significantly.
What is the most expensive phase of building a custom home?
Foundation and framing typically represent the largest single cost segments in a custom build. Material selections made during design also heavily influence overall project cost.
Do I need a soil test before building on my lot?
Yes, a geotechnical soil test is required in most California jurisdictions before foundation design begins. It determines what foundation type your soil can safely support.
What building codes apply to custom homes in California?
California enforces the California Building Code along with Title 24 energy efficiency standards on every new residential project. Local jurisdictions add zoning and setback requirements on top of state code.
Can I make changes to my home design after permits are approved?
Significant changes after permit approval require a formal change order and often re-review by the local jurisdiction. Minor finish-level changes are typically easier to accommodate mid-build.
What happens during the final walkthrough before closing?
The final walkthrough confirms the home matches the approved plans and checks every system, fixture, and finish detail. Any remaining punch list items get documented and corrected before keys are handed over.
How do I know if a builder delivers quality craftsmanship?
Look for consistent trim work, tight tolerances in tile and cabinetry, and transparent communication throughout each construction phase. A builder who welcomes site walkthroughs during construction typically has nothing to hide.