Plumbing system design is the engineered plan that determines how water enters, moves through, and exits your custom home. It covers supply lines, drainage, venting, water heating, and fixture placement. Get it right, and the house performs quietly for decades.
I have watched buyers scrutinize countertops and ignore the pipes behind the walls. That reversal costs money later, because plumbing sits inside framing and slabs where corrections turn expensive fast.
This guide covers system components, plan coordination, piping materials, water heating, pressure sizing, California code, efficiency, site conditions, specialty layouts, quality indicators, costs, and builder questions.
What Plumbing System Design Means in a Custom Home
Plumbing system design is the planning discipline that maps every water path in a house before construction begins. It answers where water comes from, how it reaches each fixture at usable pressure, and how waste leaves the building safely. In a custom home, that plan is drawn specifically for your floor plan, your site, and your household’s water use.
I treat plumbing design as an engineering document, not a sketch. It sits alongside the structural and mechanical plans and gets reviewed with the same seriousness.
Supply, Drainage, and Venting as One System
Most people picture plumbing as pipes carrying water in. The full system has three interdependent halves: pressurized supply, gravity drainage, and atmospheric venting. Remove any one and the other two fail.
Supply lines run under pressure and reach every fixture. Drainage relies entirely on slope and gravity. Venting equalizes air pressure so drains flow freely and sewer gas exits above the roofline instead of into your kitchen.
When these three are designed together, showers stay hot during a laundry cycle, and drains never gurgle. When they are designed separately, you get pressure drops, slow drains, and trap siphoning.
Why Design Happens Before Framing, Not After
Plumbing routes dictate wall thickness, joist penetrations, and slab sleeve locations. Those decisions belong on paper before a single stud goes up.
A retrofit after framing means drilling structural members, rerouting around obstacles, and adding fittings that create pressure loss and future leak points. I have never seen that path produce a better result than planning ahead.
Good construction sequencing and project management put plumbing design in the pre-construction phase, where changes cost pencil marks instead of demolition.
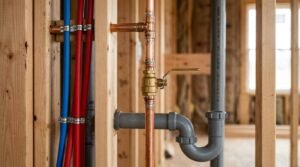
Core Components of a Residential Plumbing System
Every custom home plumbing system breaks into four component groups: water supply and distribution, drain-waste-vent piping, water heating equipment, and fixtures with their valves and access points. Understanding these groups lets you read a plumbing plan and ask sharper questions.
I walk clients through each group during design review. It takes twenty minutes and prevents most of the surprises that show up during rough-in.
Water Supply and Distribution Lines
Supply starts at the meter or well pump, passes through a main shutoff, and splits into cold and hot distribution. Trunk-and-branch layouts run a large main with smaller branches. Manifold or home-run layouts send a dedicated line to each fixture from a central distribution block.
Manifold systems deliver more consistent pressure and faster hot water because each run is shorter and independent. They use more pipe and cost more upfront.
Drain, Waste, and Vent (DWV) Network
The DWV network carries wastewater to the sewer or septic system using gravity alone. Horizontal drain lines need consistent slope, typically a quarter inch per foot for smaller pipes. Every fixture gets a trap that holds water and blocks gas.
Vent stacks connect the drain system to open air. They keep traps sealed and let waste move without vacuum resistance.
Fixtures, Valves, and Access Points
Fixtures are the visible end of the system: sinks, showers, tubs, toilets, hose bibs, and appliance connections. Behind them sit angle stops, mixing valves, and pressure balancing hardware.
Access matters more than most buyers realize. I insist on accessible shutoffs at every fixture group, cleanouts at drain direction changes, and a panel or removable section at tub valves. That single design choice turns a future two-day repair into a two-hour one.
How Plumbing Design Is Coordinated With Architectural Plans
Plumbing coordination is the process of aligning pipe routes with the architectural, structural, and mechanical drawings so nothing collides. On a custom home, this happens during design development, well before permits.
I run a coordination review where the plumbing layout gets overlaid on framing and HVAC plans. Conflicts surface on the screen instead of in the field.
Wet Wall Planning and Fixture Grouping
A wet wall is a thickened interior wall built to house supply and drain piping. Stacking bathrooms vertically and backing them onto shared wet walls shortens pipe runs, reduces fittings, and cuts material cost.
Fixture grouping also improves hot water delivery. Shorter distance from heater to tap means less waiting and less wasted water.
Coordination With Framing, HVAC, and Electrical
Drain lines need slope, ducts need volume, and beams cannot be drilled wherever convenient. Someone has to arbitrate. That responsibility belongs to the builder, and it is one of the clearest markers of construction quality and craftsmanship standards you can evaluate.
I ask trades to sign off on the coordinated plan before rough-in begins. Written agreement beats verbal assumption every time.
Piping Materials and How Builders Choose Them
Piping material selection determines system lifespan, water quality, repair cost, and insurance risk. The four materials I see most in California custom homes are PEX, copper, CPVC, and cast iron for drainage.
There is no universal best choice. The right answer depends on water chemistry, local code, slab versus crawlspace construction, and budget.
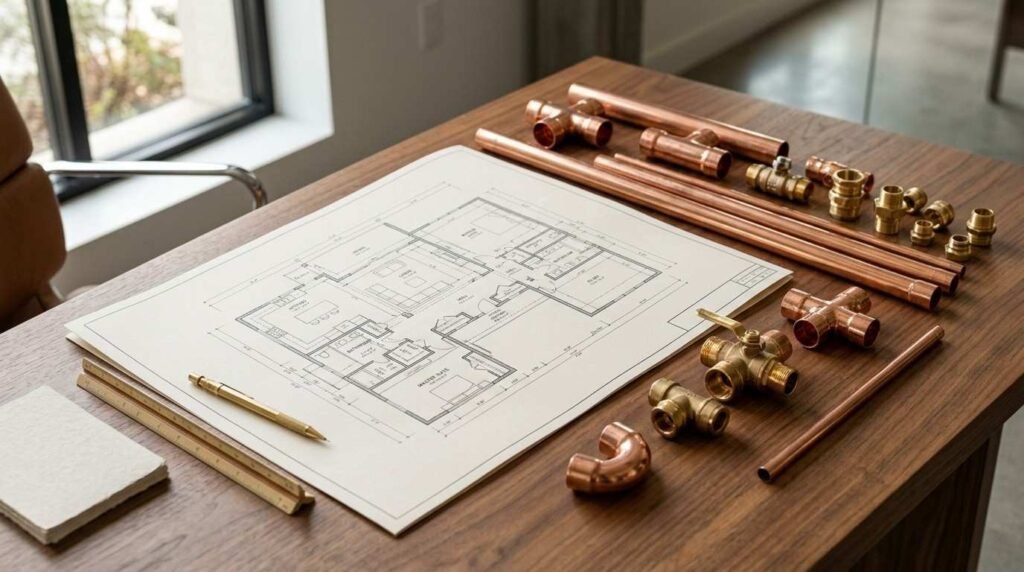
PEX, Copper, CPVC, and Cast Iron Compared
| Material | Typical Use | Strengths | Considerations |
| PEX | Supply, manifold systems | Flexible, freeze-tolerant, fewer joints, lower labor cost | UV sensitive, rodent vulnerability in some settings |
| Copper | Supply, exposed runs | Long service life, rigid, recyclable, code-familiar | Higher material cost, pinhole corrosion in aggressive water |
| CPVC | Supply, hot and cold | Corrosion resistant, low cost | Brittle over time, solvent-welded joints |
| Cast iron | Drainage stacks | Excellent sound dampening, durable | Heavy, higher install cost |
I specify cast iron for vertical drain stacks near bedrooms. The acoustic difference against PVC is immediately noticeable.
Material Longevity, Water Chemistry, and Warranty Impact
Hard water and low-pH water attack materials differently. Aggressive water shortens copper life. Very hot recirculation loops stress CPVC.
Water damage remains one of the most frequent and expensive homeowner insurance claims, which makes material and installation quality a financial decision, not just a technical one. Manufacturer warranties on piping often depend on certified installation, so I keep installer credentials and product documentation in the project file.
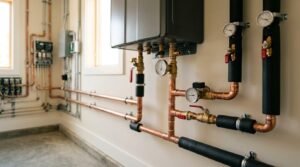
Water Heating System Design Options
Water heating design decides how quickly hot water arrives, how much is available at once, and how much energy the house consumes. It belongs in the plumbing plan, not in a late-stage appliance selection.
I size water heating against peak simultaneous demand, not household size alone. Two bathrooms running at once behave very differently from four.
Tank, Tankless, and Heat Pump Water Heaters
Storage tank heaters hold pre-heated water and recover at a set rate. Tankless units heat on demand with no standby loss and no capacity ceiling, but they need adequate gas supply or electrical service and annual descaling in hard water. Heat pump water heaters pull ambient heat and run far more efficiently than resistance electric, and they need conditioned space and air volume.
California energy standards increasingly favor electric heat pump water heating in new construction. That shift affects panel sizing and mechanical space planning, so I resolve it during design.
Recirculation and Hot Water Wait Times
Long runs waste water while you wait. A recirculation loop or a demand-controlled pump keeps hot water near the fixture and shortens that wait to seconds.
Dedicated return lines perform best and must be planned before framing. Retrofitting recirculation into a finished house is a compromise, always.
Water Pressure, Flow Rate, and Pipe Sizing
Pipe sizing is the calculation that matches pipe diameter to expected demand so every fixture gets adequate flow at usable pressure. Undersized pipe starves fixtures. Oversized pipe wastes money and slows hot water delivery.
I size from a fixture unit schedule, not from habit. Habit is how houses end up with weak second-floor showers.
Fixture Unit Load and Peak Demand
Each fixture carries an assigned fixture unit value reflecting its likely draw. Add the units on a branch, convert to expected gallons per minute, then size the pipe for that flow with acceptable friction loss.
Custom homes push these numbers higher than production homes. Multi-head showers, soaking tubs, pot fillers, and irrigation all add load.
Pressure Regulation and Well vs. Municipal Supply
Municipal pressure varies by neighborhood and elevation. High incoming pressure damages fixtures and appliances, so a pressure-reducing valve brings it into a safe working range, generally 50 to 70 psi.
Well systems introduce a pump, pressure tank, and control logic instead. Rural and off-grid home site planning changes the entire supply calculation, and I address it before the plumbing plan is finalized.
California Plumbing Code and Permit Requirements
Plumbing work in California is governed by the California Plumbing Code, energy provisions in Title 24, and local amendments adopted by each city or county. Compliance is not optional, and it is verified through inspection.
I treat code as the floor, not the ceiling. Meeting minimum requirements produces a legal house, not necessarily a well-performing one.
CPC, Title 24, and Local Amendments
The California Plumbing Code sets materials, sizing, venting, and installation standards statewide. Title 24 adds energy requirements affecting water heater efficiency, pipe insulation, and hot water distribution design.
Local jurisdictions layer on their own amendments for seismic bracing, water conservation, and septic rules. Two counties an hour apart routinely enforce different requirements, which is why local permitting experience matters when you evaluate a home builder’s qualifications.
Rough-In and Final Plumbing Inspections
Rough-in inspection happens after piping is installed and before walls close. Inspectors verify materials, slope, venting, support, and pressure test results.
Final inspection confirms fixtures, backflow protection, and water heater installation. I keep signed inspection cards in the homeowner handover package so the record travels with the house.

Water Efficiency and Conservation Design
Water efficiency design reduces consumption without reducing performance. In California, where drought cycles are a permanent planning reality, this moves from nice-to-have to structural.
I design for efficiency at the fixture, the distribution layout, and the site. All three compound.
WaterSense Fixtures and Flow Limits
The EPA WaterSense program certifies fixtures that use at least 20% less water than standard models while meeting performance criteria. California sets maximum flow rates for faucets, showerheads, and toilets that already run tighter than federal minimums.
Pressure-compensating showerheads and dual-flush toilets deliver the same experience with less volume. The savings show up on every bill for the life of the house.
Greywater, Rainwater, and Drought Resilience
Greywater systems capture water from showers, tubs, and laundry for subsurface irrigation. Laundry-to-landscape systems are the simplest entry point and are permitted broadly across California.
Rainwater harvesting adds cistern storage for irrigation or, with treatment, indoor use. Both require rough plumbing provisions during construction, which means the decision belongs in the design phase.
Site Conditions That Shape Plumbing Design
Site conditions determine what your plumbing system has to work with: where water comes from, where waste goes, how the foundation is built, and what the terrain and climate demand. Two identical floor plans on different lots get different plumbing plans.
I always start with the site, then design the system. Reversing that order produces expensive change orders.
Septic vs. Sewer and Rural Water Sources
Sewer connections require a lateral to the municipal main and payment of connection fees. Septic systems require a percolation test, a designed leach field, tank sizing, and county approval, and they impose setbacks that influence house placement.
Rural lots often combine well water with septic disposal. That pairing adds water testing, treatment equipment, and pump controls to the plumbing scope.
Slab, Crawlspace, Slope, and Freeze Considerations
Slab-on-grade construction buries supply and drain lines in concrete, so accuracy at rough-in is critical and later access is invasive. Crawlspaces and basements keep piping accessible and simplify future modification.
Sloped lots help gravity drainage and complicate pressure balance across floors. Higher elevation California sites need freeze protection through insulation, conditioned routing, and frost-depth burial.
Specialty Plumbing for Small and Custom Footprints
Specialty plumbing covers systems outside the standard residential template: compact footprints, radiant heating, whole-house treatment, and extensive outdoor lines. These are common in custom work and rare in production building.
I plan them early because each one competes for the same limited space inside walls and floors.
Compact and Tiny Home Plumbing Layouts
Small footprints demand extreme fixture consolidation. One wet wall often serves the kitchen, bath, and laundry, and every inch of pipe run gets scrutinized.
Tankless water heating and compact manifolds fit these builds well. Anyone exploring tiny home and ADU design options needs the plumbing layout resolved before the shell is built, because there is no slack space to hide corrections.
Radiant Heating, Water Treatment, and Outdoor Lines
Hydronic radiant floor heating runs PEX tubing through slabs or under subfloors and needs manifolds, zone valves, and a heat source coordinated with the plumbing plan. Whole-house filtration and softening equipment needs floor space, drainage, and electrical service.
Outdoor plumbing covers hose bibs, irrigation stub-outs, outdoor kitchens, and pool fills. Each one needs backflow protection and a freeze-safe routing decision.
How do I know my builder designed the plumbing correctly?
That question separates informed buyers from hopeful ones. The answer lives in documentation, testing records, and workmanship you can actually inspect.
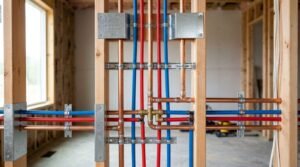
Quality Indicators That Separate Good Plumbing Design
Quality indicators are the observable, verifiable signs that plumbing was designed and installed properly. They exist in paperwork and in the physical work, and both are available to you before drywall goes up.
I encourage clients to walk the house at rough-in. Thirty minutes then reveals more than any brochure.
Documentation, Isometric Drawings, and As-Builts
A well-designed system arrives with a plumbing plan showing fixture locations, pipe sizes, and routing. Isometric drawings show the DWV layout in three dimensions and prove the venting was actually engineered.
As-built drawings record what got installed, including any field changes. I hand these to homeowners at closing because they make every future repair faster and cheaper.
Pressure Testing, Support Spacing, and Workmanship Signs
Supply lines get pressure tested, and drain lines get water or air tested before closing walls. Ask for the test results.
Then look at the craft. Straight runs, consistent hanger spacing, clean solder joints or properly crimped PEX connections, protective plates over drilled studs, and labeled shutoffs all signal disciplined work. Sloppy strapping and improvised routing signal the opposite, and they reliably predict what the rest of the building materials and finish quality look like behind the walls.
Plumbing Design Costs and Long-Term Value
Plumbing typically represents a meaningful share of a custom home’s mechanical budget, and the design decisions inside that number drive decades of operating cost. Cheap plumbing is the most expensive kind.
I break plumbing cost into design, materials, labor, fixtures, and equipment. Homeowners control more of that than they expect.
What Drives Plumbing Cost in a Custom Build
Fixture count is the biggest driver, followed by pipe run length, number of stories, material selection, and equipment choices. Scattered bathrooms cost more than stacked ones for identical fixture counts.
Site factors add another layer. Septic systems, wells, long laterals, and rock excavation all move the number materially.
Lifecycle Cost, Repairs, and Resale Impact
Water damage from failed plumbing is among the most common residential insurance claims, and a single slab leak can cost more than the upgrade that prevented it. Efficient water heating and correctly insulated distribution cut utility bills every month the house stands.
Buyers notice hot water speed, shower pressure, and drain noise during a walkthrough even when they cannot name what they are noticing. Those three things trace directly back to design, and they contribute to the long-term durability and resale value of the finished home.
Questions to Ask Your Builder About Plumbing Design
The right questions surface a builder’s process quickly. I welcome all of these, and any builder worth hiring does too.
Ask who prepares the plumbing design and whether isometric DWV drawings are included. Ask which piping materials are specified for supply and drainage and why those were chosen for your site’s water. Ask how water heating capacity was sized and whether recirculation is planned with a dedicated return line.
Then get practical. Ask where shutoffs and cleanouts will be accessible, what pressure testing is performed and documented, whether as-builts are delivered at closing, and what the plumbing workmanship warranty covers and for how long.
Vague answers are answers. A builder who cannot explain the plumbing plan did not design one.
Conclusion
I have covered supply, drainage, venting, materials, water heating, sizing, code, efficiency, site conditions, specialty systems, quality indicators, and cost across this guide.
Plumbing design connects to foundations, framing, energy performance, and resale value, and our deeper resources expand each of those dimensions for you.
We build homes where the systems behind the walls match the finishes in front of them. Talk to Tiny Home Builders California about your plumbing design today.
Frequently Asked Questions
When should plumbing design start in a custom home project?
Plumbing design starts during design development, before permits and framing. Early planning locks in wet walls, pipe routes, and water heating decisions while changes cost nothing.
Is PEX or copper better for a custom home?
Both perform well. PEX handles freezing better and installs faster with fewer joints, while copper offers proven longevity. Local water chemistry usually decides the answer.
How much does plumbing cost in a custom home?
Plumbing cost depends on fixture count, pipe run length, story count, materials, and site conditions like wells or septic. Stacked bathrooms reduce it noticeably.
Do I need a plumbing permit for a custom home in California?
Yes. Every new residential plumbing system requires permits and passes rough-in and final inspections under the California Plumbing Code and local amendments.
What causes low water pressure in a new house?
Undersized pipe, excessive run length, too many fixtures on one branch, or a misadjusted pressure-reducing valve. Correct sizing at design prevents all four.
Is a tankless water heater worth it in a custom build?
Tankless units eliminate standby loss and deliver unlimited hot water. They need adequate gas or electrical capacity and annual descaling in hard water areas.
Can I add greywater or rainwater systems later?
Retrofitting works but costs far more. Rough plumbing provisions installed during construction make greywater and rainwater systems dramatically simpler and cheaper.